Yes, straight line quilting feels simple and rewarding. You can easily create a stunning quilt with just a few tools and a bit of patience. Many quilters love how the lines add texture and make any design pop. If you want the best results, start with high-quality fabrics from Fanda Fabrics.
Their cotton fabrics help your quilt look crisp and professional. Grab your favorite prints, set up your machine, and get ready for a fun quilting experience!
Key Takeaways
Straight line quilting is easy to learn and gives your quilt a clean, modern look using simple tools and techniques.
Choosing high-quality cotton fabric, like that from Fanda Fabrics, helps your quilt stay flat and your stitching sharp.
Using guides like painter’s tape, rulers, or a walking foot with a guide bar helps you sew straight, even lines every time.
Setting your machine with the right needle, stitch length, and presser foot pressure makes quilting smoother and prevents puckers.
Start with simple designs like grids or stitch-in-the-ditch, then try creative patterns as you gain confidence.
What Is Straight Line Quilting?

Basics and Benefits
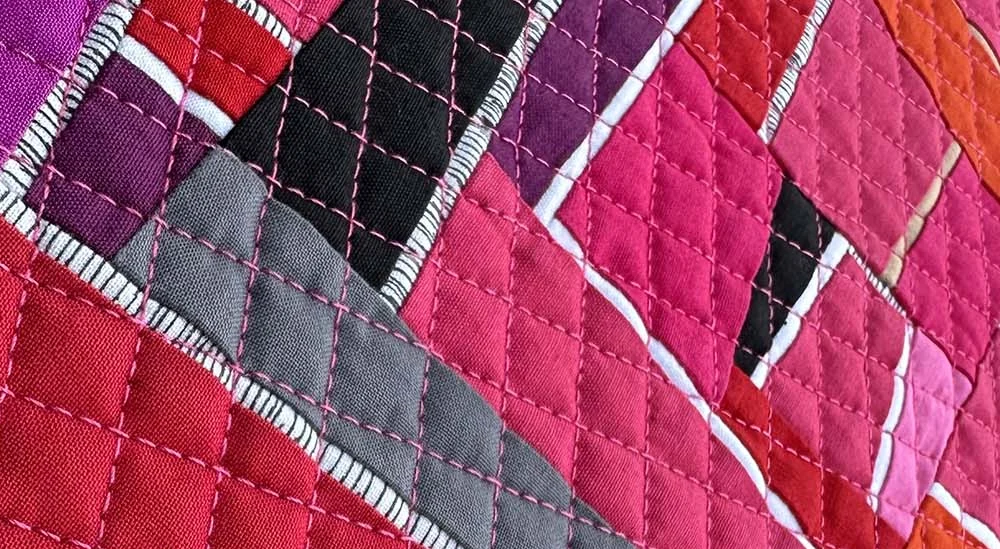
Straight line quilting is exactly what it sounds like—you sew straight lines across your quilt top. You can use this method to create simple or bold designs, depending on how you space the lines and which direction you sew. Many quilters love this technique because it’s easy to learn and gives your quilt a crisp, modern look.
Here’s why straight-line machine quilting stands out:
You can do it with a regular home sewing machine, so you don’t need fancy equipment.
It’s quick and cost-effective, making it perfect if you want to finish a quilt without spending hours on complex patterns.
You get to play with different stitch types, angles, and spacing, which adds texture and interest to your quilt.
The lines create clear geometric shapes, like grids or crosses, that make your quilt design pop.
You can try variations like grid quilting, stitch-in-the-ditch, or channel quilting for different effects.
If you’re new to machine quilting, straight-line quilting is a great place to start. You’ll see results fast and build your confidence with every project.
Why Choose Straight Line Quilting?
You might wonder why so many quilters—beginners and experts—choose straight line machine quilting. The answer is simple: it’s approachable, reliable, and always looks good.
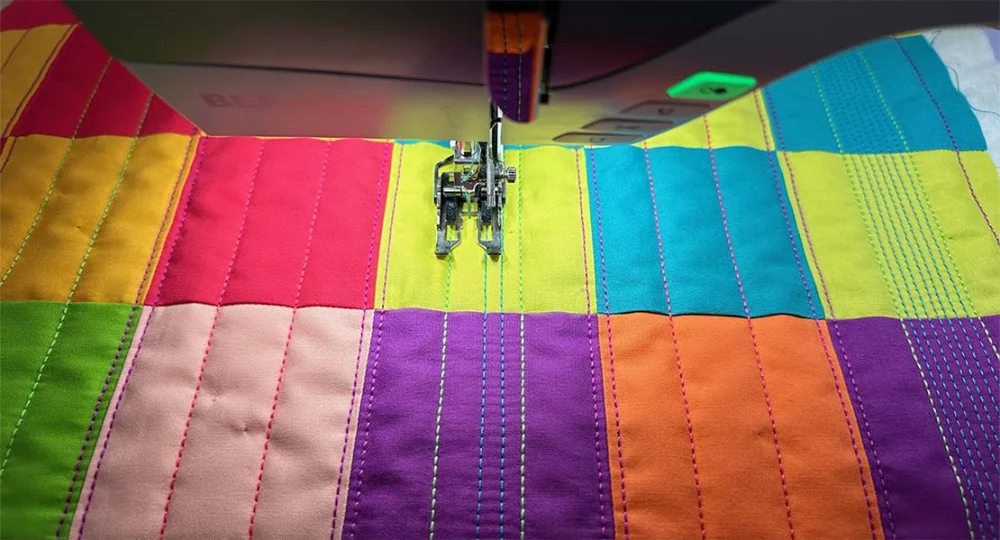
Free-motion quilting can feel intimidating, but straight-line quilting gives you control and consistency. You can follow seam lines, create crosshatch patterns, or even try gentle curves with a walking foot.
Fanda Fabrics’ Quilting Collection makes straight-line quilting even easier. The 100% cotton fabric has a tight weave and smooth texture, so your quilt top stays flat and your lines stay sharp.
The fabric doesn’t slip or bunch, which means you get crisp seams and corners every time. Pre-cut options like Fat Quarters and Charm Packs help you jump right into your project without extra prep.
Tip: Prewash your fabric and cut at 90-degree angles for the best results. Use a sharp needle and quality thread to keep your straight line machine quilting smooth and even.
With the right fabric and a little practice, you’ll find that straight line quilting opens up endless creative possibilities. You can make your quilt as simple or as detailed as you like, and every project will have a clean, professional finish.
Project Preparation for Straight Line Quilting
Getting ready for straight-line quilting is just as important as the stitching itself. With the right fabric, careful basting, and a well-set machine, you’ll set yourself up for success.
Choosing Fabrics from Fanda Fabrics
Picking the best fabric makes a big difference in your quilt. Here’s what you should look for:
Go for a wide color range so you can create bold contrasts or soft gradients.
Choose 100% cotton solids with a smooth, even weave. This keeps your quilt blocks sharp and your seams aligned.
Look for a thread count between 60 and 80 per square inch. This gives you fabric that’s strong but still easy to sew.
Make sure the fabric feels balanced—not too stiff or flimsy.
Test for colorfastness by soaking a small piece in hot water.
Select fabric printed on the straight grain for a flat, professional look.
Fanda Fabrics’ Quilting Collection, Wide Back Quilting Fabric, and Solid Color Quilt Fabric all meet these standards. You’ll find vibrant colors, crisp prints, and durable cotton that’s perfect for straight-line quilting.
Basting and Marking Tips
You want your quilt layers to stay put while you sew. Try these expert-approved methods:
Technique | Tool | Description | Tip |
|---|---|---|---|
Pin Basting | Safety Pins | Place pins every 4 inches | Pin after marking lines |
Spray Basting | Basting Spray | Smooth surface, no residue | Use in a ventilated area |
Thread Basting | Water-Soluble Thread | Holds layers, washes out | Mark lines after basting |
For marking, use chalk markers, water-soluble pens, or a Hera marker. Always test your marking tool on a scrap first. Mark your lines before basting for the best accuracy.
Tip: Good lighting helps you see your markings clearly and keeps your lines straight.
Setting Up Your Machine
A smooth quilting experience starts with the right setup. Here’s how you can get ready for walking foot quilting:
Attach a walking foot to your machine. This feeds the quilt evenly and prevents shifting.
Use a new, larger needle (size 90/14) to handle thick layers.
Set your stitch length to about 1.5 mm for most projects.
Decrease presser foot pressure if your machine allows. This helps avoid puckering.
Test your settings on a practice quilt sandwich before starting.
Use quilting gloves for better grip and control.
With these steps, you’ll have the right tools for straight line quilting and a setup that makes walking foot quilting easy and enjoyable.
How to Quilt Straight Lines?
Ready to master straight-line quilting? You’ll find that with the right tools and a few clever tricks, you can achieve crisp, professional results every time. Let’s break down the most popular methods for straight-line machine quilting and see how you can use them to create your next stunning quilt.
Using Tape as a Guide
If you want a foolproof way to sew straight lines, painter’s tape is your new best friend. This method works for any skill level and helps you avoid marking your fabric permanently.
Step-by-step:
Choose painter’s tape, masking tape, or quilter’s tape. Pick a width that matches your desired spacing—1/4″, 1/2″, or 3/4″ all work well.
Lay the longest piece of tape across your quilt top. Start from corner to corner or edge to edge, depending on your straight line quilting design.
Use shorter pieces of tape as spacers to keep your lines evenly spaced.
Stitch right next to the tape edge. As you sew, lift the tape end if you need to pivot or move around blocks.
Continue quilting along the taped lines, traveling between lines using block edges or motifs. Try not to stitch over the same spot more than twice to avoid thread buildup.
Tip: Painter’s tape peels off easily and won’t damage your fabric. It’s a great visual guide for parallel-line straight stitching.
Common challenges and fixes:
If your stitches look uneven, your fabric may be stretching. Use a walking foot to feed all layers evenly and prevent distortion.
If the tape loses its stickiness, replace it with a fresh strip for sharp lines.
Fanda Fabrics’ tightly woven cottons make this method even easier. The smooth surface helps the tape stick and keeps your lines crisp.
Marking with Rulers or Hera Marker
Some quilters prefer marking lines before sewing. Rulers and Hera markers are perfect for this job.
Place your ruler on the quilt top and run the Hera marker along the edge. This creates a crease instead of a colored line.
The crease acts as a temporary guide for your stitches. It disappears after washing or pressing, so you never have to worry about stains.
Hera markers work best on quilting cottons and stable woven fabrics, like those from Fanda Fabrics. The marks are easy to see and follow.
Pros:
Fast and clean—no ink or chalk needed.
Marks vanish after washing.
No risk of permanent stains.
Cons:
Hard to see in low light.
Creases may fade if you handle the quilt a lot before sewing.
Note: Always test your marking tool on a fabric scrap first. Good lighting helps you see the creases clearly.
Guide Bar and Walking Foot
The walking foot is a game-changer for straight-line machine quilting. It feeds all layers of your quilt sandwich evenly, preventing shifting and puckering.
Attach the walking foot to your machine. Many walking feet come with a guide bar.
Set the guide bar to your desired distance from the needle (for example, 1.5 inches).
Place the guide bar along your first stitched line or a marked crease. Sew your next line, letting the guide bar keep your spacing consistent.
Start quilting from the center of your quilt and work outward. This helps avoid puckers and keeps your quilt flat.
Why this works:
The walking foot pulls the top and bottom layers at the same speed, so your quilt stays smooth.
The guide bar acts as a physical reference, making it easy to sew parallel lines without constant marking.
Tip: Go slow and steady. The walking foot and guide bar combo is one of the secrets for sewing perfectly straight lines.
Presser Foot Edge Technique
You don’t always need extra tools for ultimate straight-line machine quilting. Your presser foot can help you keep lines even.
Use the edge of your presser foot as a tactile guide. Align it with your previous stitch line or a seam.
Many walking feet have markings (like 1/4″ or 1/2″ from the needle) to help you space your lines.
Some machines let you attach seam guides for even more accuracy.
This method is simple and effective, especially for straight-line quilting designs with regular spacing. If you want to add a visual guide, place a strip of painter’s tape on your quilt and run the foot edge along it.
Note: The presser foot edge technique works best with high-quality cotton fabrics. Fanda Fabrics’ crisp cottons glide smoothly under the foot, helping you maintain control and precision.
3 Quilting Hacks for Straight Lines
Want to take your straight line machine quilting to the next level? Try these hacks:
Painter’s Tape for Marking: Use thin painter’s tape for precise lines. Place anchor points every 5 inches to keep your tape straight and prevent drift.
Guide Bar with Walking Foot: Set your guide bar to your chosen width and align it with previous stitches. This keeps your spacing consistent and reduces errors.
Machine Settings for Control: Increase your stitch length to 3.0 for smoother lines. Set your needle to stop in the down position to hold the fabric steady between stitches. Always use a walking foot for even feeding.
Pro Tip: Slow down as you quilt. Rushing can cause fabric shifting and wobbly lines.
Troubleshooting Common Issues
You might run into a few bumps along the way. Here’s how to fix them:
Uneven stitches? Check your walking foot and make sure it’s installed correctly.
Fabric bunching? Start quilting from the center and work outward.
Lines drifting? Use more tape or re-mark with your Hera marker.
Fanda Fabrics’ high-quality cottons, like their poplin and quilting cotton, make straight line quilting easier. The fabric’s crisp texture and minimal stretch help you achieve the ultimate straight line machine quilting results. Prewashing and pressing your fabric, plus a little starch, will keep everything flat and smooth.
If you ever wondered how to do straight line quilting with confidence, these methods for straight line quilting will help you get there. Whether you’re aiming for a classic straight line quilting design or experimenting with modern patterns, you’ll love the polished finish you get with Fanda Fabrics.
Machine Settings for Straight Line Quilting
Getting your machine settings for straight line quilting just right can make all the difference in your finished quilt. Let’s break down the key adjustments you’ll want to check before you start stitching.
Stitch Length and Tension
Choosing the right stitch length and tension helps you achieve smooth, even lines. Here’s what most sewing machine experts recommend:
Set your stitch length between 2.5 and 3.5 mm for straight lines. Shorter stitches (1.5–2.0 mm) work well for detail or curves, but longer stitches look best for straight line quilting.
Start with your tension dial at 4. Adjust up or down if you see puckering or thread loops.
Always test your settings on a scrap quilt sandwich using the same fabric and thread as your project.
Use the same thread type in both the top and bobbin for balanced tension.
Clean your machine, especially the bobbin area, to prevent lint from causing tension issues.
You’ll notice that Fanda Fabrics’ durable cottons handle these adjustments beautifully. Their smooth weave helps you get crisp, even stitches every time.
Presser Foot Pressure
Presser foot pressure affects how your fabric feeds through the machine. Lowering the pressure helps your quilt layers move evenly, which reduces puckers and shifting. If your machine allows, decrease the pressure a bit—especially when working with thicker quilts.
Stitch slowly and guide your quilt gently under the foot for the best results. You’ll see fewer tucks, especially where lines cross.
Thread and Needle Choices
The right needle and thread combo keeps your stitches strong and your fabric looking great. For most machine quilting on cotton, use an 80/12 quilting needle with a 50 wt. cotton thread.
If you’re using heavier thread or quilting through thick layers, switch to a 90/14 needle. Topstitch needles work well for specialty threads. Always match your needle size to your thread and fabric. High-quality, extra-long staple cotton thread glides smoothly and creates flat, durable seams—perfect for Fanda Fabrics’ cottons.
Tip: Replace your needle regularly and use fresh thread for the best stitch quality.
With these settings, you’ll find straight-line quilting feels smooth and stress-free. Your quilt will look polished and professional, especially when you start with premium fabrics from Fanda Fabrics.
Straight Line Machine Quilting Designs
Beginner Designs
If you’re just starting with straight-line machine quilting, you’ll love how easy it is to create beautiful results. Here’s a quick table to help you pick your first straight line quilting design:
Quilting Design | Description | Suitability for Beginners |
|---|---|---|
Stitch in the Ditch | Quilt right along the seam lines. No marking needed, but take it slow for accuracy. | Good for beginners who want to skip marking. |
Matchstick Quilting | Sew close, parallel lines for lots of texture. It takes time, but looks modern and bold. | Great for texture lovers. |
Checkerboard Quilting | Quilt vertical and horizontal lines to make a grid. Use block seams as guides. | Very beginner-friendly and easy to scale. |
Cross Hatching | Quilt diagonal lines that cross each other. Adds texture without overwhelming your quilt. | Perfect for a modern look. |
Zigzag Quilting | Pivot at block corners to create zigzag lines. | Fun and dynamic for beginners. |
V or Chevron Quilting | Quilt lines in V shapes. Try decorative stitches for extra flair. | Simple with lots of creative options. |
You can see how each straight line quilting design offers a different look and feel. Try a few and see which one you enjoy most!
Simple Patterns
You don’t need complicated patterns to make your quilt stand out. Simple straight-line quilting designs can look stunning, especially when you use Fanda Fabrics’ prints and solids. Here are a few ideas to get you started:
Quilt evenly spaced lines across your quilt, either horizontally or vertically.
Try the “Geese in the Garden” pattern. It’s a favorite for practicing straight line machine quilting and works well with bold solids or playful prints.
Use your walking foot to add lines at different angles for a modern twist.
These patterns let you focus on your stitching and fabric choices. The contrast between prints and solids from Fanda Fabrics makes each straight line quilting design pop.
Creative Variations (Wavy, Crosshatch, Matchstick, Spiral)
Once you feel comfortable, you can explore creative variations to take your straight line machine quilting to the next level:
Wavy Lines: Quilt gentle, flowing lines for a relaxed, modern look. This style is perfect for curved straight line machine quilting and adds movement to your quilt.
Diagonal Crosshatch: Quilt diagonal lines in both directions to form a crosshatch pattern. This straight line quilting design gives your quilt a classic, textured finish.
Matchstick Quilting: Sew lines very close together, starting at 1/2 inch apart and moving closer for a dense, dramatic effect. This is the ultimate straight line machine quilting technique for texture lovers.
Spiral Quilting: Start in the center and quilt outward in a spiral. This straight line quilting design creates a stunning focal point.
Tip: Mix prints and solids from Fanda Fabrics for extra contrast. The clean lines and bold colors will highlight your favorite straight line quilting design and make your quilt truly unique.
Try these ideas, share your results, and don’t be afraid to experiment. Every straight line quilting design you try helps you grow as a quilter!
Conclusion
You’ll find straight-line quilting both easy and rewarding. Many quilters love how this style adds modern texture and makes any quilt stand out. You can try parallel lines, grids, or even matchstick quilting—each one offers easy ways to finish a quilt with style.
Quilters often say straight-line quilting is simple, versatile, and perfect for beginners.
Fanda Fabrics supports your creativity with a wide range of fabrics, from classic cottons to vibrant precuts.
Ready to share your quilting journey? Drop your questions or show off your latest quilt. For fresh inspiration, browse Fanda Fabrics’ Quilting Collection and discover your next project!
FAQ
How do I keep my quilting lines straight?
You can use painter’s tape, a Hera marker, or the edge of your presser foot as a guide. Go slow and check your lines often. Good lighting helps you see your markings.
What is the best stitch length for straight-line quilting?
Most quilters use a stitch length between 2.5 and 3.5 mm. Try a few test lines on a fabric scrap to see what looks best for your project.
Can I quilt straight lines without a walking foot?
Yes, you can, but a walking foot makes it much easier. It helps feed all the layers evenly and prevents shifting. If you don’t have one, sew slowly and use lots of pins.
How do I avoid puckers when quilting?
Start quilting from the center and work outward. Lower your presser foot pressure if possible. Make sure your quilt is basted well and smooth out any wrinkles before you start.
What fabrics work best for straight line quilting?
High-quality cotton fabrics, like those from Fanda Fabrics, work best. They hold their shape, press flat, and make it easier to sew crisp, even lines.