Quilting can feel tricky, but you’re not alone when it comes to those little setbacks. Sometimes, a small change makes all the difference. You might be searching for fresh quilting tips or just need a confidence boost.
Let’s turn those challenges into wins. Fanda Fabrics offers helpful products that make your journey smoother. Stay positive and remember—every quilt teaches you something new!
Key Takeaways
Start with small quilting projects to build skills and confidence without feeling overwhelmed.
Prepare your fabric well by prewashing and pressing to avoid shrinking and color bleeding.
Use sharp rotary blades and mark rulers to cut fabric accurately for professional-looking quilts.
Sew accurate seams and reduce bulk to make your quilt strong, flat, and neat.
Choose the right basting method and quality batting to keep quilt layers smooth and secure.
Start Small
Tips for Beginners
Starting your quilting journey can feel overwhelming, but you don’t have to tackle a huge quilt right away. Many beginners face a steep learning curve. You might run into uneven seams, puckered fabric, or confusion about which fabrics to choose.
Sometimes, negative self-talk creeps in and makes you doubt your skills. That’s normal! Setting realistic expectations helps you enjoy the process and keeps you motivated.
Tip: Break your project into small steps. When you focus on one step at a time, you make fewer mistakes and feel less stressed.
Here are some common challenges beginners face:
Learning new quilting techniques and tools
Struggling with fabric selection
Feeling frustrated by mistakes
Worrying about not being “good enough”
Remember, every quilter started as a beginner. Patience and a positive mindset will help you turn challenges into rewarding experiences. If you ever feel stuck, reach out to quilting communities for advice and encouragement.
Practice Projects
Small projects are perfect for beginners. They give you a chance to practice essential quilting skills without feeling overwhelmed. Try making a baby quilt, a table runner, or a cushion cover.
These projects let you experiment with thread, stitches, and fabric handling. You’ll see progress quickly, which builds your confidence.
Small quilts are less time-consuming and cost less, so you can try new quilting tips without worry.
Simple designs with straight lines help you master your sewing machine and keep your seams even.
Mistakes are easier to fix on a small quilt, so you learn faster and stress less.
When you start with small projects, you build technical skills and prepare for bigger projects. Each finish gives you a sense of accomplishment and motivates you to keep going. Before you know it, you’ll be ready for more complex quilting adventures!
Fabric Prep
Getting your fabric ready is a big step for every quilt. You want your quilt to look great and last for years. Good prep helps you avoid surprises later. Let’s break down two key steps: prewashing and pressing, plus how to prevent color bleed.
Prewash and Press
Prewashing fabric removes dust, chemicals, and loose dyes. You get a fresh start for your quilt. If you skip this step, your quilt might shrink or bleed after its first wash.
You don’t want that! Wash your fabric in cold water with a gentle detergent. Air dry or tumble dry on low. Press your fabric with a hot iron to smooth out wrinkles. This makes cutting and piecing easier.
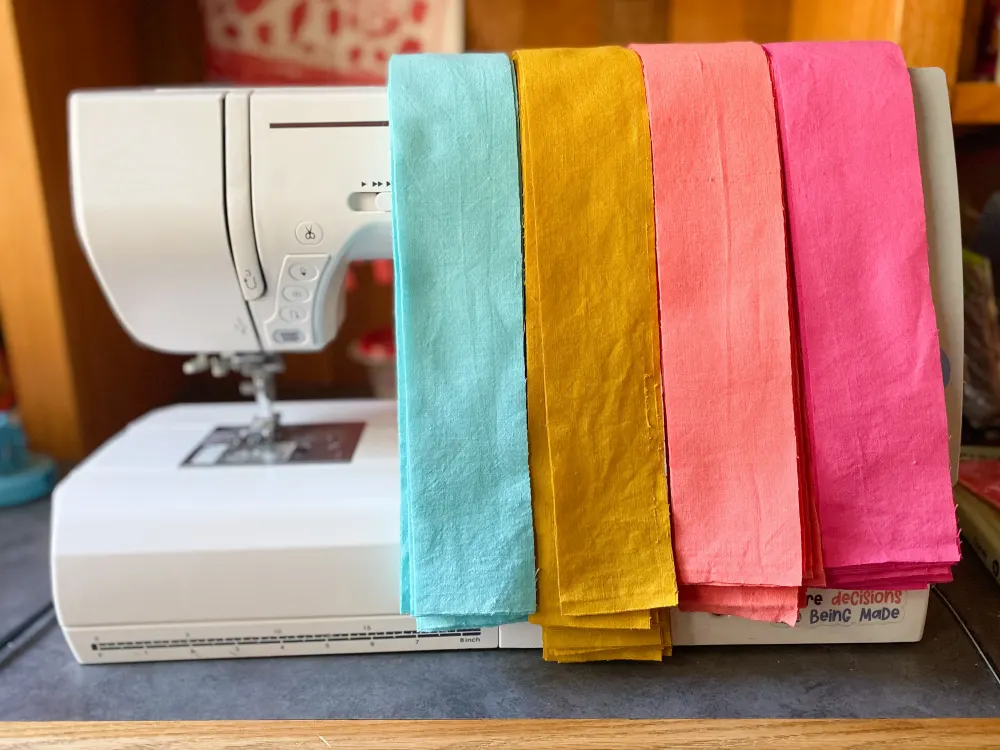
Tip: Use Fanda Fabrics Quilting Fabric Bundles for a stress-free start. These bundles come precut and coordinated, so you don’t have to measure or match colors. You save time and avoid mistakes. The high-quality cotton feels soft and sews easily, which helps you build confidence as you work.
Organize your fabric squares by color or size before you sew. This keeps your workspace tidy and helps you focus on your quilt design. Consistent sizing means your quilt blocks line up perfectly.
Prevent Color Bleed
Color bleed can ruin a quilt. You want your colors to stay bright and crisp. Textile experts recommend these steps:
Test a small piece of fabric in soapy water before you start. If the water changes color, you know the dye isn’t stable.
Prewash fabrics to remove loose dyes.
Wash with cold water to keep colors from running.
Separate fabrics by color during washing.
Toss in color-catching sheets to trap loose dyes.
Use gentle detergents and avoid hot water.
Air dry your quilt away from direct sunlight.
Handle your quilt gently to keep dyes from loosening.
If you want easy color management, try Fanda Fabrics Solid Color Quilt Fabric. These fabrics hold their color well and make your quilt pop. You get vibrant results and less worry about color bleed. Quilters love the reliability and quality of these fabrics.
Taking time to prep your fabric sets you up for quilting success. You’ll enjoy a smoother process and a beautiful, lasting quilt.
Cutting Accuracy
Getting clean, precise cuts makes your quilt look professional and helps every piece fit together. If you struggle with jagged edges or mismatched blocks, you’re not alone. Let’s talk about how you can boost your cutting skills and make your quilting projects easier.
Mark Rulers
You want your quilt blocks to line up perfectly. Marking your rulers helps you measure and cut with confidence. Use clear quilting rulers with grid lines for accurate measuring. Try adding small stickers or washi tape to the measurements you use most. This trick saves time and keeps your eyes focused on the right spot.
Tip: Always press your fabric before cutting. Wrinkles can throw off your measurements and make your quilt blocks uneven.
Here are some ways to improve your cutting accuracy:
Use a rotary cutter for smooth, straight edges.
Pair your rotary cutter with a self-healing cutting mat to protect your tools and keep blades sharp.
Choose rulers with non-slip features so they don’t slide while you cut.
Organize your workspace and keep your tools within reach.
Stand while cutting to apply even pressure and keep your posture steady.
When you square up a quilt block, use a square ruler that matches the block size. This step helps you trim edges and keep everything neat.
Rotary Blade Care
A sharp rotary blade makes cutting fabric easy and safe. Dull blades can snag your thread and leave rough edges on your quilt pieces. Replace your blade when you notice it skipping spots or dragging through the fabric. Wipe your blade after each use to remove lint and dust.
Note: Always cut away from your body and keep your wrist straight. This technique gives you better control and keeps your quilt pieces crisp.
Store your rotary cutter with the blade closed. Keep extra blades handy so you never have to stop in the middle of a quilting session. Good blade care means you spend less time fixing mistakes and more time enjoying your quilt.
Cutting accuracy sets the stage for every step in quilting. With the right tools and habits, you’ll see your quilt blocks come together beautifully. You’ll feel proud of your work and ready to tackle new quilting challenges.
Piecing Blocks
Accurate Seams
You want your quilt to look sharp and last for years. Accurate seams make a big difference. When you line up your blocks and keep your seam allowances consistent, you create a perfect quilt block every time. This precision helps your quilt lie flat and keeps patterns aligned. You avoid distortion and get a professional finish.
Good piecing techniques also boost durability. Well-joined pieces reduce stress points. Your quilt stays strong, and seams hold up over time. The quality of your thread matters, too.
Strong thread and careful workmanship mean your quilt can last for generations. Many hand-pieced quilts survive decades because of these habits.
Let’s talk about common mistakes and how to avoid them:
Print or copy your foundation paper at 100% actual size. This keeps your block sizes correct.
Don’t cut all your fabric at once. Start with enough for one block. Test your sizes and techniques before you commit.
Use slightly oversized fabric pieces. This prevents repeated seam ripping when pieces are too small.
You can use these tips to improve your piecing techniques and get better results with every quilt.
Reduce Bulk
Bulky seams can make quilting tough. You want your quilt to feel smooth and look neat. Press your seams open or to one side, depending on your pattern. Trim excess fabric from seam allowances. This keeps your quilt blocks flat and easy to join.
Choose a fine thread for piecing. Thicker thread adds bulk and can make seams stiff. Use sharp scissors or a rotary cutter to trim corners and points. This helps your quilt blocks fit together without lumps.
Try chain piecing for speed and accuracy. Sew several pieces in a row without cutting the thread between them. This technique saves time and keeps your quilt organized.
When you reduce bulk, you make quilting easier and your finished quilt more comfortable. Your quilt will look polished and feel soft, ready to be enjoyed for years.
Basting Techniques
Getting your quilt ready for stitching means you need solid basting techniques. Basting holds your quilt top, batting, and backing together so nothing shifts while you work.
If you skip this step, you might end up with puckers or uneven layers. You want your quilt to look smooth and professional, so let’s talk about two popular basting techniques: spray and pin.
Spray vs. Pin
You might wonder which basting method works best for your quilting projects. Here’s a quick comparison to help you decide:
Method | Advantages | Disadvantages |
|---|---|---|
Pin Basting | – Economical and reusable | – Cumbersome for large quilts |
Spray Basting | – Fast and efficient | – Involves spraying chemicals (fume concerns) |
If you want a quick process, spray basting saves time and gives you a smooth quilt surface. Pin basting works well if you prefer a chemical-free approach and want to reuse your supplies.
Both techniques work with different types of batting, so you can choose what fits your style.
Tip: Use Fanda Fabrics Bulk Quilt Batting for consistent quality and easy handling. This batting lies flat and stays soft, making basting much easier whether you use pins or spray.
Layering Tips
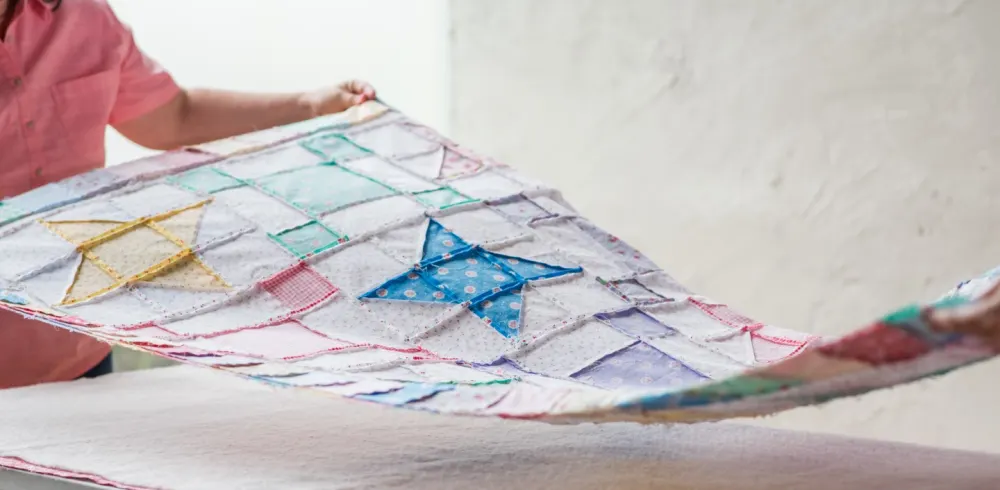
You want your quilt layers to stay aligned from start to finish. Start by laying your backing fabric flat on a clean surface. Smooth out any wrinkles. Place your batting on top, making sure it covers the backing evenly. Next, add your quilt top, lining up the edges with the batting and backing.
Work from the center out to avoid bunching.
Use gentle hands to smooth each layer.
Secure the layers with your chosen basting technique.
Check for folds or bubbles before you start quilting.
If you use Fanda Fabrics Bulk Quilt Batting, you’ll notice how easy it is to position and adjust your layers. This batting helps you achieve a neat, professional quilt every time.
Basting sets the stage for successful quilting. With the right techniques and quality batting, you’ll enjoy a smoother, more enjoyable quilting experience.
Tool Selection
Essential Quilting Tips
You want your quilt to look its best, so choosing the right quilting tools matters. The right tools help you work faster and avoid common mistakes. Many quilters rely on a few essentials to get great results. You might wonder which ones you need. Here’s a quick list to guide you:
Quilting clips keep your layers together and make handling fabric easier.
Sewing threads hold your quilt together and add strength.
Rulers and templates help you cut straight lines and perfect shapes.
Industry surveys show that quilters love clips and threads for their reliability. Rulers and templates stay popular because they help you achieve precision. You should look for durable, high-quality tools. Avoid anything that feels flimsy or has unclear descriptions. Good quilting tips often start with using the best tools for the job.
Tip: Replace dull blades often. Sharp blades make cutting fabric smooth and safe.
You can set up your workspace with these basics. Keep your tools organized so you spend less time searching and more time quilting. If you want to try new quilting tips, start with these essentials.
Fanda Fabrics Quilting Collection
You deserve fabrics that make quilting easier and more enjoyable. Fanda Fabrics Quilting Collection stands out for quality and user satisfaction. You get premium 100% cotton fabrics with a tight weave. This makes cutting and sewing simple. Your quilt will last longer and look vibrant after many washes.
Fanda Fabrics offers wide back options up to 108 inches. You can finish large quilts without extra seams. The curated fabric bundles simplify your choices. You save time and avoid mismatched colors. Many quilters trust Fanda Fabrics because of their global reputation and innovative designs.
Feature | Fanda Fabrics Quilting Collection | Other Leading Brands |
|---|---|---|
Cotton Quality | Premium, tight weave | Varies |
Wide Back Options | Up to 108 inches | Rarely available |
Curated Bundles | Yes, consistent quality | Sometimes |
Global Reputation | Strong, trusted | Regional |
You find Fanda Fabrics in major retailers and at international events. Their products suit both beginners and experienced quilters. If you want reliable results, try their quilting collection for your next quilt.
Machine Quilting
Machine Quilting Basics
You want your quilt to look polished and last for years. Machine quilting helps you finish projects faster and gives your quilt a uniform look. Many quilters use a sewing machine because it saves time and lets them try complex patterns.
You can stitch straight lines, curves, or even experiment with free motion quilting. Your sewing machine makes it easy to handle large quilts and keeps your stitches even.
Some quilters love hand quilting for its tradition and texture. Others prefer machine quilting for speed and consistency. You might even combine both methods to get the best of each. The quilting community values both styles, so choose what feels right for you.
Machine quilting comes with a few common challenges. Here’s a quick table to help you solve them:
Problem | Solution |
|---|---|
Difficulty with smooth curves | Practice geometric shapes, sketch designs, and be patient with your progress. |
Skipping stitches or thread breakage | Check needle size, rethread your sewing machine, adjust tension, and clean your machine. |
Dislike of free-motion quilting | Try walking foot techniques or take a class for new ideas. |
Quilting many blocks | Use a blending thread for all-over quilting or custom quilting on each block. |
Getting boxed in or missing areas | Stitch over previous lines and plan your quilting direction before you start. |
Speed and Control
Your sewing machine lets you quilt quickly, but you want to keep control. Start slow and get comfortable with your machine’s settings. Use a walking foot for straight lines and even stitches. If you want to try curves, practice on scrap fabric first. Adjust your speed so you can guide your quilt smoothly under the needle.
Keep your hands steady and relax your grip. You don’t need to rush. Slow, steady movements help you avoid mistakes and keep your quilt looking neat. Clean your sewing machine often and check your needle before each project. This keeps your stitches smooth and prevents thread problems.
You can enjoy the process and see your quilt come together. Machine quilting gives you the freedom to try new designs and finish projects faster. Your sewing machine is a powerful tool—use it to make quilting fun and stress-free.
Troubleshooting
Test Patches
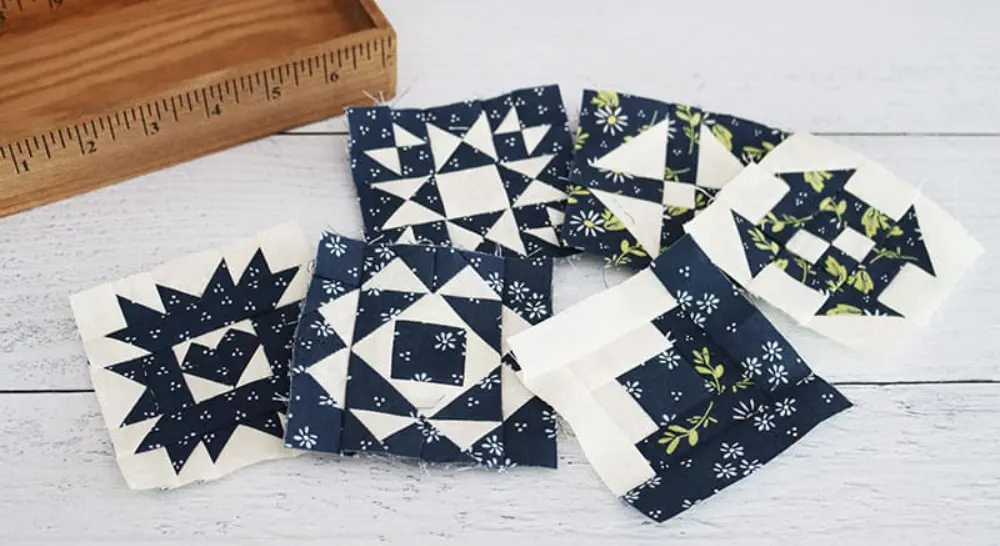
You want your quilt to look great from the start, so testing before you dive in makes a big difference. Try quilting small squares with the same fabrics and battings you plan to use. This step helps you spot problems early.
Leah Day, a well-known quilter, says test patches let you see how different battings affect warmth, weight, and softness. You can check your tension, see how your thread behaves, and notice if your quilting lines match up at corners.
Test patches also reveal surprises. Sometimes, two fabrics with the same quilting design look different after stitching. You might find it easier to fix a quilt block when you know how your materials react.
Testing saves you time and prevents wasted effort. You get to experiment with techniques and make smart choices for your quilt. Many quilters agree—test patches are a simple way to avoid headaches later.
Tip: Keep a notebook handy. Write down what works and what doesn’t. You’ll build your troubleshooting guide for future quilts.
Adjust Stitch Length
Stitch length can make or break your quilt’s look and durability. If your stitches are too short, the quilt feels stiff. If they’re too long, seams may pop open. You want smooth, even stitches every time. Here’s how you can troubleshoot stitch length problems:
Test stitching on scrap fabric before you start your quilt. This helps you check your tension and spot issues early.
Adjust stitch length settings, usually between 2.5 to 3.0 mm for quilting.
Check your threading and needle condition. Rethread if you see loops or thread breaks.
Change needles regularly. Signs you need a new needle include thread breakage, fabric snags, or a punching sound.
Clean feed dogs so your fabric moves smoothly.
Lower or adjust upper thread tension if you notice problems.
Make sure your walking foot is set up right. The arm should sit over the needle bar.
Avoid quilt drag or bunching behind the machine. This can shorten stitches.
Loosen foot pressure if your machine allows.
Handle thread removal carefully to keep tension steady.
Manage quilt bulk by stitching in sections and adjusting fabric as you go.
You can fix a quilt block that looks off by checking your tension and adjusting stitch length. These steps help you get even stitches and a smooth finish. Your quilt will look better and last longer.
Finish Your Quilt
Binding Tips
You’ve pieced your quilt top, layered your batting, and quilted everything together. Now, it’s time to add the finishing touch—binding. Binding gives your quilt a clean edge and protects it from wear. You want your quilt to look polished and last for years.
Here are some easy steps for binding:
Choose your binding fabric. Many quilters pick a contrasting color or pattern to frame their quilt.
Cut strips about 2.5 inches wide. Join them end to end for one long strip.
Fold the strip in half lengthwise and press it flat.
Attach the binding to the front of your quilt using a ¼-inch seam. Miter the corners for a neat finish.
Wrap the binding to the back and hand-stitch or machine-stitch it down.
Tip: Use clips to hold your binding in place. This keeps everything straight and makes sewing easier.
Binding isn’t just about looks. It keeps your quilt edges from fraying and adds strength. Take your time with this step. You’ll feel proud every time you see your finished quilt.
Labeling
Labeling your quilt is more important than you might think. When you add a label, you tell the story behind your quilt. You help future generations understand who made it, when, and why. Quilts often become family treasures, so you want your story to last.
Organizations like the Quilt Alliance say that quilts are historical documents. Without labels, those stories can disappear. Museums and experts recommend including details like:
Date and place of creation
Your name and birth date
Any special meaning or history
Photos, letters, or family stories
Labels help keep the link between you and your quilt strong. They make it easier for others to display, research, or appreciate your work. You can sew a fabric label onto the back, write with a permanent pen, or print one on your computer.
Note: A good label turns your quilt into a piece of history. You honor your own creativity and help preserve quilting traditions.
Take a moment to document your quilt. You’ll add value and meaning that lasts for years.
Get Quilting Tips
Community Resources
You never have to quilt alone. The quilting world is full of friendly faces and helpful advice. When you join a community, you get quilting tips, support, and inspiration every step of the way.
Many quilters find that being part of a group helps them finish more projects and learn new skills faster. You can meet others who share your passion and celebrate each quilt together.
Here are some great quilting resources and communities you can explore:
Join online groups like the Suzy Quilt Patterns Facebook group for friendly chats and advice.
Take classes at local quilt shops, museums, or community centers. You meet new friends and pick up hands-on skills.
Start your group or guild, such as a Modern Quilt Guild chapter or a Project Linus team.
Try Patchwork Posse’s Patchworkers Plus for designer tips, free patterns, and quilt-alongs.
Use platforms like Bluprint, Creative Bug, and Creative Live for online quilting classes.
Check out the International Association of Quilters for structured learning and support.
Browse Pinterest for quilt ideas, but watch out for spam.
Quilting groups and classes help you learn, share, and grow. You build confidence, improve your fine motor skills, and enjoy a sense of achievement with every finished quilt. The social side of quilting lifts your spirits and keeps you motivated.
Fanda Fabrics Inspiration
You want the best quilting resources at your fingertips. Fanda Fabrics makes it easy to find everything you need for your next quilt. Their website offers free patterns, helpful guides, and a huge selection of fabrics.
You can explore modern and classic designs, precut bundles, and even custom options. Many quilters rate Fanda Fabrics higher than other quilting websites for variety, pricing, and user experience.
Store | Average Customer Rating | Product Variety Highlights | Pricing & Offers | Website/User Experience Notes |
|---|---|---|---|---|
Fanda Fabrics | 4.8+ | Quilting cotton, bundles, precuts, customization, patterns | Competitive, small batch, fast | Easy navigation, clear support |
The Cotton Patch | 4.7 | Designer prints, thread boxes | Frequent sales, flexible returns | Smooth shopping, fast shipping |
Lady Sew and Sew | 4.6 | Wide selection, workshops | Regular deals, in-person events | Community feel, educational resources |
The Fabric Fox | 4.5 | Modern prints, bold colors | Affordable bundles, new arrivals | Fun, easy-to-use website |
Bramble Patch | 4.6 | Classic and modern fabrics, kits, and classes | Loyalty program, group discounts | Supportive, community-driven |
You can invest in quilting resources that make your creative journey smoother. Fanda Fabrics stands out for its helpful support and easy-to-use site. You find inspiration, save time, and enjoy every step of your quilting adventure.
If you want to get quilting tips, explore their site for new ideas and connect with a vibrant quilting community.
Conclusion
You can transform your quilting experience by using these practical tips. Many quilters say they enjoy more creativity, better precision, and a sense of accomplishment when they follow proven advice.
Fanda Fabrics products help you achieve smoother sewing and more durable quilts. Try sharing your favorite tips with others and exploring new ideas on the Fanda Fabrics website. You might discover fresh techniques or connect with fellow quilters who inspire you.
Start small and personalize your projects.
Label your quilts and balance your designs.
Test different threads and machines for the best results.
FAQ
How do you choose the best fabric for quilting?
You want fabric that feels soft and holds color well. Cotton works best for most quilts. Try Fanda Fabrics Quilting Collection for vibrant colors and easy sewing. Always touch and test fabric before you buy.
What’s the easiest way to fix a crooked quilt block?
Don’t stress! Trim the block with a square ruler. If it’s too small, add a border strip. You can also use sashing to hide uneven edges. Practice makes perfect, so keep going.
Should you prewash all your quilting fabrics?
Most quilters recommend prewashing. You remove dust and loose dyes. This step helps prevent shrinking and color bleed later. If you use precut bundles, check the label first.
How do you keep your quilt layers from shifting?
Use pins or spray to baste your layers. Start in the center and smooth outward. Fanda Fabrics Bulk Quilt Batting lies flat and helps keep everything in place. Take your time with this step.
Can you machine wash a finished quilt?
Yes, you can! Wash your quilt in cold water on a gentle cycle. Air dry or tumble dry low. Use mild detergent. Always check the care instructions for your fabric and batting.