Have you ever wondered how to stabilize old fabric for quilting without fancy equipment? You might have a box of vintage linens or sentimental scraps that seem too delicate to use.
Don’t worry—you can learn how to stabilize old fabric for quilting using easy, everyday tools. With a gentle approach, you can give new life to these cherished pieces and create quilts you’ll treasure for years.
Key Takeaways
Always check your old fabric carefully for holes, thin spots, or stretchiness before stabilizing it.
Choose a gentle, lightweight stabilizer that fits your fabric’s condition and avoid heat if your fabric has delicate prints.
Use simple tools like fusible interfacing, pressing cloths, and sharp needles to strengthen and protect fragile fabric.
Patch weak areas with fusible patches and hand stitching to reinforce and beautify your fabric.
Handle stabilized fabric gently when sewing, use proper needles, and take steps to prevent fraying and stretching for lasting quilts.
How to Stabilize Old Fabric for Quilting
When you want to learn how to stabilize old fabric for quilting, you might feel overwhelmed by all the options. Don’t worry—Fanda Fabrics has years of experience helping quilters like you work with delicate, vintage, or sentimental materials.
You can use simple tools and the right stabilizer to make even the most fragile fabric strong enough for your next quilt.
Assessing Old Fabrics
Before you start, take a close look at your fabric. You want to know what you’re working with so you can choose the best method for stabilizing old fabric for quilting. Here’s how you can assess your fabric:
Check for holes, tears, or thin spots. These are structural problems that need extra support.
Look for areas that are just worn or faded. Sometimes, the fabric is still strong but looks tired.
Notice if the fabric feels stretchy, especially if it’s from old t-shirts or sweatshirts. Stretchy fabric can be tricky to stabilize.
Think about the fabric’s history. Is it rare, or does it have sentimental value? Sometimes, the story behind the fabric matters as much as its condition.
Decide how you want to use the quilt. Will you display it, use it every day, or keep it as a keepsake? This helps you pick the right stabilizer and method.
Tip: If you see missing or torn patches, call them “eyesores.” If the fabric is mostly there but weak, call it “worn.” If it’s very fragile and falling apart, call it “wearing.” This helps you plan your repairs.
You might also want to avoid washing antique or very old fabrics at home. Instead, gently vacuum them with a protective screen to keep them safe.
Choosing the Right Stabilizer
Now that you know your fabric’s condition, you can pick the best stabilizer. The right stabilizer makes all the difference when you want to know how to stabilize old fabric for quilting. Here are some things to keep in mind:
Lightweight, low-heat, and non-fusible stabilizers work best for vintage fabrics. They protect delicate prints and keep the fabric soft.
Ultra-lightweight polyester nonwoven interfacing, like Pellon 906F, is gentle on fragile fabrics.
Woven cotton or poly stabilizers help with stretchy or delicate prints.
For embroidery or knits, try temporary stabilizers like tear-away or cut-away types.
If your fabric has heat-sensitive prints, use non-fusible sewn-in stabilizers or spray-baste a woven backing. This avoids heat damage.
Always pre-wash your fabric (without fabric softener) before adding a stabilizer. This helps the stabilizer stick and keeps your fabric safe.
Use a pressing cloth, like a Teflon or silicone sheet, if you need to use heat. This protects any designs or prints.
Test your stabilizer on a scrap piece first. You want to make sure it works before you use it on your precious fabric.
If you care about the environment, look for sustainable options like organic cotton or hemp interfacing.
Here’s a quick table to help you compare some expert-recommended stabilization methods:
Stabilization Method | When to Use It | Materials/Techniques |
|---|---|---|
Fabric Supports | Weak sections or full backing | Nylon netting, silk crepeline |
Overlay Techniques | Stabilize without changing appearance | Sheer netting, stitched to backing |
Stitching Methods | Attach supports or reinforce damaged areas | Couching, whip stitch, cotton thread |
Three-Dimensional Supports | For shaped or padded textiles | Darts, padded inserts, rigid backings |
Environmental & Ethical | For display or conservation, avoid light-sensitive materials | Use compatible, safe materials |
Note: Some stabilizers need heat to work, but heat can damage old prints. Always use the lowest heat setting and a pressing cloth, or choose a non-fusible stabilizer if you’re worried.
You might run into some common issues when you stabilize old fabrics:
Thin, stretchy fabric can be hard to control.
Heat-based stabilizers might damage printed designs.
No-sew adhesives sometimes don’t hold well over time.
Appliquéing fragile pieces onto a stable background can help manage stretch and size differences.
Stitching stabilizer into seams or using “stitch-in-the-ditch” keeps everything in place.
Fanda Fabrics offers a wide range of stabilizers and high-quality cotton quilting fabrics. You can find everything you need to support your old fabrics and make your quilt last for years. With the right stabilizer and a little patience, you’ll turn even the most delicate fabric into a beautiful, lasting quilt.
Step-by-Step: Adding Stabilizer
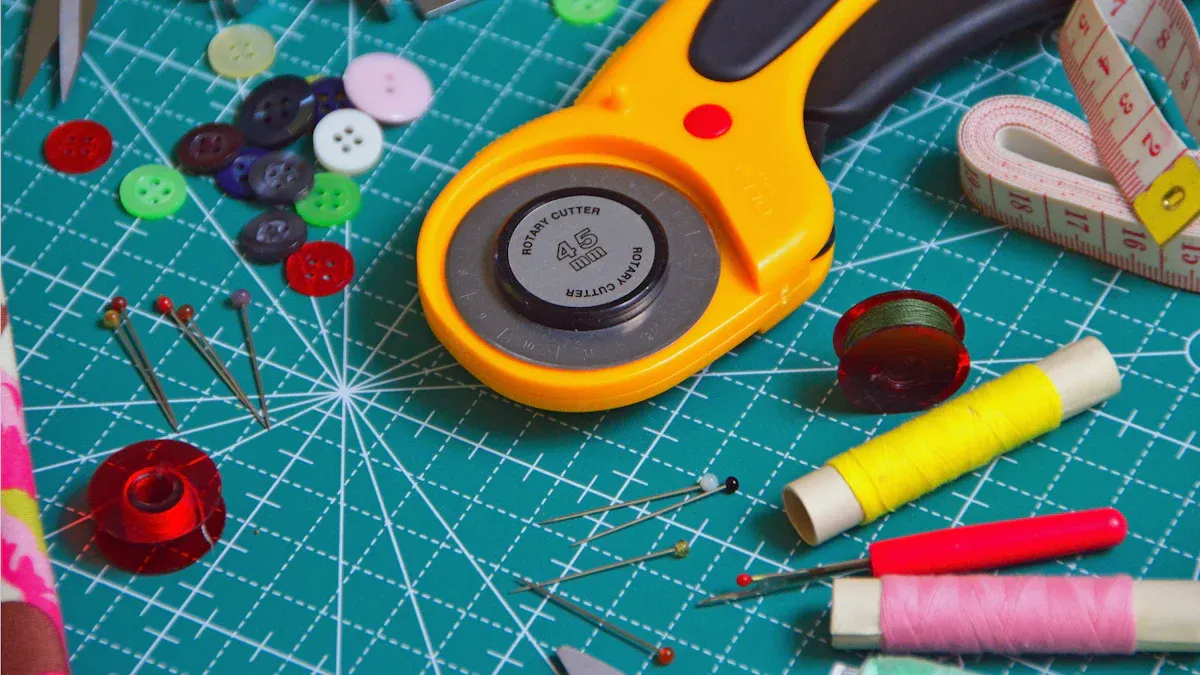
Tools and Materials Needed
Before you start adding stabilizer to your old fabric, gather everything you need. Having the right tools makes the process smoother and helps protect your delicate materials. Here’s a handy checklist:
Fusible web (like Mistyfuse, Heat n Bond, or Pellon 805 Wonder Under): These sheets bond two layers of fabric together with heat. You’ll find them especially useful for machine appliqué and stabilizing fragile fabric.
Heatnbond EZ Tee stabilizer: This product works wonders for t-shirt quilts and other stretchy fabrics. It keeps your fabric from shifting or stretching out of shape.
Paper-backed fusible webs (such as Bondaweb Vilene Vliesofix, Pellon Wonder Under, and Heat n Bond): These are versatile and easy to use.
Freezer paper: Use this for temporary stabilization. It sticks to fabric with a hot, dry iron and peels off cleanly.
Quilt marking pens: Chalk markers or heat-erasable pens (like Pilot FriXion or Clover Chaco) let you mark your fabric safely.
Iron and ironing board: You don’t need a fancy iron—just one that gets hot enough for fusibles.
Rotary cutter and fresh blades: These help you cut fabric and stabilizer accurately.
Pressing cloth: A lightweight cotton or silk cloth protects your fabric from direct heat.
Fray Check or similar fabric sealant: This liquid keeps fabric edges from fraying, which is especially important for fragile or vintage pieces.
Needles and thread: Choose sharp needles for woven fabrics and ballpoint needles for knits. Match your thread to your fabric type.
Embroidery hoop or darning mushroom: These tools help keep fabric taut when you’re reinforcing weak spots.
Tip: If you’re using Fanda Fabrics’ Cotton Quilting Fabric or Bundles, you’ll find they pair beautifully with most stabilizers and are easy to cut and handle.
Applying Fusible Interfacing
Fusible interfacing is one of the most popular stabilizer options for old fabric. It adds strength without making your fabric stiff. Here’s how you can apply it safely, even to delicate or vintage textiles:
Pre-wash and press your fabric. Always start with clean, wrinkle-free fabric. If you’re unsure, pre-wash and air-dry your interfacing too.
Cut the interfacing. Trim it to match the area you want to reinforce. For tricky shapes, cut slightly smaller than your fabric piece.
Lay out your materials. Place your fabric wrong side up on the ironing board. Put the interfacing glue-side down on the fabric.
Test first. Always test a small scrap of fabric and interfacing together. This helps you avoid surprises or damage.
Set your iron. Use a medium heat (about 135-150°C) and turn off the steam. Place a pressing cloth over your project to protect it.
Press, don’t slide. Hold the iron firmly in place for 10-16 seconds. Don’t move it back and forth—just lift and press each section, overlapping slightly.
Let it cool. Wait until the fabric cools before moving it. This helps the stabilizer set and prevents shifting.
Check the bond. Gently lift an edge to see if the stabilizer applied well. If not, repeat the pressing step.
Note: Products like Heatnbond EZ Tee stabilizer work especially well for stretchy or knit fabrics. They keep your fabric stable and make sewing much easier. If you’re working with Fanda Fabrics’ quilting cottons, you’ll find that fusible interfacing bonds smoothly and gives you a crisp, stable base for your quilt blocks.
Parameter | Recommendation / Notes |
|---|---|
Temperature | 135-150°C (medium heat) |
Pressure | Firm, even pressure; don’t slide the iron |
Time | 10-16 seconds per spot |
Ironing Motion | Press in place, don’t move the iron back and forth |
Press Cloth | Use a cotton or muslin cloth to protect the fabric |
Steam | Preferably dry pressing |
Cooling | Let the fabric cool before moving |
Testing | Always test on a scrap first |
Pro Tip: If you’re using Heatnbond EZ Tee stabilizer, follow the same pressing steps. This stabilizer is designed for t-shirts but works great for any stretchy or fragile fabric you want to quilt.
Patching and Reinforcing
Sometimes, old fabric needs more than just a stabilizer. Weak spots, holes, or thin areas call for patching and extra reinforcement. Here’s how you can tackle these repairs:
Clean and press the area. Iron the damaged spot and remove any loose threads.
Apply a fusible interfacing patch. Place it on the inside of the fabric to stabilize the weak area.
Choose your needle and thread. Use sharp needles for woven fabrics and ballpoint for knits. Match your thread to your fabric for invisible repairs, or pick a contrasting color for decorative stitching.
Hand stitch for strength. Try running stitch, ladder stitch, or even a wide zigzag to secure the patch. For larger holes, you can reweave by sewing a grid of stitches over the area.
Try boro or sashiko techniques. These Japanese methods use visible, decorative stitches to reinforce and beautify your fabric. Layer scraps from Fanda Fabrics’ Quilting Fabric Bundles for a unique look.
Use Fray Check. Dab a little on the edges of your patch or any raw fabric edges. This keeps them from unraveling as you work.
Keep fabric taut. Use an embroidery hoop or darning mushroom to hold the fabric steady while you stitch.
Tip: Always assess the damage before you start patching. For small holes, a simple patch and a few stitches may be enough. For larger or more visible repairs, get creative with decorative stitches or layered patches.
You can combine these techniques with your stabilizer for the best results. For example, use Heatnbond EZ Tee stabilizer under a patch to keep everything flat and secure. When you finish, your fabric will feel stronger and ready for quilting.
Remember: Adding stabilizer and reinforcing weak spots helps your old fabric last for years. With the right approach, you can turn even the most fragile material into a quilt that tells a story.
Sewing and Saving a Quilt
Handling Stabilized Fabric
When you start working with stabilized fabric, you’ll notice it feels a bit different from new material. You want to handle your vintage quilt blocks with care. Always support the fabric as you move it, and avoid pulling or stretching.
Lay your pieces flat while you work. If you need to cut, do it one layer at a time. This helps keep your old quilt pieces from shifting or snagging.
If you’re piecing together vintage quilt blocks, try using a pressing cloth and pressing with an up-and-down motion. Don’t iron back and forth. This keeps the shape of your blocks and prevents distortion.
Stay stitch curves and bias edges about 1/8” inside the seam allowance. This simple step helps your vintage quilt blocks keep their shape.
Sewing Tips for Old Fabrics
Sewing with old quilt fabrics can feel tricky, but you can do it! Here are some tips to make the process smoother:
Use sharp needles for woven fabrics and ballpoint needles for knits.
Choose a matching thread and avoid backstitching. Instead, leave long thread tails and knot by hand.
Reinforce seams and hems, especially on fragile vintage quilt blocks.
Try French seams or flat-felled seams for a neat finish and extra strength.
Pin only in seam allowances to avoid visible holes.
Place tissue paper or a tear-away stabilizer under slippery vintage quilt blocks to help them feed smoothly through your machine.
Cut each block on a single layer to prevent shifting.
You might run into challenges when saving a quilt made from vintage quilt blocks. Sometimes, you’ll see fraying or stretching. Don’t worry—just go slow and use gentle handwork when needed.
If you’re repairing an older quilt, consider using Fanda Fabrics’ Quilting Collection for backing or new blocks. These fabrics blend well with vintage quilt blocks and add strength to your project.
Preventing Stretch and Fray
Old quilt fabrics, especially vintage quilt blocks, can stretch or fray if you’re not careful. Here’s how you can prevent these problems:
Use lightweight fusible interfacing or muslin lining to stabilize stretchy vintage quilt blocks.
Spray baste your quilt sandwich to keep everything in place while quilting.
Quilt with smaller, closer stitches to reduce seam stress.
Apply fabric glue or seam sealant to the edges of vintage quilt blocks before sewing.
Use scotch tape along edges as a temporary fix during cutting.
Finish seams with French seams or zigzag stitches to lock in raw edges.
Tip: Always test your stabilizer or glue on a scrap first. Some products can cause aging or discoloration over time. Choose stabilizers that are gentle and designed for long-term use, especially when saving a quilt with sentimental value.
If you use Fanda Fabrics’ Quilting Collection, you’ll find the cotton fabrics are stable and easy to pair with vintage quilt blocks. This makes saving a quilt much easier and helps your old quilt last for years.
Product Picks from Fanda Fabrics
Cotton Quilting Fabric
If you want a fabric that gives your old textiles a new lease of life, you can’t go wrong with Fanda Fabrics’ Cotton Quilting Fabric. Cotton stands out for its durability and compatibility with other materials.
When you pair it with older fabrics—like linen, flannel, or even denim—you create a quilt that feels sturdy and lasts for years. Cotton also breathes well, so your quilt stays comfortable.
Starched cotton fabric holds its shape, making it easier to cut and sew.
You get crisp, clean edges, which means less fraying and more accurate piecing.
The fabric’s firmness helps you match seams and keep everything neat.
You’ll find sewing less stressful because the fabric doesn’t stretch or distort.
Tip: Try starching your cotton fabric before you start. It makes handling delicate or vintage pieces much easier.
Quilting Fabric Bundles
Choosing fabric for a quilt can feel overwhelming, especially if you want to mix old and new. Fanda Fabrics’ Quilting Fabric Bundles take the guesswork out of the process. Each bundle gives you a variety of pre-cut fabrics, so you can focus on creativity.
You’ll find bundles in all your favorite shapes:
Fat Quarters
Jelly Rolls
Mini Charm Packs
Charm Packs
Layer Cakes
These bundles make it easy to add color, pattern, and texture to your quilt. You can use them to patch worn spots or add a modern twist to vintage fabrics.
Quilting Collection
If you love the look of classic quilts, you’ll want to explore the Quilting Collection. This collection features vintage patchwork prints, soft florals, and classic motifs that bring a nostalgic feel to your projects. The fabrics come in quilt-friendly sizes and materials like cotton, linen, and polyester.
Tight weaves and even textures help prevent fraying and stretching.
Soft, smooth fabrics feel great for cuddly quilts, while crisp options work well for detailed piecing.
Many fabrics are machine washable and colorfast, so your quilt stays beautiful over time.
Note: Fanda Fabrics offers competitive pricing, so you get quality and value whether you’re making a keepsake or a showpiece.
Conclusion
You can stabilize old fabric for quilting with just a few simple steps:
Pre-soak vintage blocks in plain water and air dry.
Cut and fuse a gentle stabilizer to the wrong side of your fabric.
Trim, layer, and baste your quilt top with care.
Quilt through the stabilized fabric using the right needle.
Using the right stabilizer and gentle techniques helps you preserve fabric with sentimental value. With quality materials from Fanda Fabrics, you can confidently create quilts that last.
FAQ
How do you know if old fabric is too fragile for quilting?
You can gently tug the fabric and hold it up to the light. If it tears easily or looks see-through in spots, it needs extra support. Always test a small area before you start your project.
Can you wash vintage fabric before stabilizing it?
You can, but use caution. Hand wash gently in cool water and avoid harsh detergents. Air dry flat. If the fabric feels too delicate, skip washing and use a gentle vacuum with a screen instead.
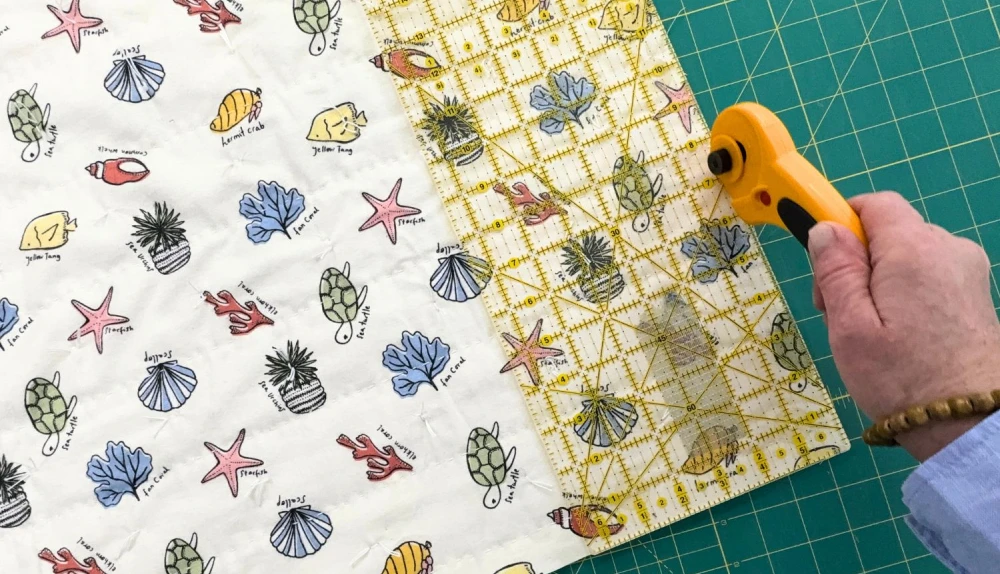
What’s the best way to cut stabilized old fabric?
Use a sharp rotary cutter and a fresh blade. Cut one layer at a time. This helps you avoid shifting and keeps your edges clean. Always support the fabric as you move it.
Do you need special needles or thread for sewing old fabric?
Yes, you should use sharp needles for woven fabrics and ballpoint needles for knits. Choose a high-quality cotton or polyester thread. This helps prevent snags and gives you smooth, strong seams.
Tip: Always test your needle and thread on a scrap first. This helps you avoid damaging your precious fabric.