Creating a quilted fabric wall hanging is a rewarding and creative project that adds a personal touch to your home decor. Whether you are a seasoned quilter or a beginner looking for a new craft, making a quilted wall hanging can be a delightful way to showcase your artistic talents.
This guide will walk you through the process step-by-step, from selecting materials to the final hanging of your masterpiece.
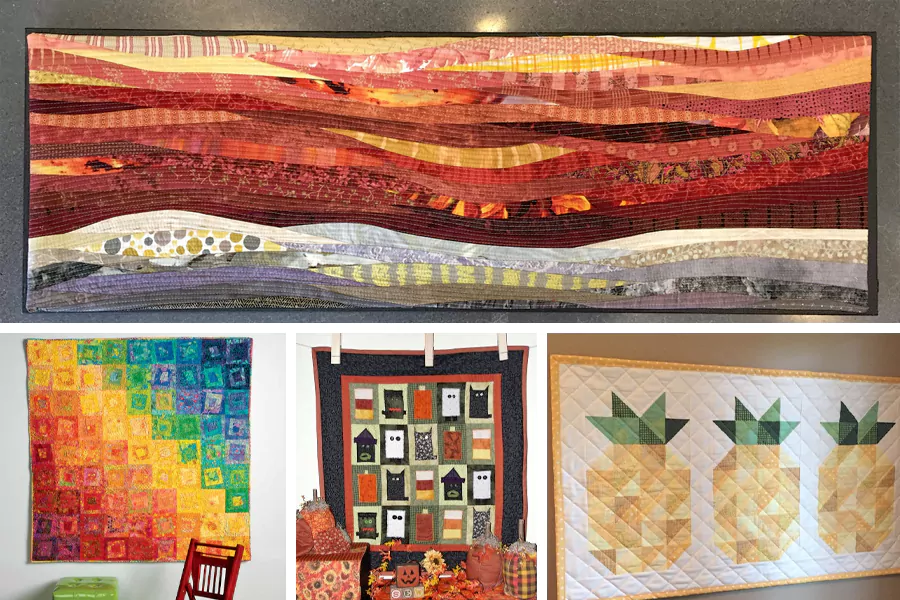
What is a Quilted Fabric Wall Hanging?

A quilted fabric wall hanging is a unique and versatile piece of artwork that adds warmth, texture, and personality to any room. Unlike traditional quilts used on beds, a quilted wall hanging is specifically designed for vertical display on walls, making it an ideal choice for adding color and interest to your living space.
How to Make a Quilted Fabric Wall Hanging?
Materials and Tools Needed
Essential Materials:
- Fabric: Choose a variety of fabrics in different colors and patterns.
- Batting: The middle layer that adds thickness and warmth.
- Backing Fabric: The fabric for the back of the quilt.
- Thread: High-quality thread in colors that match or contrast with your fabrics.
Tools:
- Sewing Machine: Essential for piecing and quilting.
- Rotary Cutter and Mat: For precise cutting of fabric pieces.
- Quilting Ruler: To ensure straight, accurate cuts.
- Pins and Needles: For holding pieces together and hand stitching.
- Iron and Ironing Board: For pressing fabric and seams.
Choosing Your Design
Inspiration Sources:
- Traditional Quilts: Look at classic designs like log cabin, star, and nine-patch. These designs are timeless and provide a structured pattern to follow.
- Modern Quilts: Explore contemporary patterns with bold colors and shapes. Modern quilts often feature minimalistic designs and striking contrasts.
- Nature: Use landscapes, flowers, and animals as inspiration for your quilt. Incorporate natural elements into your design for a unique and organic look.
Planning Your Design:
- Sketching: Draw your design on paper to plan your layout. This helps visualize the final product and make adjustments before cutting fabric.
- Color Scheme: Select a harmonious color palette. Consider the room where the wall hanging will be displayed and choose colors that complement the decor.
- Scale and Proportion: Consider the size of your wall hanging and the scale of the design elements. Ensure the design elements are appropriately sized for the overall dimensions of the wall hanging.
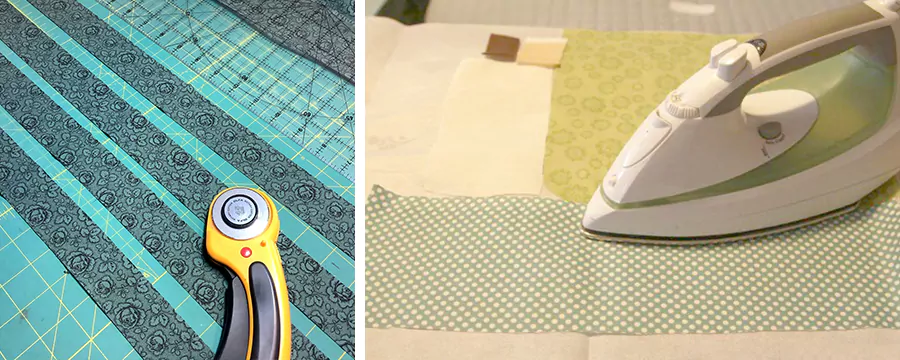
Preparing Your Fabric
Washing and Ironing:
- Pre-wash Fabric: To prevent shrinkage and color bleeding. Wash all fabrics in warm water and dry them before cutting.
- Iron Fabric: Ensure all pieces are smooth and wrinkle-free before cutting. This step is crucial for accurate cutting and piecing.
Cutting the Pieces:
- Using a Rotary Cutter: For accurate, clean cuts. Use a cutting mat and a clear ruler to guide the rotary cutter.
- Templates: Use templates for complex shapes. Templates ensure consistency and accuracy when cutting multiple pieces.
- Precision: Double-check measurements to ensure accuracy. Accurate cutting is essential for matching seams and creating a professional-looking quilt.
Piecing the Quilt Top
Layout the Design:
- Arrange Pieces: Lay out all pieces according to your design. Use a design wall or a large flat surface to see the entire layout.
- Balance Colors and Patterns: Ensure a visually pleasing arrangement. Distribute colors and patterns evenly across the quilt top to avoid clustering similar fabrics together.
Sewing the Pieces:
- Seam Allowance: Maintain a consistent seam allowance, typically 1/4 inch. Consistent seam allowances ensure all pieces fit together correctly.
- Pressing Seams: Press seams open or to one side for a neat finish. Pressing seams as you sew helps achieve a flat, smooth quilt top.
Adding Batting and Backing
Layering:
- Sandwiching Layers: Place the quilt top, batting, and backing fabric together. The quilt top should be face up, the batting in the middle, and the backing fabric face down.
- Basting: Use safety pins or basting spray to hold layers in place. Basting prevents the layers from shifting while quilting.
Quilting:
- Quilting Patterns: Decide on a quilting pattern (e.g., straight lines, free-motion). Simple quilting designs are easier for beginners, while more complex patterns add detail and texture.
- Sewing: Quilt through all layers, starting from the center and working outwards. This method helps prevent puckering and ensures even quilting.
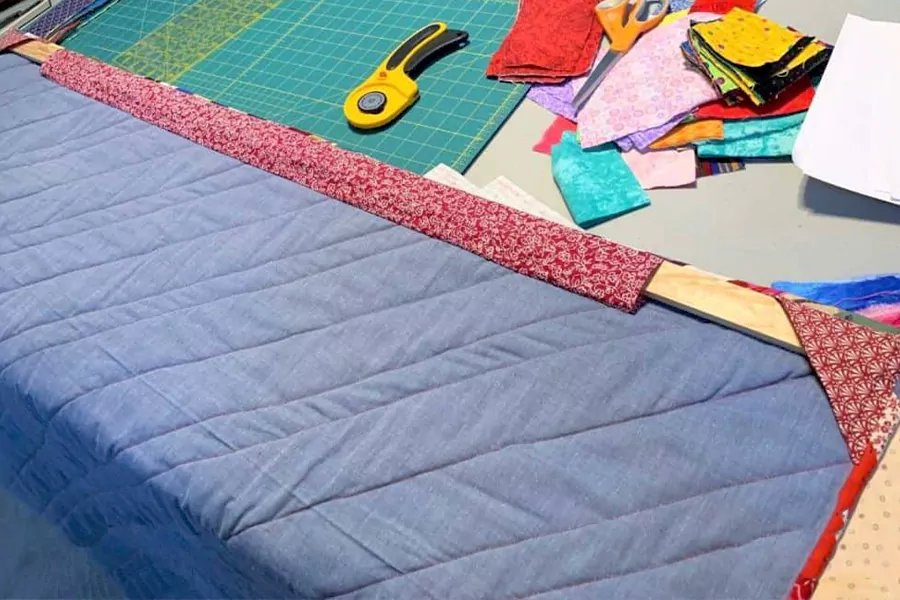
Binding the Edges
Cutting and Preparing Binding:
- Binding Strips: Cut strips of fabric for the binding. Strips are typically cut 2.5 inches wide and joined end to end.
- Joining Strips: Join strips together to create a continuous binding. Use diagonal seams to reduce bulk.
Attaching the Binding:
- Sewing Binding: Sew the binding to the front of the quilt. Align the raw edges of the binding with the edge of the quilt and sew with a 1/4-inch seam.
- Hand Stitching: Fold the binding to the back and hand-stitch it down. Use a blind stitch to secure the binding invisibly.
Adding Hanging Hardware
Sleeve or Rod Pocket:
- Creating a Sleeve: Sew a fabric sleeve to the back for hanging. Cut a strip of fabric 8 inches wide and the width of the quilt. Fold in half lengthwise and sew the raw edges to the top back of the quilt.
- Rod Pocket: Alternatively, create a pocket for a hanging rod. Ensure the pocket is wide enough to accommodate the rod.
Hanging Your Quilt:
- Hanging Rod: Use a decorative rod for display. Choose a rod that complements the quilt and the room decor.
- Hooks or Nails: Secure hooks or nails to the wall for hanging. Make sure they are level and positioned correctly to support the weight of the quilt.
Tips and Tricks
Time Management:
- Schedule Sessions: Break the project into manageable sessions. Set realistic goals for each session.
- Stay Organized: Keep your workspace tidy and tools accessible. Organize fabric pieces, threads, and tools for efficient workflow.
Common Mistakes to Avoid:
- Inconsistent Seams: Pay attention to seam allowances. Consistent seams ensure a professional finish and make it easier to match points.
- Skipping Steps: Follow each step carefully to ensure a polished finish. Rushing or skipping steps can lead to mistakes that are difficult to correct later.
Conclusion
Creating a quilted fabric wall hanging is a fulfilling project that combines creativity and craftsmanship. With careful planning, attention to detail, and patience, you can create a beautiful piece of art that will adorn your walls for years to come. Happy quilting!