If you wonder how to attach batting to fabric, you just need a simple approach. You start by gathering your materials, then layer the fabric and batting, secure them, and finish by quilting. Using high-quality fabric like F&A gives you a soft, stable, and beautiful result. This tutorial will walk you through each step. You will find this tutorial easy to follow, even if you are a complete beginner. Give it a try—you can do it!
Key Takeaways
- Choose the right batting and high-quality fabric like F&A for a soft, stable quilt that stays smooth and vibrant.
- Prepare your workspace with a flat surface, good posture, and clean, pressed materials to avoid wrinkles and shifting.
- Layer your quilt carefully by placing backing fabric, batting, and quilt top in order, smoothing out wrinkles from the center outward.
- Secure your quilt layers using pins, spray adhesive, fusible fleece, or thread basting to keep everything in place while sewing.
- Check your quilt sandwich for smoothness before quilting to ensure a neat, professional finish and avoid problems like puckering.
Materials and Tools
Types of Batting
When you start a quilt, you need to pick the right batting. You might wonder, what type of batting should I use? There are many batting options, and each one gives your quilt a different feel and look. Here’s a quick guide to help you compare:
| Batting Type | Loft/Thickness | Drape/Softness | Shrinkage | Warmth | Best Uses | Special Notes |
|---|---|---|---|---|---|---|
| Cotton | Low to medium | Soft, flexible | Shrinks | Warm | Traditional quilts, art quilts | Breathable, puckers after washing |
| Polyester | Medium to high | Less drape | No | Warm | Puffy quilts, insulation quilts | Lightweight, holds shape well |
| Wool | Medium to high | Soft, drapable | Pre-shrunk | Very | Winter quilts, art quilts | Shows quilting stitches well |
| Bamboo | Thin | Silky, soft | Minimal | Moderate | Summer quilts, eco-friendly | Antibacterial, breathable |
| Silk | Thin | Excellent | No | Moderate | Wearable quilts, art quilts | Luxurious, needs special care |
If you ask, what type of batting should I use, think about your quilt’s purpose. Cotton works well for a classic look. Polyester gives you a puffy finish. Wool keeps you warm in winter. Bamboo is great if you want something eco-friendly. Silk feels fancy and drapes beautifully. Choosing quilt batting depends on your project and personal taste.
Essential Tools
You need a few basic supplies for making a quilt. Here’s a handy list:
- Fabric scissors or rotary cutter
- Cutting mat
- Quilting ruler
- Pins or safety pins
- Basting spray or fusible web (for attaching batting)
- Sewing machine or hand-sewing needles
- Iron and ironing board
These tools help you cut, layer, and secure your batting fabric for quilting. Good tools make the process smoother and more fun.
Choosing Fabric
Picking the right fabric matters just as much as choosing batting. F&A fabrics stand out because they are soft, stable, and eco-friendly. Their preshrinking process means your quilt stays the same size after washing. You also get vibrant colors and detailed prints, thanks to advanced printing technology. Many quilters love F&A for their quality and reliability.
Tip: Using high-quality fabric like F&A helps prevent shifting and wrinkling when you layer and quilt.
Here’s why many quilters choose F&A and similar brands:
- The quilting market now favors eco-friendly and sustainable materials.
- F&A fabrics offer vibrant colors, soft texture, and a wide selection.
- Customer reviews praise their durability and colorfastness.
- Digital printing and specialty lines support creative projects.
- Certifications like OEKO-TEX® and GOTS ensure safety and quality.
- F&A’s commitment to ethical sourcing matches current trends.
When you gather your supplies for making a quilt, remember that both your batting and fabric choices shape your final result. With the right batting options and quality fabric, you set yourself up for quilting success.
Workspace Prep
Flat Surface Setup
Before you start layering or basting, you need a good workspace. A flat, sturdy surface makes a huge difference when you want smooth, wrinkle-free results. You might use a large table, a kitchen island, or even the floor if you have enough space.
Many quilters love using large, rectangular ironing boards because they give you plenty of room for pressing and arranging your layers. If your space is tight, a tabletop ironing mat works well and can turn any table into a pressing station.
Tip: Stand on an anti-fatigue mat while cutting or pressing. Your feet, knees, and hips will thank you after a long quilting session!
When you set up your sewing machine, pay attention to the height. Experts recommend measuring from your elbow to the floor while sitting with your knees and hips at 90 degrees. Your sewing surface should match this height, usually between 29″ and 34″. This setup helps you avoid back and neck pain. Always sit centered on the needle to keep your spine straight. These small adjustments make a big difference in comfort and help you focus on how to prep your quilt.
- Use a flat, stable table or board.
- Add anti-fatigue mats for comfort.
- Adjust your sewing surface height for better posture.
- Keep your workspace clutter-free for easy movement.
Prepping Fabric and Batting
Now that your workspace is ready, it’s time to get your materials in shape. Start by washing and drying your fabric, especially if you use F&A fabrics. Their preshrinking process means you won’t get surprises after your first wash. Press your fabric with a hot iron to remove any wrinkles. Smooth, flat fabric makes layering much easier.
Lay out your batting and let it relax for a bit. Sometimes batting gets creased in the package. Give it a gentle shake and let it rest flat for a few hours. If you see stubborn wrinkles, a quick pass with a cool iron (check the label first!) can help. This step is key in how to prep your quilt for perfect results.
Note: Always check that your fabric and batting are free of lint and threads before layering. Clean materials help you avoid bumps and uneven spots in your finished quilt.
With your workspace set up and your materials prepped, you’re ready to move on to layering. Taking time with these steps sets you up for success and makes the rest of the process much smoother.
Layering
How to Attach Batting to Fabric
You have your fabric and batting ready. Now, you want to know how to attach batting to fabric so your quilt comes out smooth and professional. This step is where your quilt really starts to take shape. You will layer your quilt top, batting, and backing fabric in the right order. Most quilters call this the “quilt sandwich.”
Here’s a simple step-by-step tutorial to help you:
- Lay your backing fabric right side down on your flat surface.
- Smooth out any wrinkles with your hands or a clean ruler.
- Place the batting on top of the backing. Make sure the batting covers the entire area.
- Add your quilt top, right side up, on top of the batting.
You want all three layers to line up neatly. If you use F&A’s stable fabrics, you will notice how much easier it is to keep everything flat. Their preshrunk and soft texture helps the layers stay put while you work.
Tip: If you want to know how to attach batting to fabric without frustration, always start with clean, pressed materials and a tidy workspace.
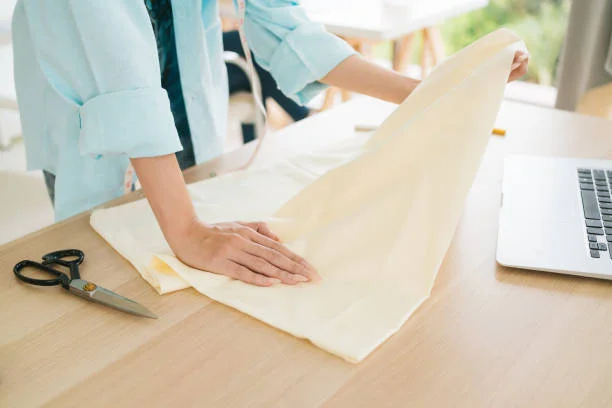
Smoothing Layers
Getting your quilt layers together without bumps or folds is key. You want your quilt to look crisp and feel comfortable. Here’s how you can smooth out your batting and fabric:
- Start at the center of your quilt sandwich.
- Use your hands to gently press outward, smoothing the batting and fabric as you go.
- Work in small sections, moving from the middle to the edges.
- If you see a wrinkle, lift the top layer and batting, then smooth again.
Some quilters like to use a light spray of real starch on the fabric before layering. Starching helps stabilize the fabric, especially on bias edges or curved blocks. Experts recommend starching every inch of fabric, sometimes even twice, to keep things accurate and reduce stretching. This step makes a big difference when you want to quilt layers together without shifting.
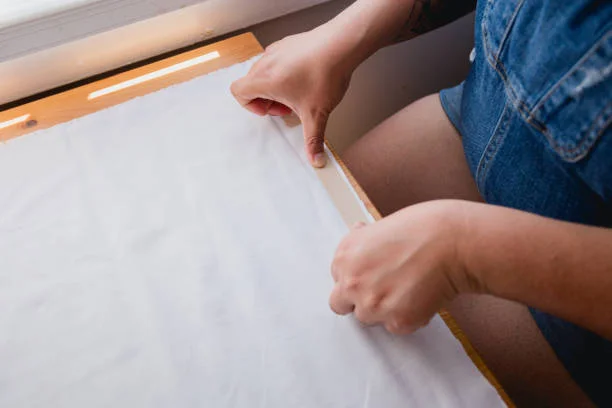
You can also tape the edges of your backing fabric to your table. Use painter’s tape or masking tape. This keeps the fabric from moving while you add the batting and quilt top. Taping works best if you pull the fabric just taut—not stretched tight.
Note: F&A’s stable fabrics make smoothing much easier. Their preshrunk process means you won’t get surprise puckers after washing.
Preventing Shifting
You want your quilt layers together to stay put while you sew or quilt. Shifting can cause wrinkles, uneven stitches, or even bunching in the batting. Here are some tried-and-true ways to prevent shifting:
- Tape the edges of your backing fabric to your work surface.
- Use plenty of pins or safety pins to secure the layers. Place pins every 4-6 inches.
- Try basting spray for a quick hold. Lightly spray between the layers to keep batting and fabric together.
- For extra security, use thread basting. Sew large, loose stitches by hand through all layers.
Many quilters also use templates made from acrylic or cardstock to trace and cut fabric pieces. This helps keep everything accurate and reduces bias distortion. When you sew, go slowly and stop often to adjust the fabric. This helps prevent puckers and keeps your seams straight.
If you use F&A fabrics, you will notice how their stability helps prevent shifting. Their fabrics hold their shape well, making it easier to quilt layers together without frustration.
Callout: Take your time with this step. A little patience now saves you from fixing mistakes later!
This tutorial shows you how to attach batting to fabric in a way that keeps your quilt looking neat and feeling soft. With the right batting, quality fabric, and careful layering, you set yourself up for quilting success.
Basting Methods
When you reach the basting stage, you’re almost ready to start quilting. Basting holds your quilt sandwich—fabric, batting, and backing—together so nothing shifts while you sew. You have several options for basting, and each one has its own strengths. Let’s walk through the most popular methods so you can pick the one that fits your project and comfort level.
Pin Basting
Pin basting is a classic method that many quilters trust. You use curved safety pins or straight pins to secure the layers. Here’s how you do it:
- Lay your quilt sandwich flat on a large table or clean floor.
- Smooth out the fabric and batting, starting from the center and working outward.
- Place pins every 4-6 inches, making sure you catch all three layers.
- Use craft foam squares as pin caps to protect your fingers and fabric.
Many quilters, including those who have basted over 40 quilts, find pin basting reliable and efficient. They use large tables, clamps, and even slightly bent long pins for extra security. Foam caps on pins help prevent fabric damage and keep your hands safe. If you have limited floor space or struggle with large quilts, pin basting can make the process much easier. You get a smooth, secure quilt sandwich that’s ready for sewing or machine quilting.
Tip: Pin basting works well for most projects, but if you plan lots of free-motion quilting, you might want to try spray basting for even smoother results.
Spray Adhesive
Spray basting uses a temporary adhesive to hold your layers together. This method is fast and helps you avoid pin marks or thread tails. Here’s a quick tutorial:
- Lay out your backing fabric, batting, and quilt top.
- Lightly spray adhesive between each layer, smoothing as you go.
- Press the basted quilt on both sides to set the adhesive and remove wrinkles.
Let’s look at how different spray adhesives perform:
| Adhesive Spray | Yellowing | Strength Loss | Stiffness Change | Notes |
|---|---|---|---|---|
| Sullivans | Yes | No | Stiffens | Repositionable, non-permanent bond |
| Sulky KK2000 | Less | >30% | Loss then stiff | Bond disappears in 2-5 days |
| 505 Spray & Fix | No | No | Similar to control | Colorless, acid free, archival quality |
Spray basting almost eliminates pleats and puckers, giving you a smooth quilt surface. You save time during sewing because you don’t have to stop and remove pins. Just remember, some adhesives may yellow or lose strength over time, so check the label if you want your quilt to last for years. Many quilters love spray basting for its speed and smooth results, especially when learning how to sew a quilt.
Note: Always use spray adhesive in a well-ventilated area and protect your workspace from overspray.
Fusible Fleece
Fusible fleece is a special type of batting with adhesive on both sides. You use an iron to fuse the batting to your fabric. Here’s how you do it:
- Place the fusible batting between your quilt top and backing.
- Use a hot iron to press and bond the layers together.
- Let the quilt cool before moving it.
Fusible batting gives you a temporary bond. You can peel it off and reattach it if needed, but the bond weakens with handling. If you roll or fold your quilt, you may need to re-iron it to keep the layers together. After you finish sewing and wash your quilt, the adhesive washes out, and the batting and fabric shrink together. Many people find fusible fleece easier to use than traditional batting, especially for bags or small projects. However, if you want strong, lasting adhesion, you may need to re-iron before each sewing session.
Callout: Fusible fleece is great for beginners who want a quick, easy way to hold layers together while learning how to sew a quilt.
Thread Basting
Thread basting is the oldest method, but it still works well today. You use long, loose stitches to hold the layers in place. Here’s a simple tutorial:
- Thread a needle with contrasting thread.
- Sew large stitches (about 2-3 inches long) through all layers, starting from the center.
- Work outward, smoothing the fabric and batting as you go.
- Remove the basting stitches after quilting.
Thread basting takes more time than pin or spray basting, but it’s gentle on your fabric and batting. You don’t have to worry about adhesive residue or pin holes. Many hand quilters prefer this method, especially for delicate fabrics or heirloom projects. If you want to master how to sew a quilt by hand, thread basting gives you full control over your layers.
Tip: Use a bright thread color so you can easily spot and remove the basting stitches later.
Check for Smoothness
No matter which basting method you choose, always check your quilt for smoothness before you start sewing. Here’s what you should do:
- Run your hands over the quilt sandwich to feel for bumps or wrinkles.
- Lift the edges and peek between layers to spot any shifting.
- Press the quilt on both sides to set the adhesive or flatten the layers.
- Make sure the batting stays flat and even, with no bunching.
Spray basting, in particular, helps you achieve a flat, wrinkle-free quilt sandwich. Proper smoothing and pressing can take about 20 minutes per layer, but this step pays off with a professional finish. If you find any loose or shifted fabric, fix it now. Effective basting prevents shifting, puckering, and clumping during quilting. You’ll find that your sewing goes more smoothly, and your finished quilt looks crisp and even.
Note: Taking time to check for smoothness improves the quality of your quilt and makes the rest of the how to sew a quilt process much easier.
With these basting methods, you can confidently move on to the next steps in your quilting journey. Whether you use pins, spray, fusible fleece, or thread, you’ll find a method that fits your style and project. This tutorial gives you the tools to keep your batting and fabric layers secure, so you can focus on the creative part—sewing your quilt!
How to Add Batting to a Quilt
Put Batting in a Quilt
When you want to put batting in a quilt, you need a clear plan. Start by preparing your workspace. Make sure your table is clean and flat. This helps you avoid wrinkles and bumps. Choose the right batting for your project. Cotton, polyester, and blends all work well, but think about the loft and softness you want.
Here’s a simple way to put batting in a quilt:
- Lay your backing fabric right side down. Smooth it out and tape the edges to keep it steady.
- Place the batting on top of the backing. Let the batting rest for a few hours or use a dryer with a damp towel to relax wrinkles.
- Trim the batting so it’s slightly larger than your quilt top.
- Lay your quilt top right side up on the batting. Smooth out any creases with your hands or a ruler.
- Use safety pins, basting spray, or thread basting to secure the layers. Start from the center and work outward to prevent shifting.
Tip: Always check for smoothness before you start quilting. A flat quilt sandwich makes sewing much easier.
If you want to try a different method, you can use a glue stick to baste the batting to the quilt top. Just dab a little glue and press the fabric down. This keeps the batting in place while you sew.
After you put batting in a quilt, trim any extra batting and backing, leaving about 1-2 inches around the edges. This gives you room for adding the backing to the quilt and binding later. Iron the quilt sandwich from both sides to set everything in place.
Join Batting Pieces
Sometimes your batting isn’t big enough for your quilt. Don’t worry! You can join batting pieces and still get a smooth, durable result. Start by cutting the batting edges straight. Overlap the pieces slightly, then use a zigzag stitch on your sewing machine to join them. This keeps the seam flat and strong.
You can also use batting tape. Lay the batting pieces edge to edge and press the tape over the seam. This method works well for all types of batting.
Uniformity matters when you join batting pieces. Precision cutting and careful sewing help your quilt look neat and last longer. Quilting stitches will hold everything together, making your quilt strong and cozy. When you finish, your quilt will resist bunching and stay soft after many washes.
Note: Always check that the joined batting feels even. Uneven seams can show through the quilt top.
When you know how to add batting to a quilt and join batting pieces, you can tackle any project with confidence. Whether you’re putting batting in a quilt for the first time or adding the backing to the quilt, these steps help you get a professional finish every time.
How to Sew a Quilt
Quilting Layers
You have your quilt sandwich ready, and now you want to know how to sew a quilt that looks great and lasts. Start by choosing your quilting pattern. Straight lines, diagonal lines, or gentle curves work well for beginners.
Avoid dense diamond or square patterns at first, since these can cause wrinkling and thread breakage. When you sew, use a stitch length of about 2.5 mm and aim for 10–12 stitches per inch. This range gives you strong seams and helps prevent shifting or puckering.
If you notice wrinkles or shifting while sewing, check your stitch length, needle size, and thread type. Studies show that the right stitch density and pattern reduce common problems like seam slippage and puckering.
Try to keep your stitch spacing between half an inch and one inch, depending on your design. You can use machine quilting for tight, even stitches or hand quilting for a softer look. Some quilters like tufting, which means tying knots every 4 inches to hold the layers and batting together.
Tip: F&A fabrics make quilting easier because they stay flat and resist stretching. Their stable weave helps you avoid shifting and wrinkling as you sew.
When you learn how to sew a quilt, you will see that careful planning and the right tools make a big difference. Always start sewing from the center and work outward. This method keeps the layers smooth and prevents bunching. If you want to try creative designs, use shells, rows, or floral motifs to add interest and keep the batting in place.
Trimming and Binding
After quilting, you need to trim your quilt sandwich. Use a sharp rotary cutter and ruler to square up the edges. Make sure your corners are neat. Precise trimming helps your binding fit perfectly and gives your quilt a professional look.
Binding is the last step in how to sew a quilt. You can use continuous bias binding or French-fold binding for strong, flexible edges. Bias binding works best on curves, while French-fold gives extra durability. Some quilters use glue to hold the binding in place before sewing. Press the binding with an iron to set sharp creases.
You can attach binding by hand with a slip stitch or by machine for a faster finish. Both methods look neat if you take your time. Careful trimming and binding prevent problems like uneven edges or loose seams. When you use F&A fabrics, you get crisp, vibrant edges that make your quilt stand out.
Note: If you want to know how to finish a quilt with a polished look, pay attention to trimming and binding. These steps turn your hard work into a beautiful, lasting quilt.
Now you know how to sew a quilt from start to finish. With practice, you will master sewing, layering, and binding. Enjoy the process and let your creativity shine!
You just learned how to attach batting to fabric step by step. Start with the right materials, layer everything smoothly, baste your quilt, and sew with care. Using quality fabric like F&A gives your project a soft feel and a professional look. Don’t worry if your first quilt isn’t perfect. Every time you practice, you get better and more creative.
Remember: Every quilt you make tells your story. Enjoy the process and have fun!
FAQ
How do you keep batting from shifting while quilting?
You can use pins, basting spray, or thread basting to hold the layers together. Start quilting from the center and work outward. This method helps keep everything flat and smooth.
Can you wash a quilt with batting inside?
Yes, you can wash your quilt. Use cold water and a gentle cycle. Air dry or tumble dry on low. F&A fabrics hold up well and keep their color after washing.
What side of the batting faces the quilt top?
Most batting has no right or wrong side. If your batting feels smoother on one side, place that side against the quilt top. This helps the needle glide through more easily.
Do you need to prewash batting before quilting?
You usually do not need to prewash batting. Most modern batting, including cotton and blends, works best straight from the package. Always check the label for special instructions.
🧵 Tip: Always read the care instructions for both your fabric and batting before starting your project!