Making a quilted name tag gives you a chance to show off your creativity with just a few basic supplies and a small piece of fabric. You can pick your favorite colors, patterns, and even add your own personal touch.
If you want your project to look great and last, try using high-quality fabric from Fanda Fabrics. Learning how to make a quilted name tag is easy, fun, and perfect for both beginners and experienced crafters.
Key Takeaways
Choose high-quality fabrics like those from Fanda Fabrics for durability and a professional look.
Gather essential tools such as a rotary cutter and fabric markers to simplify the sewing process.
Personalize your name tag using embroidery, applique, or fabric markers for a unique touch.
Experiment with different fabrics and colors to create a quilt name tag that reflects your style.
Use fabric scraps or charm packs to make a scrappy quilt guild name tag that is both creative and sustainable.
Materials for Quilt Name Tag
Before you start making your quilt name tag, you need to gather the right materials. Picking quality supplies makes the process smoother and helps your finished tag look professional.
Choosing Fanda Fabrics
You want your quilt name tag to last and look great, so start with premium fabrics. Fanda Fabrics offers several options that work perfectly for this project:
Double-Sided Quilted Fabric: This fabric gives you two patterns in one, so you can choose which side to feature. It’s soft, durable, and easy to work with. You won’t need extra lining, which saves time.
Quilting Collection: If you love variety, try the precut bundles or charm packs. These come in vibrant colors and patterns, making it easy to mix and match for a unique look.
Wide Back Quilting Fabric: This fabric is ideal if you want a seamless back for your tag. It comes in extra-wide sizes, so you can cut multiple tags from one piece.
Tip: High-quality fabric resists fraying and fading, so your quilt name tag stays beautiful even after lots of use.
Here’s a quick comparison to help you see the benefits:
Feature | Fanda Fabrics’ Double-Sided Quilted Fabric | Other Quilting Fabrics |
|---|---|---|
Durability | High durability, resists wear and tear | Varies |
Lightweight | Yes | Varies |
Maintenance | Machine washable | Varies |
Usability for Quilters | Easy to install and maintain | Varies |
Essential Tools
You don’t need a lot of fancy tools to make a quilt name tag. Here’s what you’ll want to have on hand:
Pick a quilt block that matches your style or theme.
Cut the block down to the size you want, like 3″x3″ for a small tag.
Sew the block, add a fabric strip for your name, and use a specialty stitch or appliqué to attach your name.
Personalization Options
You can personalize your quilt name tag in many ways. Try embroidery, applique, or fabric markers to add your name. Use colorful borders from the Quilting Collection for extra flair.
Premium fabrics cost more, but they save you time and give you better results.
Budget fabrics are cheaper, but you might spend more time cutting and prepping.
Precut bundles offer convenience and lots of fabric choices, which can make the higher price worth it.
When you use quality materials and the right tools, your quilt name tag will stand out and last for years.
How to Make a Quilted Name Tag?

Ready to dive into your project? This step-by-step tutorial will walk you through how to make a quilted name tag from start to finish. You’ll find clear instructions for each stage, so you can create a tag that looks professional and feels personal. Let’s get started!
Prepare Fabrics
First, pick your fabrics. You want something sturdy and colorful. Fanda Fabrics’ Double Sided Quilted Fabric works great for this. You get two patterns in one, so you can choose which side you want to show.
If you prefer more variety, grab a charm pack or precut bundle from the Quilting Collection. These fabrics make sewing easier and help your quilt name tag stand out.
Tip: Wash and iron your fabric before you start. This helps prevent shrinking and makes sewing smoother.
Cut and Layer
Now, cut your fabric to the size you want. Most quilt name tags measure about 3″x4″, but you can go bigger or smaller. Use a rotary cutter for clean edges. If you use double-sided quilted fabric, you don’t need extra batting or backing. Just cut one piece and you’re ready to layer.
Here’s a quick cutting guide:
Tag Size | Main Fabric | Backing (if needed) | Batting (optional) |
|---|---|---|---|
Small | 3″x4″ | 3″x4″ | 3″x4″ |
Medium | 4″x6″ | 4″x6″ | 4″x6″ |
Stack your layers in this order:
Backing fabric (if you use it)
Batting (optional)
Main fabric (face up)
If you use Fanda Fabrics’ double-sided quilted fabric, skip the batting and backing. This fabric has everything built in, so you save time and effort.
Add Name Panel
It’s time to personalize your quilt name tag. Cut a small strip of light-colored fabric for your name panel. You can use a piece from the Quilting Collection for a pop of color. Place the panel on the front of your tag, near the bottom or center.
Write your name using a fabric marker, or try embroidery for a classic look. If you like applique, sew your name onto the panel with a zigzag stitch. Secure the panel with pins, then sew around the edges to attach it.
Note: If you want extra flair, add decorative stitches or small fabric shapes from your scrap pile.
Quilt and Finish Edges
Now, quilt your tag. Use straight lines, diagonal patterns, or even free-motion designs. This step adds texture and keeps your layers together. If you use double-sided quilted fabric, you can skip this step or add a few stitches for style.
Finish the edges with bias tape or a simple zigzag stitch. Fold the tape over the edge, pin it in place, and sew all the way around. If you want a clean look, use a matching thread. For a bold border, pick a bright color from the Quilting Collection.
Here’s a quick edge-finishing tutorial:
Cut bias tape to fit all sides.
Fold the tape over the edge.
Pin in place.
Sew with a straight or zigzag stitch.
Add a safety pin, magnet, or ribbon loop to the back so you can wear your quilt name tag. You’ve just completed your project!
Tip: Double-sided quilted fabric from Fanda Fabrics makes this process faster. You don’t need extra layers, and your tag feels sturdy right away.
Now you know how to make a quilted name tag with easy sewing steps. This tutorial gives you everything you need to create a tag that’s both functional and fun. Try different fabrics, colors, and techniques to make your quilt name tag unique.
If you want more ideas, check out the next section for creative ways to personalize your tag.
How to Make a Quilt Name Tag: Personalization
Personalizing your quilted name tag makes it truly yours. You can use embroidery, applique, fabric markers, or creative borders to add flair and make your name stand out. Let’s look at some easy ways to customize your tag.
Embroidery or Applique
Embroidery gives your name tag a classic, handmade look. You can stitch your name by hand or use a machine for neat, clear letters. Applique lets you add shapes, letters, or even small motifs using different fabrics. Embroidered appliques allow you to play with colors and textures, making your tag pop.
Patches focus on clarity and durability, so your name stays visible after many washes. If you want something artistic, try combining embroidery with appliqué for a dynamic effect.
Tip: Use fabrics from Fanda Fabrics’ Quilting Collection for colorful letters or fun shapes. These fabrics hold up well and keep your tag looking fresh.
Popular ways to add names include:
Hand embroidery
Machine embroidery
Iron-on letters
Printable fabric
Foundation paper pieced letters
Traditionally pieced letters
Using Fabric Markers
Fabric markers offer a quick and easy way to write your name. You can use stencils for perfect letters or freehand for a personal touch. Some recommended markers include:
Sharpie Ultra Fine Point
Prismacolor Premier Fine Line
Dritz Fine Line Permanent Fabric Pen
Pentel Gel Roller for Fabric
Pigma Micron
Uchida Fine Point Fabric Marker
Arteza Micro-Line Ink Pens
These markers create crisp lines and last through many washes. Labels made with quality markers can keep their print for up to 50 wash cycles.
Creative Borders
Borders add personality and help your tag stand out. Try mixing different fabrics from the Quilting Collection for a patchwork look. You can also use ribbons, beads, or buttons to match your style. Vary the width of your border strips to create movement and interest.
Here are some border ideas:
Use contrasting fabrics for visual interest
Add embellishments like flowers or buttons
Create layered borders with strips of different widths
Note: Creative borders not only frame your name but also show off your quilting skills. Experiment with colors and textures to make your tag unique.
Scrappy Quilt Guild Name Tag Ideas
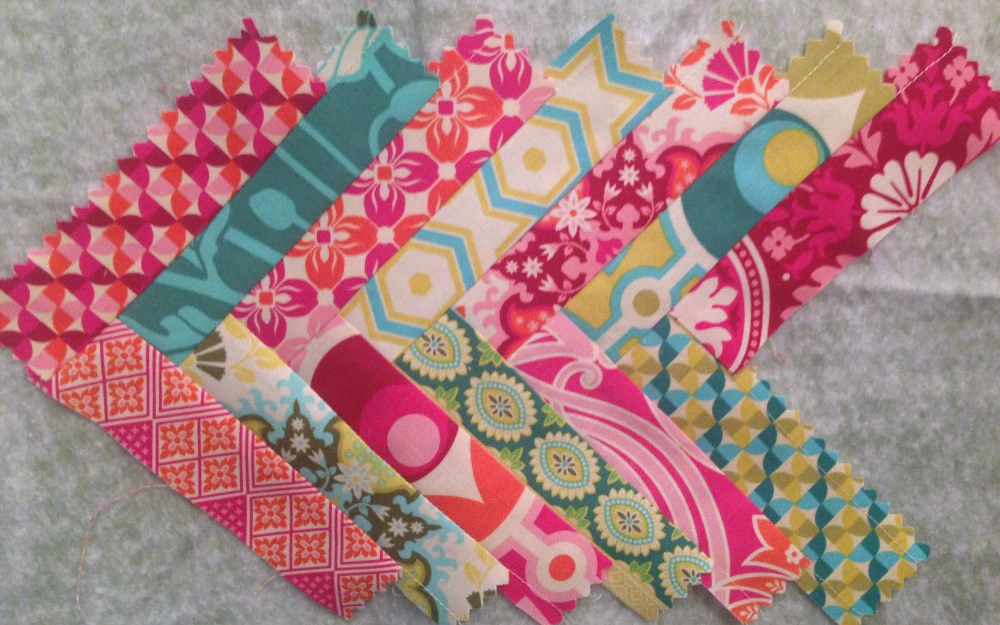
If you want your scrappy quilt guild name tag to stand out, patchwork is the way to go. You can use fabric scraps or charm packs from Fanda Fabrics to create the scrappy patchwork. This method lets you mix colors, patterns, and textures for a one-of-a-kind look.
Patchwork also helps you use up leftover pieces, making your project sustainable and personal.
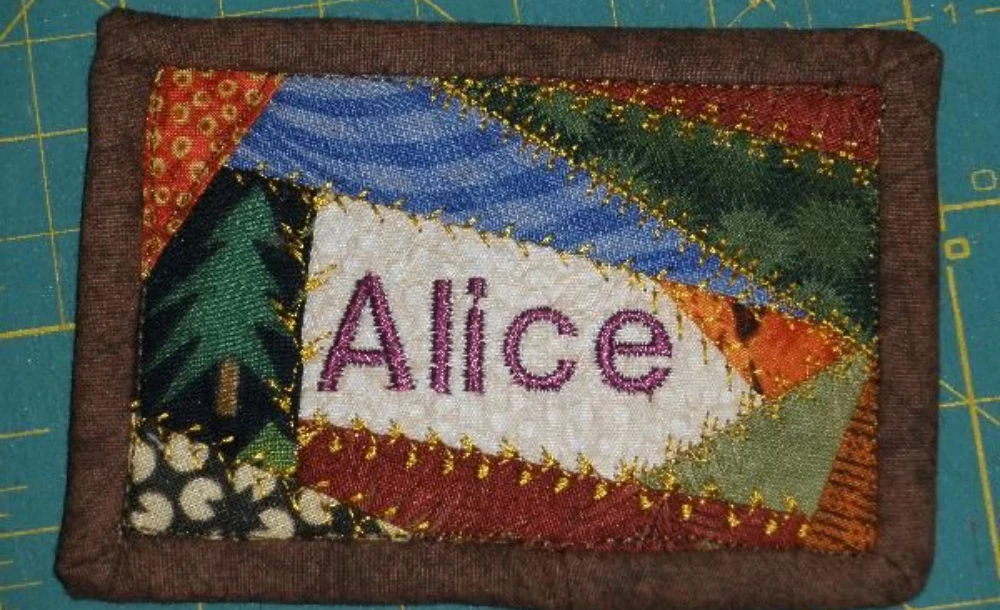
Assemble the Scrappy Quilt Guild Name Tag
Start by gathering your favorite fabric scraps or a charm pack. Lay out the pieces and arrange them in a way that feels fun and balanced. Sew the scraps together to form a small patchwork panel.
You can play with shapes—squares, rectangles, or even triangles. Once you finish the patchwork, trim it to your desired size for the scrappy quilt guild name tag.
Next, attach the name to the scrappy patchwork panel. You can use embroidery, applique, or a fabric marker. This step adds your personal touch and makes your tag easy to spot at guild meetings. Patchwork gives you endless options for creativity, so don’t be afraid to experiment.
Tip: Using scraps from Fanda Fabrics means your scrappy quilt guild name tag will have unique textures and colors. You also help reduce waste by reusing fabric.
Binding and Backing
Now it’s time to finish the edges. Choose a binding fabric that complements your patchwork. Secure stitching is key here. Make sure you sew slowly and close the mitered corners to avoid catch points. Smooth binding joins help your scrappy quilt guild name tag last longer.
If you want extra support, add a thin layer of batting inside the binding.
For the backing, pick a solid or patterned fabric that matches your patchwork style. Lay the backing behind your patchwork panel, then sew around the edges. A binding that covers all raw edges will keep your scrappy quilt guild name tag looking neat and strong.
Common challenges include keeping the folded edge of the binding over the sew line and getting the corners just right. Take your time, and use a stiletto if you need more control.
Attaching Pins or Magnets
You want your scrappy quilt guild name tag to be easy to wear. You can use a safety pin, a brooch pin, or a magnet. Magnets work well if you don’t want to poke holes in your clothes.
To attach magnets, make sure the magnetic side faces away from the stiff backing. Secure the snap with a zig-zag stitch, and use binding clips to hold everything together while you sew.
Patchwork name tags are fun to make and easy to personalize. Try different layouts, colors, and finishing touches. Your scrappy quilt guild name tag will show off your creativity every time you wear it.
Conclusion
You can create a quilted name tag that shows off your style and skills. Try Fanda Fabrics for soft, durable cotton that holds color well and makes your tag look amazing. Mix different fabrics, colors, and techniques to make your tag unique. Here are some tips to keep your tag looking fresh:
Tip | Description |
|---|---|
Secure Label | Place your label on the back before quilting to make it harder to remove. |
Permanent Info | Write your name, town, and year with a permanent pen before adding the label. |
Don’t forget to flaunt your scrappy quilt guild name tag at your next event!
FAQ
How do you attach your quilted name tag to clothing?
You can sew a safety pin or brooch pin to the back. Magnets work well if you want to avoid holes. Some people add a ribbon loop for easy hanging.
Can you wash a quilted name tag?
Yes, you can wash it. Use a gentle cycle and mild detergent. Air dry for best results. Fanda Fabrics’ materials hold up well after washing.
What size should your quilted name tag be?
Most tags measure 3″x4″ or 4″x6″. You can adjust the size to fit your style. Smaller tags work well for events. Larger tags show off more details.
What’s the easiest way to add your name?
Fabric markers make it quick and simple. You can also use iron-on letters or hand embroidery. Choose the method that matches your skill level.
Can you use leftover fabric scraps for your name tag?
Absolutely! Scraps add color and texture. Patchwork designs look unique and help reduce waste. Charm packs from Fanda Fabrics work great for this.