If you want to know how to make patchwork curtains, you just need to gather some fabric scraps, plan your layout, and start sewing. Many beginners love how to make patchwork curtains because this project lets you show off your creativity and personalize your space.
You can practice basic sewing skills, and the result is both useful and decorative. Some people wonder how to make patchwork curtains for a door—just measure, cut, and use French seams for neatness.
If you ask how to make patchwork curtains with the best fabric, try batik for its bright colors, even though it may fade in sunlight. When you learn how to make patchwork curtains, you get a fun and rewarding experience that adds style to any room.
Key Takeaways
Gather basic materials like fabric scraps, thread, and scissors to start your patchwork curtain project.
Measure your windows carefully to ensure a perfect fit for your curtains, adding extra width and length for fullness and hems.
Plan your design by choosing a color palette and arranging fabric pieces before sewing to create a balanced look.
Use sewing techniques like French seams for a polished finish, or opt for fabric glue for a no-sew option.
Finish your curtains with proper hemming and care to keep them looking beautiful and lasting longer.
Materials for Patchwork Curtains
Essential Supplies
You don’t need fancy equipment to start making patchwork curtains. You can gather most supplies from your local craft store or even repurpose items you already have at home. Here’s what you’ll want to have on hand:
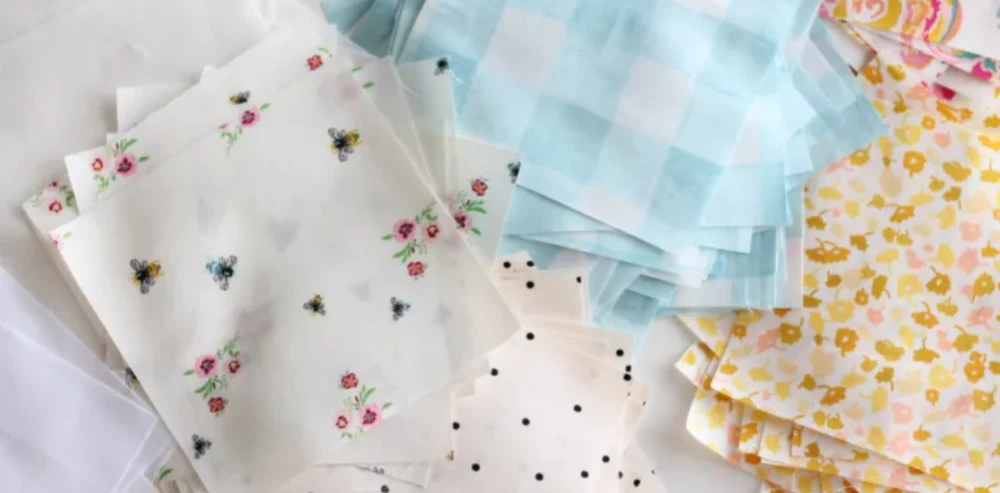
Fabric scraps (cotton, linen, polyester, velvet, silk, brocade, Tyvek)
Thread that matches or contrasts with your fabric
Sewing machine or needle for hand sewing
Scissors or rotary cutter
Measuring tape or ruler
Pins or clips to hold pieces together
Iron and ironing board
You can experiment with different textures and colors. Cotton feels soft and easy to work with. Linen gives your patchwork curtains a breezy look and stands up well to daily use. Tyvek is lightweight and easy to maintain, which helps if you want low-fuss curtains. If you want to compare fabric types, check out the table below:
Fabric Type | Durability | Ease of Use | Characteristics |
|---|---|---|---|
Cotton | Moderate | Easy | Soft, breathable, versatile, available in many colors and patterns. |
Linen | Moderate | Moderate | Textured, breathable, creates an airy atmosphere, may wrinkle easily. |
Polyester | High | Very Easy | Durable, wrinkle-resistant, easy to clean, budget-friendly. |
Velvet | High | Moderate | Luxurious, soft, adds warmth, ideal for formal settings. |
Silk | Moderate | Difficult | Smooth, luxurious, requires careful maintenance. |
Brocade | High | Moderate | Heavy, ornate, excellent insulation and sound absorption. |
You can mix and match these fabrics for a unique patchwork look. Try combining cotton and linen for a casual style, or add velvet for a touch of luxury.
Optional Extras
Want to make your patchwork curtains stand out? You can add a few extras to boost their style and function:
Lining or backing for extra durability and a polished finish
Curtain rods or rings for easy hanging
Embellishments like tassels, trim, or decorative buttons
Ruffles at the bottom or sides for a playful touch
Tip: If you love a whimsical vibe, try adding ruffles or colorful trim. These small details can turn a simple patchwork into a statement piece.
You can personalize your curtains with these extras, making them truly one-of-a-kind. Don’t be afraid to experiment with different textures and decorations. Your patchwork curtains will reflect your creativity and style.
How to Make Patchwork Curtains?
Measuring Windows
Getting the right size for your patchwork curtains starts with careful measuring. You want your curtains to fit well and look great. Here’s a simple way to measure your windows:
Measure the width and length of your window. Write down these numbers.
Add extra length for hemming. Add extra width for fullness. Most people multiply the window width by 1.5 or 2 for a fuller look.
If you already have curtains you like, measure them. Use those dimensions as your guide. If they don’t have a rod pocket, add 3 inches to the top.
For windows without curtains, add at least 6 inches to each side of the width. This helps your patchwork curtains cover the window completely.
Want your curtains to look extra full? Multiply the width by 2.
If you plan to make two panels, divide the total width by 2. This gives you the width for each panel.
Tip: Always double-check your measurements before you start cutting fabric. It saves time and prevents mistakes.
Planning Your Design
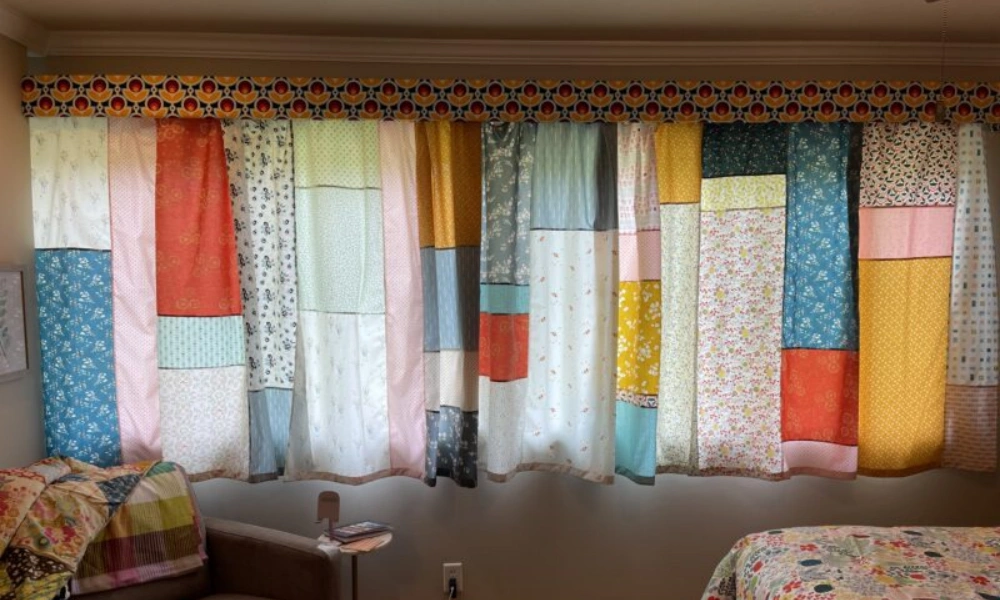
Now comes the fun part—planning your patchwork design. You get to decide how your patchwork curtains will look. Here are some ideas to help you create a balanced and beautiful design:
Pick a color palette. You can go for coordinated colors for a calm, sophisticated look. If you want something playful, mix bold patterns and bright shades.
Use cotton fabrics for most of your patches. Cotton is easy to sew and lasts a long time. Wash and iron your fabric before you start.
Think of your curtain as a blank canvas. Try out traditional layouts like neat rows, or go for an asymmetrical style if you want something unique.
Place lighter and darker colors in a way that feels balanced. This keeps your patchwork curtains from looking too busy.
Mix different textures, like linen and denim, to add depth and interest.
Note: Lay out your fabric pieces on a table or the floor before sewing. Move them around until you find a layout you love.
Cutting Fabric Pieces
Cutting your fabric pieces with care makes your patchwork look neat and professional. Here’s how you can do it:
Mark even sections on your fabric. Use a fabric marker or chalk to make clear lines.
Grab a ruler for precision. This helps you cut straight lines and keeps all your squares or rectangles the same size.
Pin each fold in place. This keeps the fabric from shifting.
Press the folds flat with an iron. This step helps your pieces keep their shape.
You can cut your fabric into squares or rectangles, depending on the look you want. Uniform pieces make sewing easier and give your patchwork curtains a tidy finish.
Arranging Patchwork Layout
Arranging your patchwork pieces is where your creativity shines. You can use different strategies to get the look you want. Here’s a quick guide:
Strategy | Description |
|---|---|
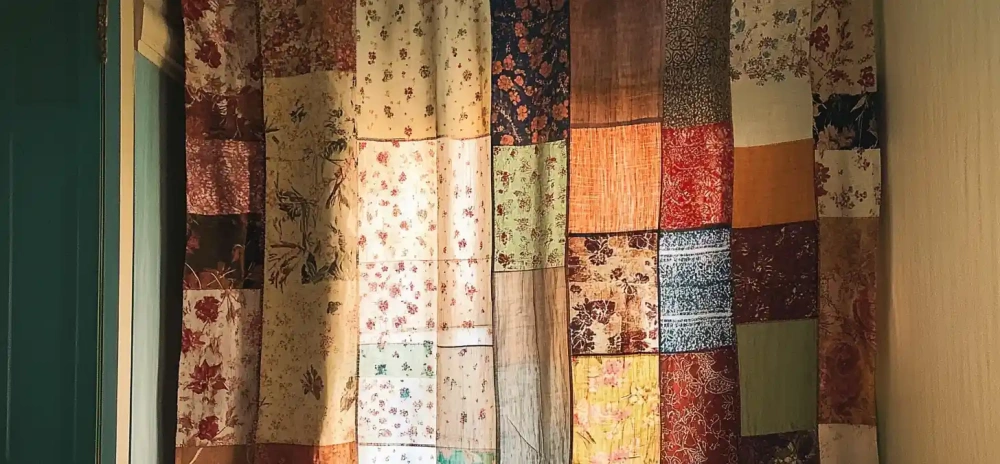
Uniform Color Palette | Choose similar colors to avoid a chaotic look. |
Neutral Fabric Border | Add a neutral border or background for a cohesive finish. |
Organizing Fabric Pieces | Arrange pieces in vertical stripes, squares, or asymmetrical blocks. |
Try laying out your fabric pieces in different ways. You might like neat rows, bold stripes, or a mix of shapes. Using a neutral border can help tie everything together. If you want your patchwork curtains to stand out, play with color and pattern until you find a combination that feels just right.
Remember: There’s no wrong way to arrange your patchwork. Trust your eye and have fun with the process!
Sew Patchwork Curtains
Sewing Techniques
You have a few great options when you sew patchwork curtains. If you want a neat and polished look, try French seams. Start by placing the wrong sides of your fabric together and sewing a straight line. Then, fold the fabric so the right sides face each other and sew again.
This technique hides the raw edges and keeps your patchwork from fraying. French seams work best for lightweight fabrics and give your curtains a clean finish.
If you use heavier fabrics, you might want to try flat-felled seams. These seams add strength and last a long time. For a quick and tidy edge, use a 3-thread narrow overlock. This method trims the fabric and finishes the edge in one step, which saves time and reduces waste.
Tip: Always press your seams flat with an iron. This step helps your patchwork curtains hang smoothly and look professional.
Assembling Panels
Once you finish sewing your patchwork pieces, you can start assembling the panels. Make sure you cut the sides straight so your curtains do not end up uneven. You can add simple borders using coordinating fabrics to give your panels a cohesive look. Borders also help your patchwork stand out.
Follow these steps to assemble your panels:
Cut your patchwork sections to the length you want, including extra for hems and headers.
Sew the sections together, matching patterns if you like.
Hem the bottom edge before you finish the sides.
Lay your panels out and check for straight edges. Iron the seams flat for a crisp appearance.
Adding Rod Pocket or Tabs
You need a way to hang your curtains. The easiest method is to add a rod pocket. Fold the top edge of your panel down about 3 inches. Sew along the bottom edge of this fold to create a pocket for your curtain rod. Do not sew the sides of the pocket shut.
If you prefer tabs, cut strips of fabric and sew them evenly across the top of your panel. Tabs give your patchwork curtains a casual look and make them easy to slide open and closed.
Note: Hem the bottom edge first, then create your rod pocket or attach tabs. This order keeps your curtains looking neat and helps them hang evenly.
DIY Patchwork Curtains: No-Sew Option
Using Fabric Glue or Fusible Tape
You don’t need a sewing machine to create diy patchwork curtains. If you want a quick and easy method, try using fabric glue or fusible tape. These tools help you bond fabric pieces together without any stitches. Here’s how you can do it:
Lay out your fabric squares or rectangles in the pattern you like.
Use a product like Dritz Stitch Witchery. Place the tape between two fabric pieces, then press with a hot iron. The tape melts and creates a strong, permanent bond. This works best for cotton or other fabrics that can handle heat.
If you work with delicate fabrics, grab a bottle of fabric glue such as Dritz Unique Stitch or Dritz Liquid Stitch. Squeeze a thin line along the edge of one piece, press it to the next, and let it dry. The glue dries clear and holds well.
Tip: Always test your glue or tape on a scrap piece first. Some fabrics react differently, so check for any changes in color or texture.
You can finish your diy patchwork curtains by folding the top edge over and gluing it down to make a rod pocket. Slide your curtain rod through, and you’re ready to hang your new creation.
Tips for Improvised Patchwork Curtain
If you love upcycling, you can make an improvised patchwork curtain from old clothes, tablecloths, or leftover fabric. This diy project saves money and helps the planet. You reduce waste and cut down on the need for new materials. Here are some tips to get started:
Pick out a mix of fabrics that look good together. Wash them first for a fresh start.
Cut your pieces to the same size. Use a cardboard template for even squares.
Arrange your layout on the floor or a table. Try different patterns until you find one you like.
Use fabric glue or fusible tape to join the pieces. Press each seam flat as you go.
Add a backing fabric for extra strength. Glue or tape it to the back, folding the edges under for a neat finish.
Fold the top edge over and secure it to make a rod pocket or attach loops for hanging.
Note: Making diy patchwork curtains from repurposed materials keeps fabric out of landfills, saves water and energy, and lowers pollution. Every improvised patchwork curtain you make supports a healthier planet.
You can turn almost anything into diy patchwork curtains. Old shirts, pillowcases, or even scarves work great. This improvised patchwork curtain project lets you get creative and helps you live more sustainably.
Finishing Patchwork Curtains
Hemming and Edges
You want your curtains to last and look neat, so finishing the edges is a must. Fraying can ruin all your hard work. Here’s how you can hem your patchwork curtains for a strong, clean edge:
Hang your curtains and smooth out any creases.
Pin the extra fabric at the bottom to the length you want.
Decide on your hem width—usually 2 to 4 inches works well.
Fold the hem up twice to hide the raw edge, then pin it in place.
Iron the fold to set the crease.
Sew the hem by hand or with a sewing machine. If you don’t sew, use fusible hemming tape and press with an iron.
For the sides and patchwork seams, French seams work great. They hide raw edges and keep your patchwork looking polished. You can also use a hemmer foot for a tidy, narrow hem on the vertical edges.
Skipping pre-washing can lead to shrinking or color bleeding later. Always wash your fabric before you start.
Final Touches and Care
You’ve finished sewing, but a few extra steps will make your curtains look professional and last longer. Try these expert tips:
Press the patchwork panel well and trim any uneven edges.
Finish the bottom hem with a securing stitch at the start and end, then press it flat.
For pleated curtains, neaten the pleats and loosely tie them with a ribbon overnight to help them hold their shape.
Use a Blindstitch or Edgestitch foot for a perfectly straight hem.
When it comes to caring for your patchwork curtains, gentle cleaning is best. Use a mild detergent and a soft cloth for spot cleaning. If you need to wash the whole curtain, check the care label first.
Hand washing or a gentle machine cycle with cold water works for most fabrics. Lay your curtains flat to dry away from direct sunlight to keep colors bright. Store them in a cool, dry place wrapped in cotton, not plastic.
Understanding pattern repeats helps your panels line up and look consistent. Take time to check your layout before sewing.
Check your curtains often for loose threads or small tears. Fix them right away with a matching thread. Wash your hands before handling your patchwork to keep it clean and bright. With these steps, your patchwork curtains will stay beautiful for years.
Conclusion
You did it! Now you can hang your patchwork curtains and enjoy the cozy vibe they bring to your space. Try new fabrics or layouts next time—creativity grows with practice. Want some inspiration? Check out these amazing DIY ideas:
Niki Tsukamoto’s panels with a redwood-inspired palette
Ramie Korean Patchwork Curtain found on Etsy
Lucy Bathurst’s minimalist linen voile cafe curtains
Tamar Barnoon’s curtain with sunlight apertures
Line Sander Johansen’s abstract scrapwork series
Yumiko Sekine’s linen kitchen cloth curtain
Share your own creation online—you might inspire someone else!
FAQ
How do I wash patchwork curtains?
You should wash your patchwork curtains on a gentle cycle with cold water. Use mild detergent. Air dry them flat or hang them up. Avoid direct sunlight to keep the colors bright.
Can I make a patchwork shower curtain?
Yes, you can! Use water-resistant fabrics like polyester or nylon. Add a plastic liner behind your patchwork shower curtain to protect it from moisture. This way, you get style and function in your bathroom.
What size should my patchwork curtain panels be?
Measure your window or door first. Add extra width for fullness and extra length for hems. Most people double the window width for a full look. Divide by two if you want two panels.
Do I need a sewing machine for patchwork curtains?
No, you don’t need one. You can use fabric glue or fusible tape for a no-sew option. This method works well for beginners or anyone without a sewing machine.