You can learn how to make a quilted pillow with no prior sewing experience. You’ll find this project manageable and fun, especially if you start small. Take a look at some common beginner mistakes:
Mistake | Explanation |
|---|---|
Not pre-washing fabric | Fabric can shrink, and colors may bleed after finishing. |
Not starching and pressing | Starching keeps fabric crisp for easier sewing. |
Squaring up blocks incorrectly | Trimming blocks when not needed can cause problems. |
Perfectionism | Trying to make every detail perfect can slow you down. |
A quilted pillow lets you experiment with patchwork, learn precision, and enjoy creative fulfillment. Sewing also brings stress relief and encourages patience. You’ll love seeing your pillow come together!
Key Takeaways
Start with the right materials. Use 100% cotton fabric and cotton quilt batting for durability and ease of handling.
Accurate cutting is crucial. Use a rotary cutter and a square ruler to ensure straight edges and perfect squares.
Press seams as you go. This step keeps your quilted pillow looking professional and helps align blocks accurately.
Choose between an envelope closure or a zipper for your pillow sham. Each method has its benefits for comfort and ease of use.
Practice makes perfect. Don’t worry about mistakes; each project helps you improve your sewing skills.
How to Make a Quilted Pillow?
Materials from Fanda Fabrics
Ready to start your diy quilted pillow? You’ll need a few basic supplies. Fanda Fabrics offers everything you need for a successful project. Here’s a quick checklist to get you started:
Double-sided quilted Fabric: This fabric is perfect for reversible pillows and saves you time since you don’t need extra lining.
Quilting Collection: Choose from vibrant prints, solid colors, and precut bundles. These fabrics are soft, durable, and easy to work with.
Cotton Quilting Fabric: Experts recommend sticking with 100% cotton for your first project. Quilter’s cotton holds its shape, resists fraying, and stands up to repeated washing.
Cotton Quilt Batting: This adds softness and structure to your quilted pillow. Fanda Fabrics offers batting in different thicknesses for your comfort.
Sewing machine or needle and thread: You can sew by hand or use a machine.
Rotary cutter, cutting mat, and square ruler: These tools help you cut straight lines and perfect squares.
Pins or clips: Hold your fabric pieces together while you sew.
Iron: Press your seams for a crisp finish.
Tip: Plain cotton, cotton lawn, and poplin are all beginner-friendly. These fabrics are stable, easy to handle, and forgiving if you make a mistake. Linen blends also work well for simple projects and add texture.
If you want to follow a free pattern, Fanda Fabrics’ Quilting Collection includes charm packs and layer cakes that make cutting and piecing even easier.
Cutting and Preparing Fabric
You’re ready to cut your fabric pieces. Accurate cutting is key to a neat quilted pillow. Let’s break down the steps:
Choose Your Pillow Size
Decide what size you want. Here’s a handy table for standard pillow dimensions:Pillow Size
Unfinished Dimensions
18″ Square Pillow
19″ Square
Standard Sham
20.5″ x 26.5″
Pillowcase
29.5″ x 21″ (each)
Set Up Your Tools
Use a rotary cutter, cutting mat, and square ruler for best results. These tools help you cut straight lines and square corners. Here’s a quick guide:Tool Type
Size/Description
Use Case
Square Ruler
6½”, 9½”, 12½”, 16½”
Squaring corners, cutting patchwork, and making templates for pillow tops and designs.
Rotary Cutter
18mm, 28mm, 45mm, 60mm
Cutting curved pieces, small-scale projects, and multiple layers of fabric for quilting.
Cutting Mat
Essential for protecting surfaces and providing a grid for accurate cutting.
Used in conjunction with rulers and rotary cutters for precise fabric cutting.
Cut Your Fabric
Lay your fabric flat on the cutting mat. Use the ruler to measure and mark your dimensions. Cut slowly with the rotary cutter to keep edges straight. If you’re using Double-Sided Quilted Fabric, you only need one piece for the front and one for the back. For patchwork, cut several squares or rectangles from your chosen fabrics.Prepare Batting and Backing
Cut your cotton quilt batting to match the size of your pillow top. If you want a reversible quilted pillow, use Double Sided Quilted Fabric for both sides. Otherwise, pick a coordinating cotton quilting fabric for the back.Press and Starch
Iron your fabric pieces before sewing. Starching helps keep the fabric crisp and easy to handle. Press seams as you go for a professional look.
Note: Quilting cotton is the best choice for beginners. It’s durable, easy to cut, and holds up well after washing. You’ll find it forgiving and stable, which makes learning how to make a quilted pillow much easier.
You’ve now prepared all your materials and cut your fabric pieces. The next step in this tutorial will guide you through assembling your quilted pillow top.
Quilted Pillow Top
Quilt Sandwich Assembly
You’re ready to build your quilt sandwich—the foundation of every quilted pillow. This step brings together your pillow top, cotton quilt batting, and backing fabric. Here’s a simple way to assemble it:
Lay your quilt top wrong side down on the cotton batting. Make sure the edges line up.
Place the backing fabric underneath, leaving about 3 inches of extra fabric and batting around the quilt top. This extra space helps you avoid running short during sewing.
Smooth out any wrinkles. Start at the center and work outward. Iron your fabric pieces first for a crisp finish.
Use basting spray or pins to hold the layers together. Spray basting makes adjustments easy if you need to reposition anything.
Tip: Always keep extra backing fabric on hand. Running out can cause stress and slow down your project.
Cotton quilt batting adds comfort and durability to your pillow. It’s breathable, resists pilling, and stands up to frequent washing. You’ll notice a soft, cozy feel that lasts, and a slight puckering effect after washing gives your pillow a classic quilted look.
Quilting Techniques
Now comes the fun part—quilting your pillow top! If you’re following a free pattern or making your own design, stick with beginner-friendly techniques:
Try basic patchwork. Cut nine 6″ x 6″ squares and sew them together using a 1/4″ seam allowance.
Use a walking foot on your sewing machine. This helps you sew through all the layers smoothly.
Quilt straight lines or a cross-hatch pattern. Stitch about 1/4″ away from each seam for a neat finish.
You can use cotton or polyester thread. Cotton thread works well for piecing and gives a matte look. Polyester thread is great for quilting and adds a bit of shine.
If you choose Double Sided Quilted Fabric from Fanda Fabrics, you get a reliable base material that keeps its shape. The pre-quilted texture adds depth, and both sides look finished—perfect for reversible pillows. Here’s a quick table of benefits:
Advantage | Description |
|---|---|
Reliable Base Material | Keeps your pillow looking crisp and neat. |
Texture and Depth | Adds dimension, even with simple sewing techniques. |
Finished Look on Both Sides | No need for extra lining—your pillow looks great from every angle. |
This tutorial shows you how to make a quilted pillow with easy steps. You’ll love the creative process and the satisfaction of sewing something beautiful for your home.
Quilted Patchwork Pillow Cover
Piecing and Sewing
You’re about to bring your quilted patchwork pillow cover to life. Start by picking a free pattern or creating your own design. Lay out your fabric squares or rectangles on a flat surface.
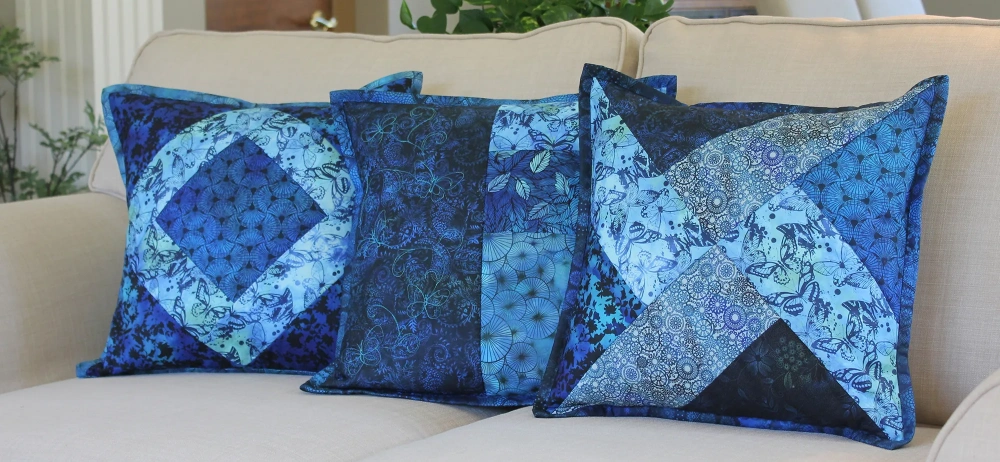
Try arranging them in rows or experiment with popular beginner patterns like the Starburst Pillow, Beautiful Blues Pillow, or Patchwork Pillow. You can mix floral prints, solids, or even neon colors for a bold look.
Fanda Fabrics Quilting Collection gives you plenty of choices. The vibrant mix of patterns and colors mimics traditional patchwork. The 100% cotton fabric feels soft and breathable, making your pillow comfortable and stylish.
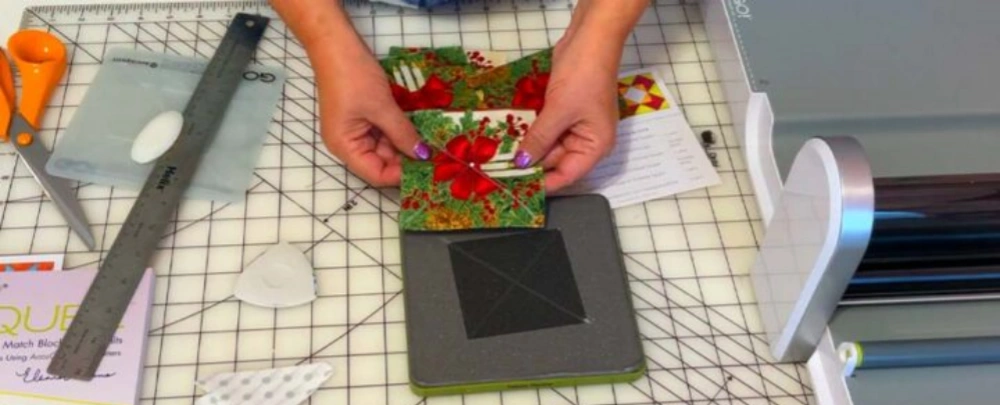
When you begin sewing, use a rotary cutter to snip folded edges for better precision. Place your blocks directly on interfacing if you want to avoid a grid layout.
Follow a tutorial from Elizabeth Hartman for sewing small blocks if you want perfect alignment. Keep your seam allowances consistent to make sure your quilted pillow holds up over time.
Here’s a quick table of sewing techniques for strong seams:
Technique | Description |
|---|---|
French seams | Enclose raw edges for a clean finish on both sides. |
Zig-zag stitches | Prevent fraying, especially on exposed edges. |
Proper seam allowances | Make seams strong, especially at corners and edges. |
Tip: Quilt in the same direction to keep your seams strong and your pillow looking neat.
Pressing Seams
Pressing seams is the secret to a professional-looking quilted patchwork pillow cover. Most quilters press seams to the side, which works well for simple patterns. If you’re working with bulky seams, press them open to reduce thickness. Use a small rubber mallet gently on bulky intersections to flatten them.
Try shortening your stitch length to prevent unraveling when pressing seams open. If you notice bulk when pressing to the side, switch to a thinner bobbin thread. Pressing all seams open can help with accuracy, especially in small blocks.
Note: Press your seams as you go. This step keeps your quilted pillow crisp and helps each block line up perfectly.
With these steps, you’ll see your quilted patchwork pillow cover come together beautifully. The Fanda Fabrics Quilting Collection adds artistry and elegance, making your pillow a standout piece in any room.
Quilted Pillow Sham and Finishing
Envelope Closure or Zipper
You want your quilted pillow sham to be easy to remove and clean. You have two popular options: envelope closure or zipper. Each method has its own perks. Take a look at this quick comparison:
Feature | Envelope Closure | Zipper Closure |
|---|---|---|
Pillow Security | Less secure; pillows may slip out | Very secure; pillows stay in place |
Comfort | May cause discomfort due to flaps and seams | Smooth surface; no flaps for better comfort |
Ease of Use | More complicated to put on and take off | Easier to use; quick to change |
Allergens Protection | Less effective; may allow allergens in | Better protection; fully closed |
Aesthetic Appeal | Tidier appearance with flaps | Smooth look without unsightly flaps |
If you choose a zipper, pick one that’s at least 2 inches shorter than your finished pillow size. This keeps the ends neat and prevents bunching. Envelope back quilted pillow shams look classic and tidy, while zippers offer a modern, sleek finish.
Make the Pillow
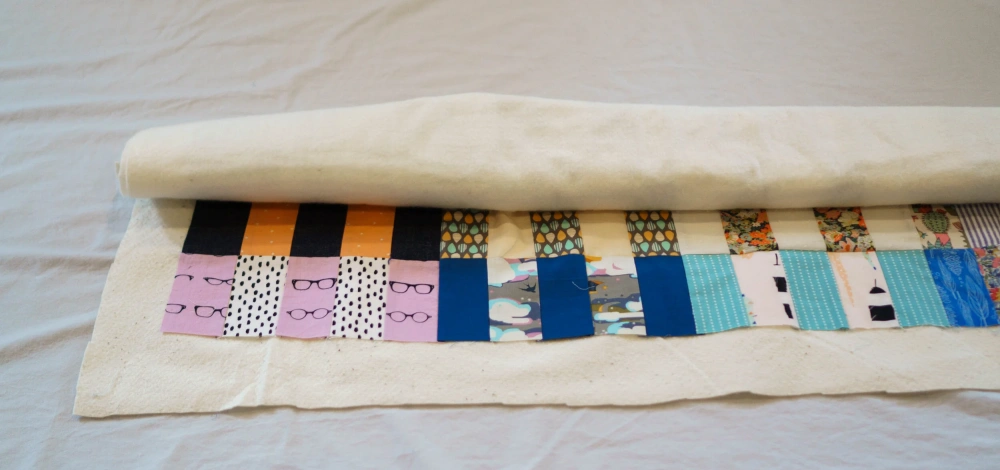
Let’s make the pillow come together! You’ll start by arranging your fabric squares. Lay out 48 squares in 6 rows of 8, mixing colors for a balanced look. Sew the squares into rows, then join the rows to form the sham center. Add border strips if you want a framed effect.
Layer muslin, cotton quilt batting, and your sham top. Quilt the layers using simple straight lines or a crosshatch pattern. Trim the edges so everything lines up. Finish the edges of the back flap sections by turning them in and top-stitching.
Align the back flaps with the sham front, then secure them. Sew around the edges and bind with prepared binding. Insert your pillow and admire your work!
Double-sided quilted Fabric from Fanda Fabrics makes this process easier. You get a finished look on both sides, so you don’t need extra lining. The reversible design means your quilted pillow sham looks great from every angle.
Tip: Select a sturdy backing fabric like cotton twill for durability. Press your seams as you sew. Match colors carefully for a professional finish.
If you run into trouble, check your seam allowances and make sure your layers are smooth before sewing. Don’t worry if your first pillow isn’t perfect. Practice helps you improve every time you make the pillow.
Conclusion
You did it! Take a moment to admire your quilted pillow and celebrate your creativity. If you feel inspired, try making other beginner-friendly projects with Fanda Fabrics:
Simple strip quilts
Table runners
Placemats
Tote bags
Patchwork pillows
Practice helps you build muscle memory and confidence. Even short sessions lead to steady improvement. To keep your pillow looking fresh, use these cleaning tips:
Tool/Supply | Purpose |
|---|---|
Soft Brush | Loosens dirt and dust gently |
Mild Detergent | Cleans without damaging fabric |
Clean Cloths | Blots stains, and excess liquid |
Vacuum with Brush Attachment | Removes surface dust safely |
Handheld Steamer | Refreshes and smooths out wrinkles |
Keep experimenting, keep sewing, and enjoy every new project you create!
FAQ
How do you wash a quilted pillow?
You can wash your quilted pillow in cold water using a gentle cycle. Use mild detergent. Air dry or tumble dry on low. Always check the care label on your fabric for best results.
What size pillow should you make as a beginner?
Start with an 18-inch square pillow. This size is easy to handle and fits most standard pillow inserts. You can try smaller sizes if you want a quick project.
Can you make a quilted pillow without a sewing machine?
Yes! You can sew by hand using a simple running stitch. Hand sewing works well for small pillows. It takes more time, but you get a cozy, handmade feel.
Why does your pillow look lumpy after stuffing?
You might have uneven stuffing or missed pressing your seams. Try spreading the filling evenly. Press your seams flat before assembling. This helps your pillow look smooth and professional.