You can create the perfect quilted pencil case by following this quilted pencil case tutorial. Quilted pencil cases combine practicality with creative flair, making them ideal for your back-to-school needs.
If you’re new to sewing, don’t worry—this quilted pencil case tutorial guides you through every step, so you can sew with confidence. Fanda Fabrics provides high-quality materials to support you throughout the entire process. Let’s dive in and start crafting your own unique pencil case today!
Key Takeaways
Choose high-quality fabrics from Fanda Fabrics for a stylish and durable pencil case. Double-sided quilted Fabric offers a reversible design, adding versatility to your project.
Download and print the free pattern to simplify the cutting process. This pattern includes all necessary shapes and markings for a successful sewing experience.
Take your time when cutting and preparing fabric. Accurate measurements and neat edges lead to a polished final product.
Experiment with patchwork techniques to personalize your pencil case. Mixing colors and patterns allows for a unique design that reflects your style.
Follow beginner tips like pre-washing fabric and using interfacing to avoid common sewing mistakes. These steps ensure a sturdy and professional-looking pouch.
Materials & Pattern
Fabric Choices from Fanda Fabrics
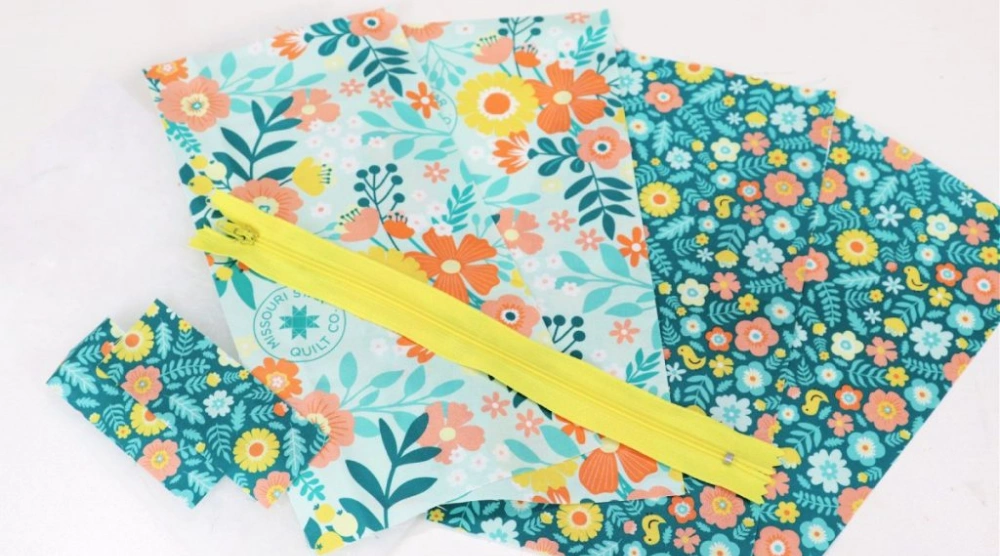
You want your quilted pencil case tutorial to start with the right materials. Let’s talk about fabric. Fanda Fabrics offers a great selection for this project. You can choose Double Sided Quilted Fabric if you want a reversible look. This fabric gives you two patterns in one, so your pencil case stands out.
Quilting Fabric Bundles are perfect for patchwork or mixing colors. These bundles come in handy for small projects and help you use up scraps. The Quilting Collection has vibrant patterns and soft cotton, making your sewing experience smooth.
Here’s a quick list of what you’ll need:
Double-Sided Quilted Fabric or Quilting Fabric Bundles from Fanda Fabrics
Pattern printout (see below for the free pattern)
Zipper (7-9 inches)
Sewing machine or needle and thread
Scissors or rotary cutter
Pins or clips
Ruler or measuring tape
Iron
Did you know? Using quilting fabric bundles for small projects like pencil cases helps reduce waste. You can use leftover scraps, compost them, or donate them to schools for art projects. This makes your sewing more sustainable and supports your community.
Download Free Pattern
You don’t need to search far for the perfect pencil case pattern. You can download the free pattern right from this tutorial. Just print it out at home. The pattern includes all the shapes you need to cut your fabric. Lay the pattern on your chosen fabric, trace, and cut. You’ll find clear markings for zipper placement and seam allowances.
“Free patterns attract new people to quilting by allowing them to try the craft without commitment. This approach not only helps beginners get started but also serves as a marketing tool for designers, enabling them to build a relationship with potential customers.”
Once you have your pattern pieces, you’re ready to sew. The quilted pencil case tutorial will guide you through each step, so you can create a pencil case that fits your style. Grab your supplies and let’s get started!
Cut & Prep Fabric
Select Colors and Patterns
Choosing your fabric is one of the most exciting steps. You get to decide how your pencil case will look and feel. Start by picking colors that make you happy or match your school supplies. If you want a bold look, try mixing bright shades from the Fanda Fabrics Quilting Collection. For a softer vibe, go with pastels or classic prints.
When you select your fabric, pay close attention to the pattern. Some fabrics have stripes, florals, or even fun shapes. Make sure the pattern lines up the way you want it to appear on your finished pencil case.
If you use directional prints, check that the design will face the right way once you sew everything together. This small detail makes your project look polished.
Tip: Lay out your fabric and pattern pieces before cutting. This helps you see how the colors and designs will work together.
Cut Pieces with Pattern
Now it’s time to cut your fabric. Place your printed pattern on the fabric and secure it with pins or clips. Use a ruler to double-check your measurements. Trace around the pattern with a fabric marker or chalk, then cut along the lines with sharp scissors or a rotary cutter.
Here are some common mistakes to watch out for:
Forgetting to use interfacing can make your pencil case flimsy. Add interfacing for extra stability.
Not trimming edges with pinking shears may lead to fraying, especially before you add the zipper.
Ignoring the direction of the pattern can cause your design to look upside down or sideways.
Misaligned stripes or prints can make the finished product look messy.
Take your time with this step. Double-check that each piece matches the pattern and that the edges are neat. Good prep work sets you up for a smooth sewing experience!
Quilt & Assemble
Layer and Quilt
Ready to bring your quilted pencil case tutorial to life? Let’s start with layering and quilting. You’ll need your cut fabric pieces, backing, and wadding. Here’s a simple step-by-step process:
Lay out your outer fabric rectangle, about 12″ x 10″.
Place a slightly larger backing fabric underneath.
Add a piece of wadding between the layers to create a quilt sandwich.
Use spray-basting to hold everything together.
Quilt the layers however you like—straight lines, cross-hatch, or even free-motion if you feel adventurous.
Pro Tip: Double-sided quilted Fabric from Fanda Fabrics makes this step easier. You get a quilted design on both sides, so you don’t need extra lining or backing. Your zippered pencil case can be reversible, giving you two looks in one!
Quilting doesn’t take long. Many sewists finish a pencil case in under 20 minutes once they get the hang of it. If you’re new to sewing, take your time and enjoy the process.
Trim Edges
After quilting, you need to trim your fabric to the right size. This step helps your pencil case look neat and professional. Here’s how you do it:
Trim your quilted rectangle to about 9″ x 11″.
Make sure the quilt top lies flat and the corners are square.
Sew a stay-stitch around the edges to prevent fraying.
Choose your binding—premade bias binding works well, or you can make your own.
For a decorative finish, try rickrack, piping, or ruffles if you want something playful.
Note: Always check that your pattern pieces match up before you sew. A flat quilt top and sharp corners make your zippered pencil case look polished.
If you want a knife-edge, trim the batting smaller than the quilt top, turn under the edges, baste, and finish with a blind stitch. Baste the outer edges of the backing and batting to keep everything in place.
Add a Zipper for a Zippered Pencil Case
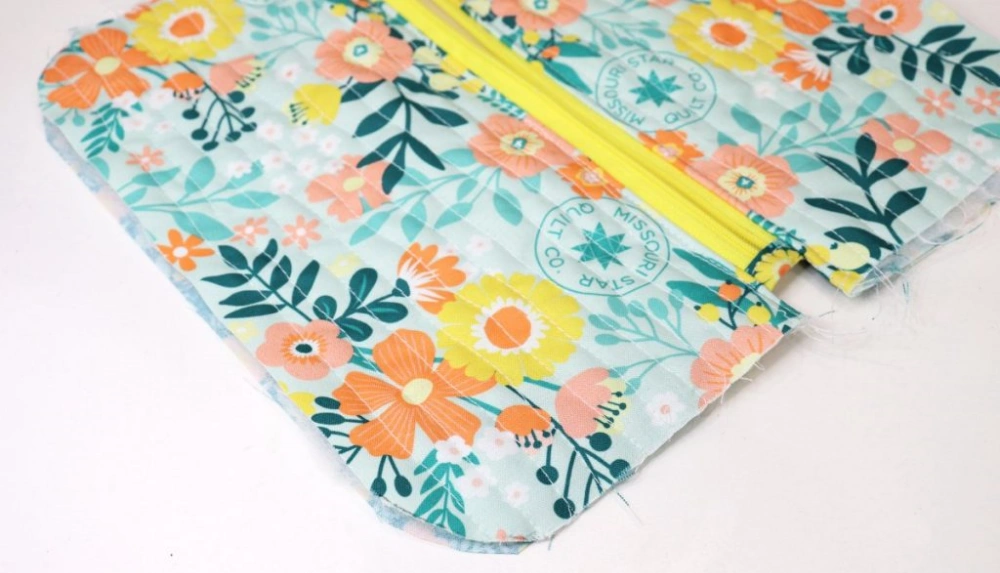
Adding a zipper can feel tricky, but you’ve got this! Follow these steps for a smooth finish:
Lay the exterior fabric wrong side up on top of the zipper and lining.
Pin all edges in place to keep the ends from flapping.
Use a regular sewing foot. Line up the left edge of the foot against the zipper for a small seam allowance.
Sew slowly across the zipper, making sure both sides of the zipper fabric touch to avoid gaps.
After sewing, trim the zipper to match the fabric edge. Use pinking shears to prevent fraying.
If you want a boxy shape, flatten the pouch, line up the zipper with the bottom seam, and trim the corners.
Tip: Use a zipper longer than you need. You can always trim it down after you sew. This makes the process easier and gives you a cleaner finish.
Double Sided Quilted Fabric from Fanda Fabrics shines here. You don’t need extra lining, and the reversible design means your zippered pencil case looks great inside and out. The pattern on both sides adds style, and you save time during assembly.
You’ve now quilted, trimmed, and added a zipper. Your quilted pencil case tutorial is almost complete! Enjoy your new creation and show off your sewing skills.
Sew a Boxy Zippered Pouch
Ready to take your pencil case to the next level? You can sew a boxy zippered pouch that stands out and holds more than just pencils. This style gives your pouch extra room and a professional look. Let’s break down the steps so you can create a sturdy, stylish pouch with ease.
Boxy Shape Steps
You’ll notice that making a boxy zippered pouch is a bit different from sewing a flat pencil case. The boxy shape adds dimension, making your pouch perfect for storing pens, markers, and even small art supplies.
Here’s a simple guide to help you sew a boxy zippered pouch:
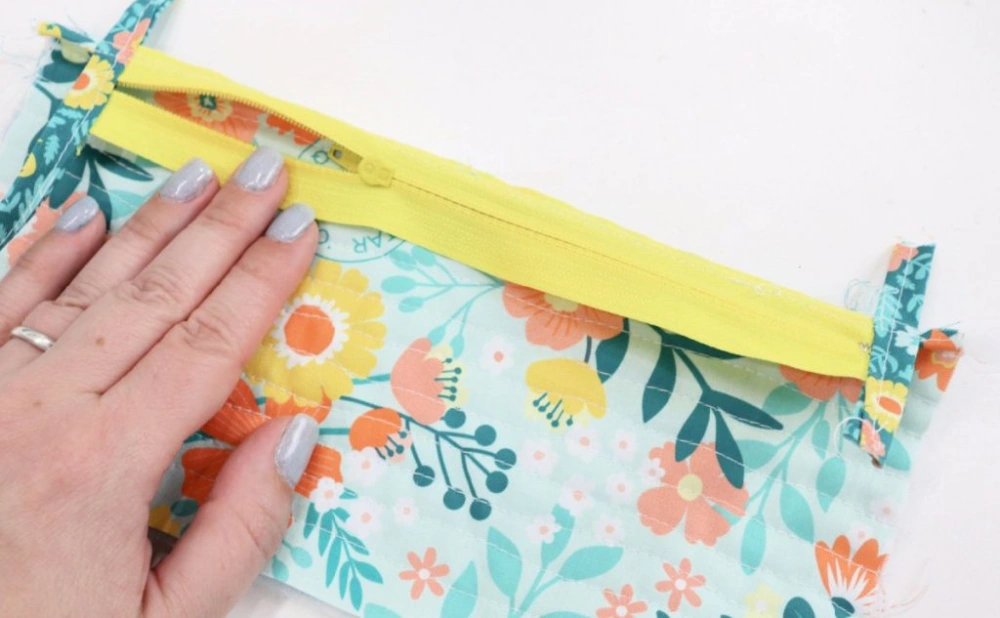
Attach the zipper to the fabric
Place the zipper face down on the right side of your quilted fabric. Pin it in place. Sew along the edge using a regular sewing foot. Flip the fabric and press the seam flat.Sew the bottom seams
Fold the fabric so the right sides face each other. Sew along the bottom edge to create the base of your pouch.Box the corners
Pinch each corner of the pouch so the side and bottom seams line up. Measure about 1 inch from the tip and mark a straight line. Sew across this line to create a flat base. Trim the excess fabric from each corner.Turn the pouch right side out
Gently push the corners out so your pouch takes shape. Press the seams with an iron for a crisp finish.
Here’s a quick comparison between a boxy zippered pouch and a flat pencil case:
Step | Boxy Zippered Pouch | Flat Pencil Case |
|---|---|---|
1 | Attach the zipper to the fabric | Sew the zipper to the fabric |
2 | Sew the bottom seams | Sew the ends |
3 | Box the corners | N/A |
4 | Turn the pouch right side out | Turn the pouch right side out |
Tip: When you box the corners, you give your pouch a roomy interior. This step makes your pouch stand upright and hold more supplies.
You only need basic sewing skills to complete these steps. The boxy shape looks impressive, but is easy to achieve once you follow the process.
Patchwork & Personalization
Want your pouch to reflect your personality? Patchwork is the way to go. You can use Fanda Fabrics Quilting Fabric Bundles to mix and match colors, patterns, and textures. These bundles make it easy to create a coordinated design without spending time picking individual fabrics.
Here’s why Quilting Fabric Bundles work so well for patchwork pouches:
Benefit | Description |
|---|---|
Variety and Coordination | Bundles provide a cohesive set of patterns and colors, making it easier to create coordinated designs. |
Flexibility | They allow for mixing and matching different pieces, suitable for various projects. |
Convenience | Bundles save time by eliminating the need to select and cut fabrics individually, enabling quick project starts. |
You can try these popular patchwork techniques for your pouch:
Sew together fabric scraps to form the body of your pouch.
Use interfacing to add structure and durability.
Quilt the layers with straight lines for a classic look.
Trace and draft templates for appliqué pieces if you want to add shapes or letters.
Cut small appliqué shapes with care for neat edges.
Add decorative quilting to make your pouch stand out.
Note: Patchwork lets you use leftover fabric scraps, making your pouch eco-friendly and unique. You can personalize your pouch with initials, fun shapes, or even themed prints.
If you want a shark pencil case or a pouch with bold stripes, patchwork gives you endless options. You can combine different textures and colors for a one-of-a-kind look. Fanda Fabrics Quilting Fabric Bundles help you start your project quickly and keep your pouch coordinated.
You now have the steps and inspiration to sew a boxy zippered pouch that’s both practical and creative. Try out patchwork, add your favorite colors, and enjoy your new pouch every day!
Tips & Troubleshooting
Beginner Tips
Starting your first quilted pencil case feels exciting, but you might worry about making mistakes. You can avoid the most common beginner errors with a few simple habits. Here are three top tips to help you get a neat, sturdy pouch every time:
Pre-wash your fabric before you sew. This step prevents shrinking and color bleeding after you finish your pouch.
Starch and press your fabric before you start. Crisp fabric helps you cut and piece accurately, so your pouch keeps its shape.
Square up your blocks before you assemble them. Uniform blocks make your pouch look professional and help everything line up.
Tip: Take your time with each step. Rushing leads to uneven seams and wonky corners. Enjoy the process and watch your pouch come together.
Common Issues
You might run into a few challenges while you sew your pouch. Don’t worry—most problems have quick fixes. Here’s a table with frequent issues and solutions from experienced sewists:
Issue | Solution |
|---|---|
Wavy Seams | Adjust presser foot pressure, use a walking foot, employ tissue paper, avoid stretching fabric, and steam the seams. |
Fabric Pulling Down Into Throatplate | Use the correct needle, place tissue paper beneath the fabric, and start sewing further down the seam. |
Tunneling | Increase top thread tension, decrease bobbin tension, and apply interfacing. |
Bobbin Threads Breaking | Use stretch thread, wind the bobbin by hand, and pull the thread tails through the machine before sewing. |
If you notice uneven seams on your pouch, you can fix them with these steps:
Re-cut blocks that are too large or small. Press the edges flat with an iron.
Keep your seam allowances consistent. Set your sewing machine tension correctly to prevent puckering.
Align trimmed blocks before you sew. Pin them securely so they don’t shift.
Use sharp rotary cutters and accurate rulers for precise cutting.
Adjust your machine’s tension settings before you start. Test on scrap fabric first.
Note: Practice makes perfect. Each pouch you sew will look better than the last. You’ll build skills and confidence with every project.
Conclusion
You did it! Show off your quilted pencil case and share your creative twists with friends or online. Many readers say this tutorial helped them learn new skills and inspired requests for more projects. If you want to keep sewing, try these Fanda Fabrics favorites:
Quilting Fabric Bundles for easy patchwork
Premium Quality Cotton Fabrics for soft, durable pieces
Wide Back Quilting Fabric for bigger quilts
Drop your questions or feedback in the comments. You can also tag your photos on social media. I love seeing what you make!
FAQ
How do I print the free pattern at the right size?
You should set your printer to “actual size” or “100% scale.” Check the test square on the pattern after printing. If it matches the measurement, you’re good to go!
Can I sew this pencil case by hand?
Yes, you can sew the pencil case by hand. Use small, tight stitches for strength. A backstitch works best for seams. Hand sewing takes longer, but you’ll get a sturdy pouch.
What type of zipper should I use?
A nylon coil zipper works well. Choose one that’s 7 to 9 inches long. You can trim a longer zipper if needed. Avoid metal zippers for beginners—they’re harder to sew.
How do I keep my fabric from fraying?
You can use pinking shears to trim the edges. Zigzag stitch along raw edges helps too. If you use Double Sided Quilted Fabric, you won’t need extra lining, which reduces fraying.
Can I wash my quilted pencil case?
Yes, you can wash your pencil case. Use cold water and a gentle cycle. Air dry for best results. If you use Fanda Fabrics, the colors stay bright and the fabric stays soft.