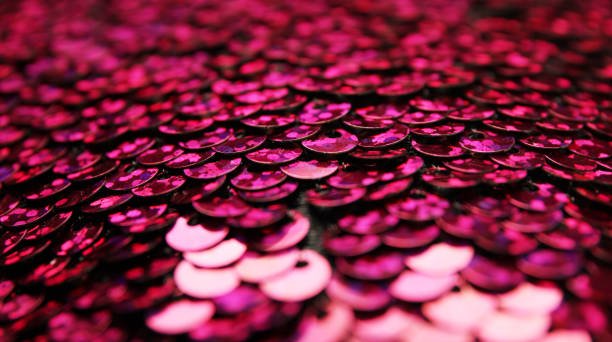
Who doesn’t love a little sparkle? Sequins can transform ordinary fabric into something extraordinary, adding dazzling flair to clothing, home decor, and craft projects. But if you’ve ever wondered how to stick sequins on fabric so they stay put and look professional, you’re in the right place. We’re here to demystify the process, sharing our top tips and techniques to ensure your sequin creations shine for years to come. Get ready to add some serious sparkle to your next DIY!
When it comes to attaching these tiny, shimmering discs, we have several reliable methods at our disposal. The best choice often depends on the type of fabric, the desired effect, and the durability required for the finished product. Let’s explore the primary ways we can attach sequins securely.
The Classic Stitch: Sewing Sequins for Lasting Brilliance
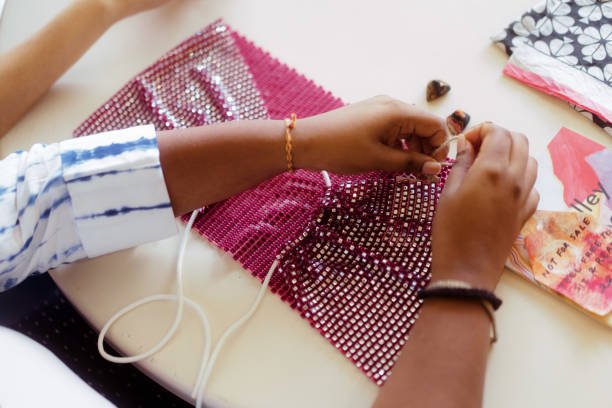
Sewing is arguably the most secure and traditional method for attaching sequins. It offers superior durability, especially for garments that will be worn and washed frequently. For any project where longevity is key, we always recommend hand-sewing individual sequins for the best results.
When We Choose Sewing for Sequin Attachment:
- Garments: Dresses, tops, elaborate costumes, or anything that will be worn and needs to withstand movement.
- Items Requiring Frequent Washing: If the fabric needs to be laundered often, sewing offers the most robust attachment.
- Achieving Intricate Patterns or Overlapping Effects: Hand-sewing allows for precise placement and creating scale-like or dense sequin coverage.
- High-Quality Finishes: For a truly professional and durable embellishment, sewing is our go-to method.
Tools We’ll Need for Hand-Sewing Sequins:
- Sequins: Loose sequins with a central hole. These are typically flat or cupped.
- Needle: A fine beading needle (size 9 or 10) or a sharp, small-eyed hand-sewing needle. This allows us to pass through the tiny sequin hole easily.
- Thread: Strong polyester or nylon thread that matches the sequin or fabric color. Avoid cotton thread, as it can be prone to breaking over time.
- Thimble (optional but recommended): To protect your finger, especially when working on dense fabrics or for long periods.
- Fabric Marking Tool (optional): A fabric pencil or chalk can help us plan out our design for precise sequin placement.
Our Step-by-Step Guide to Hand-Sewing Sequins:
- Prepare Your Fabric: Always start with a clean, ironed, and wrinkle-free fabric surface. If working with delicate or stretchy fabrics, consider using a temporary stabilizer underneath to prevent puckering.
- Thread Your Needle: Cut a comfortable length of thread (around 18-24 inches to avoid tangles) and knot one end securely. We often double the thread for extra strength.
- Position Your First Sequin: Bring your needle up from the back of the fabric at the desired placement point. Pull the thread through until the knot is hidden on the back.
- Place the Sequin: Slide a sequin onto the needle, letting it rest flat against the fabric.
- Secure the Sequin (Two Common Methods): The Single Sequin Stitch, commonly used for individual placement, involves bringing the needle down beside the sequin hole (around 1/16th of an inch away) and pulling the thread to the fabric’s back, securing the sequin with a small stitch. Repeating this 1 – 2 times adds more stability. For a scale-like effect, the Overlapping Sequin Stitch is ideal. After threading the needle through the sequin hole, insert it under where the next sequin’s edge will be, creating an overlapping, shimmering surface that conceals the stitches.
- Continue Attaching: Repeat the process, spacing your sequins as desired. For a dense, “full coverage” look, position them very close together; for a scattered, delicate effect, leave more space.
- Knotting Off: When you’ve attached a section of sequins or run out of thread, make a small, secure knot on the back of the fabric, close to a previous stitch. We usually make a double knot for reliability.
Tips for Sewing Success:
- Short Stitches: Keep your stitches small and neat to minimize visible thread and ensure the sequin lies flat.
- Consistent Tension: Maintain even tension as you sew to prevent puckering.
- Practice Makes Perfect: If you’re new to sequin sewing, try a few on a scrap piece of fabric to get a feel for the technique.
The Speedy Solution: Using Fabric Glue for Sequins
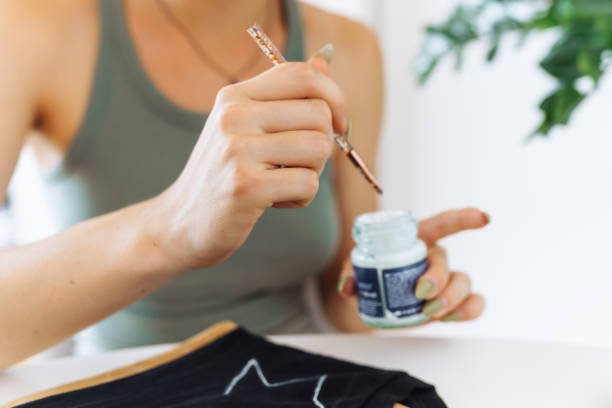
Fabric glue offers a quick and easy way to attach sequins, making it ideal for less permanent projects, costume accents, or when intricate hand-sewing isn’t feasible. It’s a great option when we need to cover a large area quickly or work with materials difficult to sew.
When We Choose Fabric Glue for Sequins:
- Costumes or Single-Use Events: Perfect for temporary embellishments that don’t need to withstand extensive wear or washing.
- Craft Projects: Embellishing cards, scrapbooks, non-wearable home decor items, or children’s crafts (with supervision).
- Large Area Coverage: When we need to add many sequins quickly, gluing can be a time-saver.
- Fabrics Difficult to Sew Through: Some materials, like stiff felt or certain non-wovens, take glue better than a needle and thread.
Tools We’ll Need for Gluing Sequins to Fabric:
Wax Paper or Parchment Paper: To protect your work surface from glue seepage.
Sequins: Any type of sequin will work, but flat-backed sequins can sometimes be easier to glue as they have a larger surface area for adhesion.
Fabric Glue: Look for a flexible, permanent fabric glue that dries clear. Popular and reliable choices we use include Fabri-Tac, Aleene’s Fabric Fusion, or E6000. Ensure it’s designed for fabric.
Toothpicks, Cotton Swabs, or Fine-Tip Applicator: For precise glue application, to prevent excess glue.
The Heat-Activated Option: Iron-On Sequins & Patches

While not traditional loose sequins, iron-on sequin patches or embellishments offer a convenient and relatively quick way to add a sequined design without individual attachment. These are pre-made motifs or appliques with a heat-activated adhesive backing.
When We Choose Iron-On Sequins:
- Adding a Specific Sequin Design or Motif: When we want a pre-designed shape like a star, heart, or letter.
- Quick Embellishment: Ideal for fast personalization of items like denim jackets, backpacks, or t-shirts.
- When Sewing or Gluing Individuals is Too Time-Consuming: For those who want sparkle without the detailed work.
Tools We’ll Need for Iron-On Sequins:
Ironing Board: A firm, heat-resistant surface.
Iron-on Sequin Patch/Motif: Ensure it’s explicitly designed for iron-on application.
Iron: Set to the appropriate temperature for your fabric and the patch. Ensure the steam setting is off.
Pressing Cloth (optional but recommended): A thin piece of cotton fabric (like a clean pillowcase) to protect the patch and fabric from direct heat.
How We Apply Iron-On Sequins:
- Preheat Iron: Set your iron to the recommended temperature for your fabric and the specific patch (check the patch’s instructions). Turn off the steam setting.
- Position Patch: Place the sequin patch on your fabric exactly where you want it.
- Apply Heat: Place a pressing cloth over the patch. Press firmly with the hot iron for the specified time (usually 20-30 seconds), applying even pressure. Do not move the iron around as you press; lift and re-position if needed.
- Flip and Repeat: Turn the garment inside out and iron the back of the patch for another 10-15 seconds to ensure strong adhesion.
- Cool Down: Allow the patch to cool completely before handling or moving the fabric. This helps the adhesive bond properly.
Pros and Cons of Iron-On Sequins:
| Pros of Iron-On Sequins | Cons of Iron-On Sequins |
|---|---|
| Very quick and easy to apply | Limited to pre-designed patches, less customizable |
| No sewing or individual gluing involved | May not withstand heavy washing/drying as well as sewn |
| Creates a bold, defined design instantly | Adhesion can sometimes fail over time or with wear |
| Good for quick personalization and repairs | Not suitable for delicate fabrics that can’t withstand high heat |
Tips for Working with Various Fabrics When Sticking Sequins
The fabric you choose significantly impacts how sequins adhere and the overall success of your project. We always consider the fabric’s weight, stretch, and delicate nature.
Heavy Fabrics (Denim, Canvas, Velvet): These durable fabrics can handle heavier sequins and generally accommodate both sewing and gluing well. For velvet, press from the back to avoid crushing the pile.
Cotton & Linen: These natural fibers are generally easy to work with for both sewing and gluing. Their stable weave provides good support for stitches and adhesive.
Synthetics (Polyester, Nylon, Acrylic): Good choices for sequins. Be careful with heat if ironing or using hot glue, as synthetics can melt or scorch easily.
Stretch Fabrics (Jersey, Spandex, Lycra):
Sewing: Use a ballpoint or stretch needle to avoid snagging fibers. Consider using a slight zigzag stitch (0.5mm width, 2.0-2.5mm length) to allow the stitches to stretch with the fabric. A lightweight, temporary stabilizer can also prevent puckering.
Gluing: Ensure your chosen glue is flexible once dry. A stiff glue will crack and peel off as the fabric stretches.
Delicate Fabrics (Silk, Chiffon, Organza, Lace):
Sewing: Use a very fine needle (e.g., size 9 or 10) and fine thread. We highly recommend backing these fabrics with a sheer, lightweight, water-soluble, or tear-away stabilizer to prevent puckering, stretching, or tearing.
Gluing: Use minimal glue and test extensively on a hidden area first. Even small amounts of glue can be visible or stiffen these lightweight materials.
Troubleshooting Common Sequin Sticking Issues
Even with the best of intentions, we sometimes have challenges figuring out how to attach sequins to fabric. Don’t worry, these issues are common, and we have solutions. If sequins fall off during sewing, it’s usually due to a loose knot or insufficient stitching; we recommend using double knots and at least two small, firm stitches per sequin.
For glued sequins to fall off, make sure to use a permanent, flexible fabric glue and apply a generous amount (but not too much!) to the back of the sequin; always test it on a scrap of fabric first. If the glue seeps through, it means too much adhesive was used or the fabric is too fragile; try using a smaller dot or consider sewing. Puckering of fabric around sewn sequins is usually caused by too much tension; iron with even, gentle pressure or use a stabilizer.
Finally, melting or warping of sequins is a sign of too much heat; never iron sequins directly, always use an ironing cloth and iron on a low heat from the wrong side of the fabric. By addressing these common issues, we can ensure your sequin creations stay beautiful and durable.
Conclusion
From dazzling costumes to subtle embellishments, knowing how to stick sequins on fabric truly opens up a world of creative possibilities. We’ve explored the reliable techniques of hand-sewing for ultimate durability and using fabric glue for quicker projects, alongside essential tips for working with various fabric types and caring for your sparkling creations. While challenges like sequins falling off or fabric puckering can arise, we’ve shared our best troubleshooting advice to help you overcome them. We hope this comprehensive guide has given you the confidence and knowledge to embrace the sparkle and transform your fabric into a shimmering masterpiece. Happy sequining, and may your projects shine brightly!