Welcome! If you love crafting or want to try something new, you’re in the right place. This tutorial shows you exactly how to quilt pot holders, even if you’re just starting.
You’ll find that making a potholder is both fun and practical. Grab your favorite fabrics from Fanda Fabrics and get ready to make something you’ll use every day. Let’s sew together and see what you can create!
Key Takeaways
Choose high-quality fabric like Fanda Fabrics’ Double Sided Quilted Fabric for durability and style. This fabric is reversible and easy to care for.
Use natural cotton or wool batting for heat resistance. Avoid polyester to ensure safety while handling hot items.
Follow a simple step-by-step process for cutting, layering, and quilting. Start with a 7” or 8” square for your potholder.
Practice binding techniques for a professional finish. Mitered corners and double-fold binding enhance the look and durability of your potholder.
Wash your potholders regularly to keep them clean. Use a gentle cycle and air dry to maintain their quality.
Materials for Quilted Potholders
Choosing Fabric from Fanda Fabrics
When you start a new potholder project, fabric choice matters. You want something that looks great and withstands heat. Fanda Fabrics offers a wide range of options, but their Double-Sided Quilted Fabric stands out.
This fabric gives you two patterns in one, so you can flip your potholder for a fresh look. It grips well, resists wear, and feels light in your hand. Take a look at how it compares:
Feature | Fanda Fabrics’ Double-Sided Quilted Fabric | Other Brands |
|---|---|---|
Grip | Excellent grip—quilt blocks won’t slide off | Varies |
Durability | Durable and resists wear | Often less durable |
Design | Reversible design, more style options | Typically one-sided |
Weight | Lightweight, hangs flat | Heavier options |
Maintenance | Machine washable, easy care | May need special care |
You can also explore Quilting Fabric Bundles for more color and pattern choices. Solid color quilt fabric works well for simple, classic designs.
Selecting Batting and Insulation
The right batting keeps your hands safe from heat. Cotton, wool, and specialty batting are the most common choices for quilted pot holders. Natural cotton or wool fabrics work best.
Avoid polyester, since it can melt. For extra protection, try using three layers of cotton batting. You can also add a layer of Insul-Brite or Thermalam for even more heat resistance.
Cotton batting and towel material work best for insulation, and adding Insul-Brite can enhance protection. Insul-Brite keeps fingers 5 to 10 degrees cooler, providing extra seconds of carrying time.
Fanda Fabrics’ Cotton Quilt Batting is soft, durable, and perfect for this project.
Essential Tools for Potholder Projects
You don’t need a lot of fancy equipment, but a few basics make the job easier. Here’s a quick list of materials needed for your potholder:
100% cotton fabric (choose from Fanda Fabrics’ collections)
Cotton batting or insulated batting like Insul-Brite
Thread (cotton thread is best for heat resistance)
Bias tape for binding
Scissors or rotary cutter
Pins or sewing clips
Sewing machine
Iron and ironing board
Cotton thread holds up well under heat and stress, making it the safest choice for your project. With these tools and materials, you’re ready to create a potholder that’s both beautiful and practical.
How to Quilt Pot Holders: Step-by-Step
Ready to dive in? Here’s an easy-to-follow pattern for how to quilt pot holders. You’ll find this process simple, even if you’re new to sewing. Let’s break it down step by step so you can create beautiful quilted potholders with confidence.
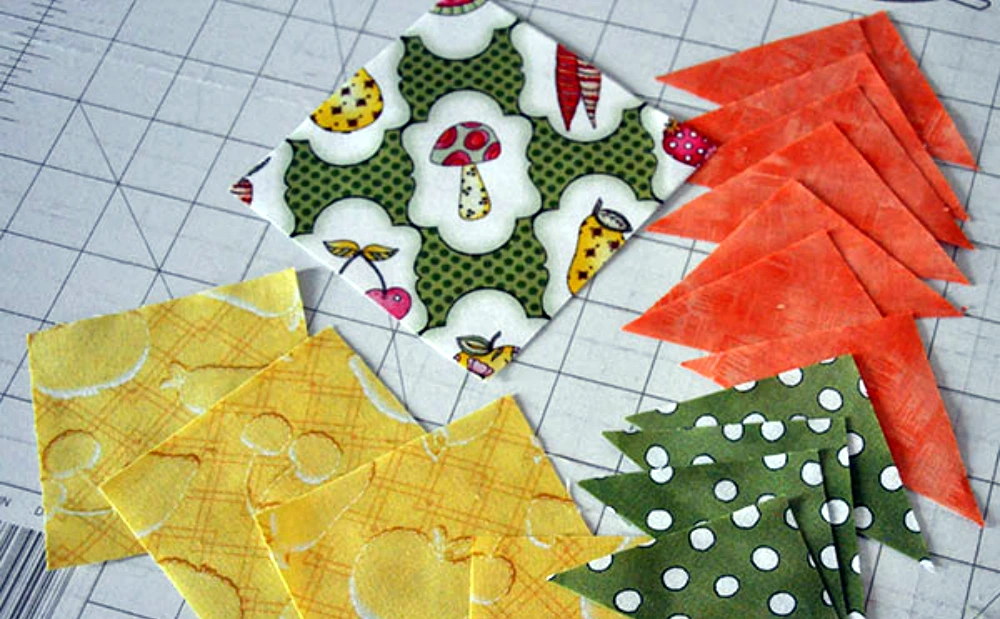
Cutting Fabric and Batting
Start by deciding the size of your quilted pot holder. Most people like a 7” or 8” square, but you can go bigger if you want.
Cut two squares of fabric for the front and back. If you use Fanda Fabrics’ Double-Sided Quilted Fabric, you only need one square since it’s reversible. This fabric saves you time and gives your potholder a professional look.
Cut your batting to match the size of your fabric. For extra heat protection, cut two layers of cotton batting or add a layer of insulated batting.
If you want a hanging loop, cut a strip of fabric about 1” x 5”.
Tip: Always use preshrunk batting. This helps prevent shrinkage and bunching after you wash your quilted potholders.
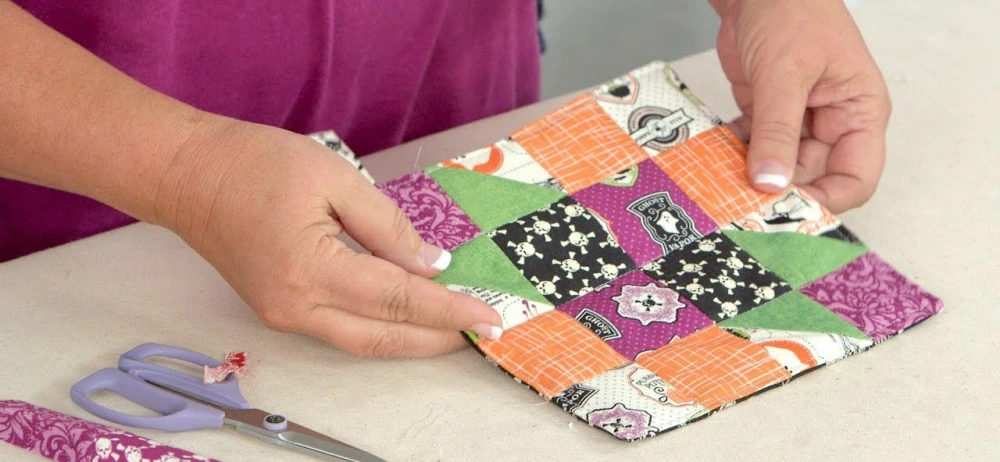
Layering and Pinning
Lay your backing fabric face down.
Place the batting on top, then add your top fabric face up.
If you’re using Double Sided Quilted Fabric, just layer it with the batting—no need for extra fabric.
Smooth out all layers so there are no wrinkles.
To keep everything in place while you sew, use these pinning techniques:
Use basting pins every 2 inches in a grid pattern. This stops the layers from shifting.
Place pins parallel to the edge when you add binding. Make sure the pin goes through all layers, with the head pointed to the right for easy removal.
For corners, use 3-4 pins per corner, placing them perpendicular to the corner. This keeps the binding secure on both sides.
Note: Beginners sometimes feel overwhelmed by all the layers. Take your time and double-check that everything lines up before you start quilting.
Quilting the Layers
Mark your quilting lines with a fabric marker or chalk. Straight lines or a simple grid work well for beginners.
Sew along your marked lines, starting from the center and working outward. This helps keep the layers smooth.
If you want to try something new, use the “quilt as you go” method. This lets you quilt each block individually, which is easier to handle than a big, bulky project. It’s perfect if you have a small sewing machine or want to avoid wrestling with thick layers.
Some beginners worry about mastering quilting techniques like free motion quilting. Don’t stress! Straight lines look great and are easy to sew. Focus on keeping your stitches even.
Tip: If you use Fanda Fabrics’ Double Sided Quilted Fabric, you can skip some steps. The fabric’s built-in quilting means you only need to sew a few lines to hold everything together.
Adding Binding and Loop
Trim the edges of your quilted pot holder so they’re even.
Fold your binding in half lengthwise and press it with an iron.
Open the binding and align the raw edge with the edge of your potholder. Pin it in place, using pins parallel to the edge for best results.
Sew the binding to the front, then fold it over to the back and stitch it down. For corners, use extra pins to keep everything neat.
To add a hanging loop, fold your fabric strip in half, press it, and tuck the ends under the binding at one corner. Sew it in place as you finish the binding.
Many beginners find binding tricky at first. Don’t worry if it’s not perfect. Each time you make a quilted potholder, you’ll get better at it.
You’ve just finished your first quilted potholder! This tutorial shows you how to quilt pot holders in a way that’s simple and fun. If you want to try more designs, experiment with different fabrics from Fanda Fabrics. You can use this same process for any easy-to-follow pattern you find.
Remember, the most common challenges for beginners include choosing the right batting, learning binding, and feeling confident about material choices. Take it slow, and don’t be afraid to ask for help or try new techniques.
Design Ideas for Quilted Pot Holder
Using Quilting Fabric Bundles
You can make your quilted potholders stand out by using Fanda Fabrics’ quilting fabric bundles. These bundles give you a mix of colors and patterns that work well together. You don’t have to spend time picking out each fabric. The designers have already matched them for you. This makes your project easier and more fun.
Feature | Description |
|---|---|
Variety | Fabric bundles include a collection of fabrics that are carefully coordinated by designers, offering a cohesive set of patterns and colors. |
Flexibility | Bundles provide flexibility for various quilting projects, allowing for intricate designs or use in multiple projects. |
Convenience | Bundles save time by eliminating the need to select and cut fabrics individually, perfect for quick starts with a variety of coordinated fabrics. |
Pre-cut bundles help you finish projects faster. You do less cutting, which saves your wrists and reduces waste. You get a budget-friendly way to try new designs. Jelly rolls and charm packs are perfect for binding and piecing. You can start sewing right away.
For most quilted pot holder projects, an 8” block works well. After you add binding, your finished potholder will measure about 8 ½”.
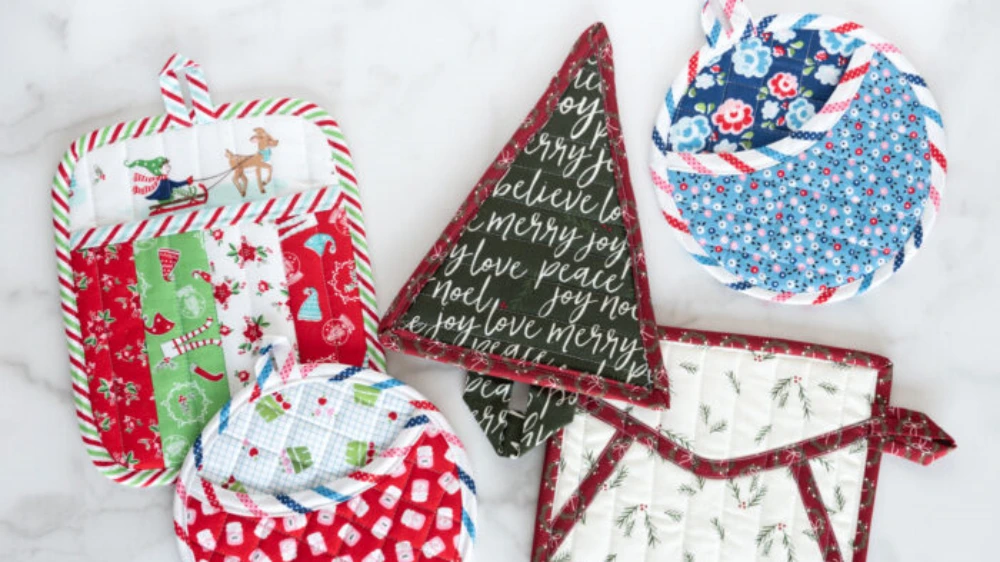
Creative Patterns and Color Choices
You can find inspiration everywhere. Seasonal themes, nature, and colorful patterns all work for quilted pot holders. Try a fall leaf design for autumn or a fruit salad print for a fun kitchen look. Stylish prints add a pop of color to your space.
Choose colors you love. This makes the process more enjoyable.
Subdued color schemes create a soft, classic look.
Vintage fabrics match traditional kitchens.
Modern prints give your potholder a fresh feel.
Jinny Beyer’s method lets you build a palette with many colors, then narrow it down. You might mix orange and purple for a bold effect.
Don’t be afraid to experiment with block sizes or patterns. You can use solid color quilt fabric for a simple style or mix prints for something unique. Try different layouts until you find one that feels right. Your quilted pot holder will reflect your personality and brighten your kitchen.
Tips for Perfect Potholder Finishes
Binding Tips for a Neat Edge
You want your potholder to look sharp and last a long time. The way you bind the edges makes a big difference. Expert quilters use a few tried-and-true techniques for a professional finish. Check out this table for some top tips:
Binding Technique | Description | Importance |
|---|---|---|
Mitered Corners | Fold the binding diagonally at corners for a crisp, sharp look. | Gives a professional appearance. |
Fabric Choice | Use cotton bias tape for strength and flexibility around corners. | Ensures durability and neatness. |
Double-Fold Binding | Finish edges with double-fold binding for a clean, sturdy result. | Protects edges from wear and tear. |
You can use Fanda Fabrics’ solid color quilt fabric or their pre-made bias tape for binding. These materials help you get smooth edges and keep your potholder looking new.
Tip: Sew binding with small, even stitches. Take your time at the corners. Mitered corners always impress!
Adding a Hanging Loop
A hanging loop makes your potholder easy to store and adds a nice touch. You want it to stay secure, so follow these steps:
Fold your fabric strip in half, offsetting the ends a little.
Place the loop on the back of your potholder, lining up the raw edges with the top edge.
Sew the loop down, keeping your stitches inside the 1/4″ binding seam.
When you attach the binding, make sure the loop is tucked in and sew over it again for extra strength.
Note: Press the loop before sewing. This keeps it flat and helps you get a neat finish.
Care and Maintenance
You want your quilted potholders to stay fresh and safe. Regular washing keeps them clean and looking good. Machine wash your potholders with other kitchen textiles like towels. Use a gentle cycle and mild detergent. Fanda Fabrics’ double-sided quilted fabric and cotton quilt batting hold up well in the wash.
Wash your potholders often, especially if they start to look rough.
Air dry or tumble dry on low to keep the fabric soft.
Check for loose threads or worn spots after each wash.
If you follow this tutorial and use quality materials, your potholders will last for years and always look their best.
Conclusion
You just learned how to make quilted potholders step by step. Try out your own patterns and color ideas. Fanda Fabrics gives you everything you need for strong, beautiful potholders. Their quilted insulation fabric keeps the batting in place, so your potholders last longer than most.
Share your creations with friends or give them as gifts. Need more inspiration? Visit Fanda Fabrics’ website for fresh fabric ideas and supplies. Happy sewing!
FAQ
How do I keep my potholder from shrinking after washing?
Always prewash your fabric and batting before you start sewing. This step helps prevent shrinkage later. Use cold water and a gentle cycle. Let your potholder air dry for the best results.
Can I use polyester batting for quilted potholders?
Polyester batting can melt under high heat. Stick with 100% cotton batting or specialty heat-resistant batting. You want your potholder to protect your hands, not melt in the kitchen!
What size should I cut my fabric for a standard potholder?
Most people like a 7” or 8” square. After adding binding, your finished potholder will measure about 8 ½”. You can go bigger or smaller if you want a custom fit.
How do I get neat corners on my binding?
Fold the binding at each corner to create a mitered edge.
Use pins to hold the fold in place.
Sew slowly around corners for a crisp, professional look.
Practice makes perfect. Your corners will get better with each project!