Quilting fabric is a timeless craft that allows you to create beautiful, functional pieces of art. how to quilt fabric,Whether you’re a beginner or an experienced quilter, mastering the art of quilting fabric opens up a world of creativity and possibility.
In this guide, we’ll take you through everything you need to know to become a quilting pro, from choosing the right materials to mastering intricate stitching techniques. So grab your fabric and let’s dive in!
Choosing the Right Fabric
Selecting the right fabric is a critical step in any quilting project, as it directly impacts the appearance, durability, and overall quality of your finished quilt. Here, we delve deeper into the factors to consider when choosing quilting fabric.
Types of Fabric
Quilting fabric comes in various types, with cotton being the most popular choice among quilters. Cotton fabric is prized for its durability, breathability, and ease of care, making it ideal for quilting projects. Additionally, cotton fabric holds colors well and offers a wide range of prints and patterns to suit any aesthetic.
Aside from cotton, other common fabric types used in quilting include linen, flannel, and blends. Linen fabric offers a distinct texture and drape, while flannel provides warmth and coziness, making it perfect for quilts intended for colder climates. Blended fabrics, such as cotton-polyester blends, combine the best qualities of each fabric type, offering durability, softness, and wrinkle resistance.
Fabric Quality: When selecting quilting fabric, prioritize quality over quantity. High-quality fabric not only looks better but also holds up better over time, ensuring that your quilt remains beautiful and intact for years to come. Look for tightly woven fabric with a smooth hand feel and minimal stretching or fraying along the edges. Avoid fabrics with loose threads, uneven weaves, or visible flaws, as these can affect the overall appearance and longevity of your quilt.
Color and Pattern Selection:
The color and pattern of your fabric play a significant role in the overall design and visual impact of your quilt. When choosing fabrics, consider factors such as color coordination, contrast, scale, and mood to achieve the desired look and feel. Opt for a cohesive color palette that complements your quilt’s theme or design motif, ensuring harmony and balance in your finished piece.
Experiment with a variety of prints and patterns, from florals and geometrics to solids and stripes, to add interest and dimension to your quilt. Mix and match fabrics with different textures, scales, and color intensities to create visual depth and movement. Remember to step back and assess your fabric choices as a whole to ensure a cohesive and visually appealing composition.
Choosing the right fabric is a crucial step in the quilting process, impacting the overall look, feel, and durability of your finished quilt. By considering factors such as fabric type, quality, color, and pattern selection, you can create stunning quilts that reflect your unique style and creativity.
How to Quilt Fabric by Hand
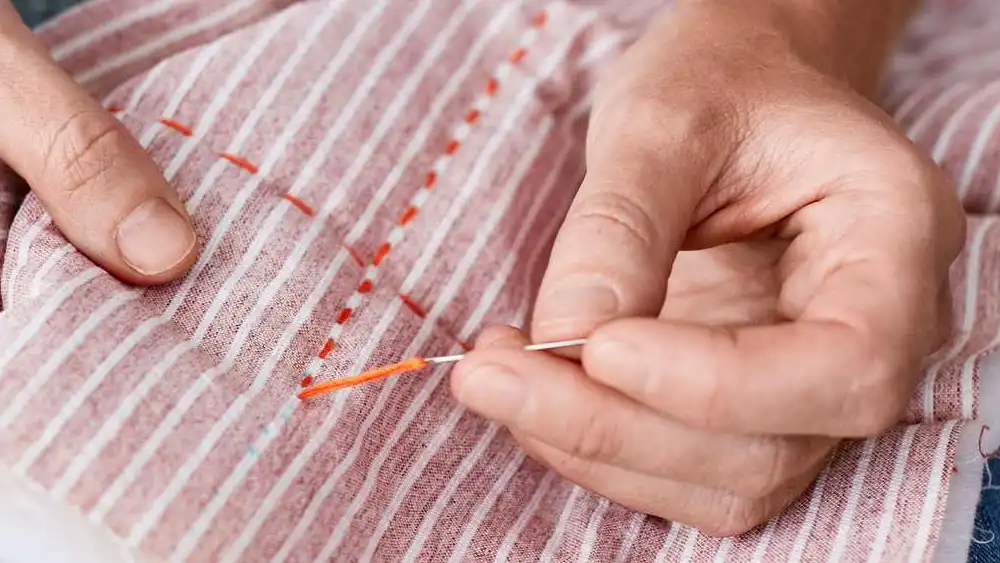
How to make quilted fabric, Quilting by hand is a timeless technique that allows for precise control and creates a timeless, heirloom-quality finish. Here’s a step-by-step guide on how to quilt fabric by hand:
- Prepare Your Quilt Sandwich: Start with a quilt sandwich consisting of your quilt top, batting, and backing fabric. Baste the layers together using safety pins or thread basting to secure them in place.
- Select Your Quilting Thread: Choose a quilting thread that complements your fabric and design. Opt for a high-quality cotton or polyester thread in a color that blends well with your quilt top.
- Thread Your Needle: Thread a quilting needle with a single strand of thread, approximately 18-24 inches in length. Knot the end of the thread securely to prevent it from pulling through the fabric.
- Plan Your Quilting Design: Decide on the quilting design you want to create, whether it’s simple straight lines, intricate motifs, or freehand stitches. Mark your quilting lines or design on the quilt top using a fabric marker or quilting stencil, if desired.
- Start Quilting: Begin quilting in the center of your quilt and work outward, smoothing the fabric as you go to prevent puckering. Use a rocking motion to insert the needle through all layers of the quilt sandwich, pulling the thread taut with each stitch.
- Maintain Even Stitches: Aim for even stitches that are approximately 1/4 to 1/2 inch in length, depending on your quilting design and personal preference. Consistent stitch length and tension are key to achieving a professional-looking finish.
- Rotate Your Quilt: As you quilt, periodically rotate your quilt to work in different directions and prevent strain on your hands and wrists. This also helps to ensure even stitching and consistent tension throughout the quilt.
- Take Breaks and Rest: Quilting by hand can be time-consuming, so be sure to take breaks and rest your hands and eyes regularly to prevent fatigue and strain. Enjoy the meditative rhythm of hand quilting and take your time to savor the process.
- Finish and Knot Off: When you reach the end of your quilting line or design, secure the thread with a small knot on the back of the quilt. Trim any excess thread and continue quilting, following your marked lines or design until the entire quilt is quilted.
- Final Touches: Once you’ve finished quilting, remove any basting stitches and trim excess batting and backing fabric from the edges of the quilt. Press the quilt top to set the stitches and flatten any wrinkles or creases.
By quilting fabric by hand, you’ll create a beautiful and timeless quilt that bears the unique imprint of your craftsmanship and dedication. Enjoy the process of hand quilting as you bring your quilt to life, stitch by stitch.
Essential Tools and Supplies
Having the right tools and supplies can make all the difference in your quilting journey. From cutting tools to sewing machines, here’s what you need to get started.
Cutting Tools
Invest in quality rotary cutters, rulers, and cutting mats for precise fabric cutting. These tools ensure accuracy and efficiency in your quilting projects.
Sewing Machine
While hand quilting is an option, a sewing machine speeds up the process and allows for more intricate designs. Choose a machine with quilting-specific features for optimal results.
Thread and Needles
Use high-quality thread and needles designed for quilting to prevent breakage and ensure smooth stitching. Consider factors like thread weight and needle size based on your fabric and design.
Preparing Your Fabric
Properly preparing your fabric sets the foundation for a successful quilting project. From washing and ironing to creating a quilting plan, here’s what you need to do before diving in.
Washing and Ironing
Pre-wash your fabric to remove sizing and prevent shrinkage after quilting. Ironing ensures smooth, wrinkle-free fabric for accurate cutting and piecing.
How to Cut Fabric for Quilting:Cutting Fabric Pieces
Accurate cutting is essential for precise piecing and quilting. Use rotary cutters and acrylic rulers to cut fabric pieces to the desired size and shape according to your quilt design.
Creating a Quilting Plan
Plan out your quilt design, including block layout, color placement, and quilting motifs. Consider factors like symmetry, balance, and focal points for a cohesive and visually appealing quilt.
Basic Quilting Techniques
Mastering basic quilting techniques is essential for quilters of all skill levels, laying the foundation for successful and enjoyable quilting projects. In this section, we’ll explore three fundamental quilting techniques: piecing, pressing, and basting.
Piecing: Piecing is the process of sewing together fabric pieces to create blocks or quilt tops. Accurate piecing ensures that your blocks align properly and your seams lie flat, resulting in a polished and professional-looking quilt. Here’s a step-by-step guide to piecing:
- Cutting Fabric Pieces: Begin by cutting fabric pieces to the desired size and shape according to your quilt design. Use a rotary cutter, acrylic ruler, and cutting mat for precise cutting.
- Arranging Fabric Pieces: Lay out your fabric pieces in the desired pattern or design, paying attention to color placement, contrast, and balance.
- Sewing Seam Allowances: Place two fabric pieces right sides together, aligning the raw edges. Sew along the designated seam line using a 1/4-inch seam allowance, ensuring consistent stitches and backstitching at the beginning and end of each seam.
- Pressing Seams: Press seams open or to one side using a hot iron and steam, depending on your quilt design and pattern instructions. Use a pressing cloth to protect delicate fabrics and prevent shine.
- Trimming Excess Fabric: Trim excess fabric and threads from your pieced units for a neat and tidy appearance. Use sharp scissors or a rotary cutter for precise trimming.
- Assembling Blocks: Sew pieced units together to create quilt blocks, ensuring that seams nest together and corners match accurately. Press blocks carefully to maintain flatness and accuracy.
By mastering the art of piecing, you’ll be able to create intricate quilt designs with confidence and precision, setting the stage for more advanced quilting techniques.
Pressing: Proper pressing is essential for achieving crisp, flat seams and ensuring the overall quality of your quilt. Here are some tips for effective pressing:
- Set Up Your Ironing Station: Place your ironing board near your sewing machine for easy access. Keep a spray bottle filled with water nearby for steam pressing.
- Prep Fabric: Before pressing, ensure that your fabric is clean and wrinkle-free. Pre-wash and iron your fabric if necessary to remove any sizing or wrinkles.
- Pressing Seams Open vs. to One Side: Depending on your quilt design and pattern instructions, press seams open or to one side. Use a hot iron and steam to set seams and prevent fabric distortion.
- Use Pressing Aids: Use pressing aids such as pressing hams, seam rollers, or clapper boards to achieve flat, crisp seams and sharp creases.
- Pressing Technique: Place your iron over the seam allowance and apply gentle pressure, moving the iron along the seam in smooth, even strokes. Avoid pushing or pulling the fabric, which can stretch or distort the seams.
- Check for Accuracy: After pressing, check your seams for accuracy and flatness. Trim any stray threads or uneven edges for a polished finish.
By incorporating proper pressing techniques into your quilting process, you’ll achieve professional-looking results and ensure that your quilt blocks lay flat and smooth.
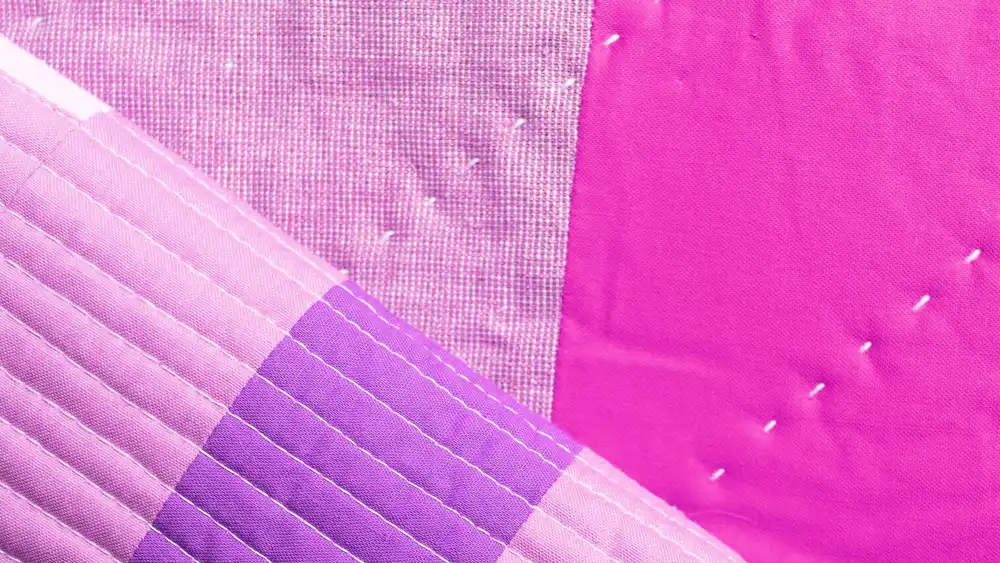
Basting: Basting is the process of temporarily securing quilt layers together before quilting. Proper basting ensures that your quilt sandwich remains stable and flat during the quilting process. Here’s how to baste your quilt:
- Prepare Your Quilt Sandwich: Lay your backing fabric wrong side up on a flat surface, followed by the batting and then the quilt top right side up. Smooth out any wrinkles or creases.
- Pin Basting: Use safety pins or curved basting pins to secure the layers of your quilt sandwich together. Place pins every few inches across the quilt top, ensuring that all layers are smooth and flat.
- Thread Basting: Alternatively, you can use hand basting to secure the layers together using a needle and thread. Use long, even stitches to baste around the perimeter of the quilt and across the center, removing pins as you go.
- Spray Basting: For a faster and easier basting method, consider using a temporary fabric adhesive spray to bond the layers together. Follow the manufacturer’s instructions for best results, ensuring even coverage and minimal overspray.
- Check for Smoothness: Once basted, check your quilt sandwich for any wrinkles, puckers, or creases. Smooth out any imperfections before proceeding to quilting.
By mastering these basic quilting techniques—piecing, pressing, and basting—you’ll lay a solid foundation for successful quilting projects and set yourself up for creative exploration and experimentation in the world of quilting.
Quilting Designs
Quilting designs add texture, visual interest, and dimension to your quilt, enhancing its overall appearance and creating a cohesive and polished finish. In this section, we’ll explore three popular quilting designs: straight line quilting, free motion quilting, and appliqué.
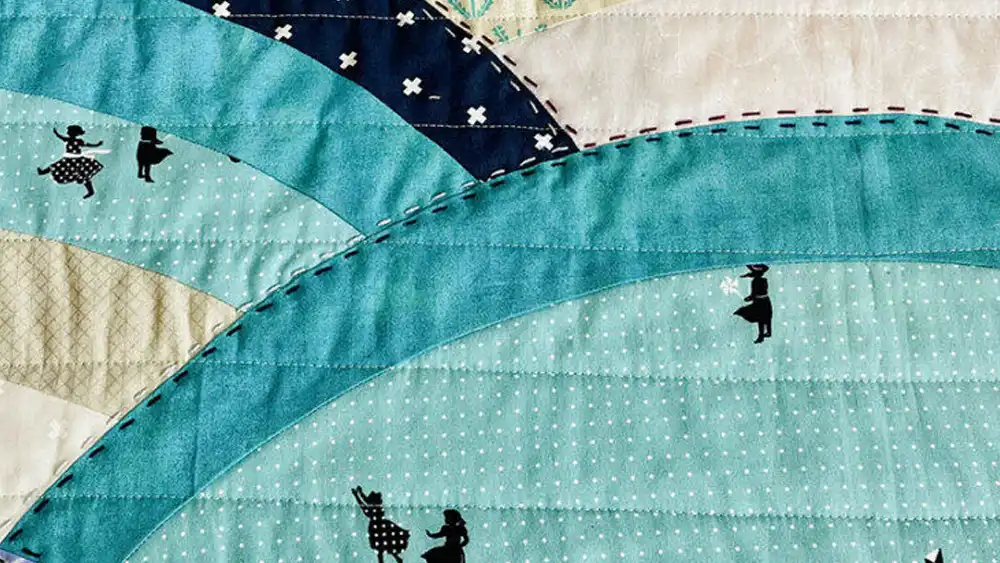
Straight Line Quilting: Straight line quilting is a versatile and beginner-friendly quilting technique that creates clean, geometric designs and adds structure and stability to your quilt. Here’s how to incorporate straight line quilting into your project:
- Marking Guidelines: Use a fabric marker or quilting ruler to mark straight lines on your quilt top, following the desired quilting pattern or design. You can choose from various line spacing and orientations to achieve different effects.
- Quilting Setup: Attach a walking foot or quilting guide to your sewing machine to ensure even stitches and smooth quilting. Adjust your machine’s stitch length and tension as needed for optimal results.
- Quilting Technique: Begin quilting along the marked lines, starting from the center of your quilt and working outward. Use gentle, even pressure to guide the fabric under the needle, maintaining consistent stitch length and spacing.
- Backtracking and Securing Stitches: Backtrack over each quilting line at the beginning and end of stitching to secure the stitches and prevent unraveling. Trim any thread tails for a clean finish.
- Variations and Embellishments: Experiment with variations of straight line quilting, such as parallel lines, crosshatch patterns, or diagonal grids, to add visual interest and texture to your quilt. You can also incorporate decorative stitches or thread colors for added embellishment.
By mastering straight line quilting, you’ll be able to create modern, graphic quilts with crisp, clean lines and intricate designs, perfect for both traditional and contemporary quilt projects.
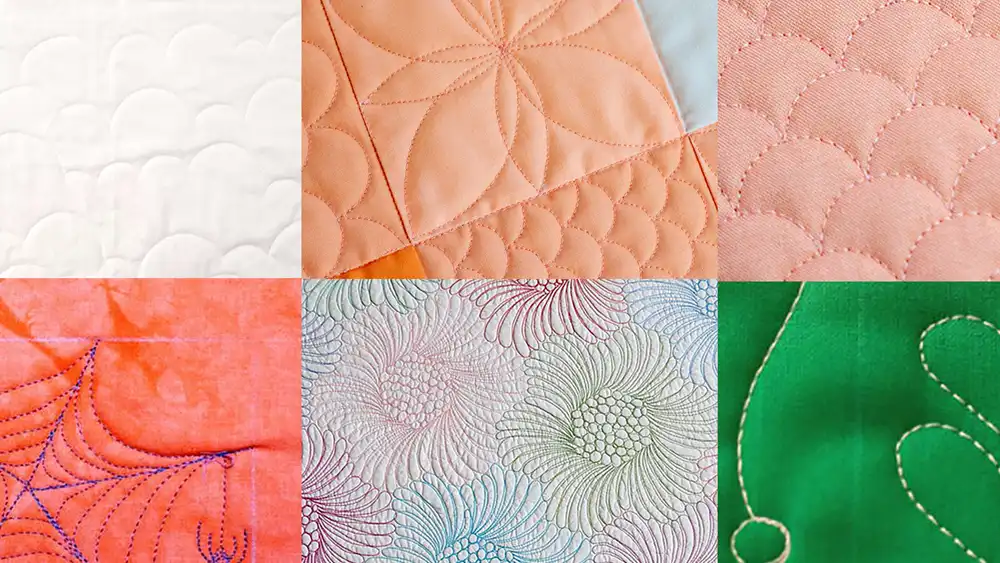
Free Motion Quilting: Free motion quilting offers endless creative possibilities, allowing you to quilt intricate designs, motifs, and patterns with freehand control. Here’s how to get started with free motion quilting:
- Dropping Feed Dogs: Lower or cover the feed dogs on your sewing machine to allow for freehand movement of the fabric. Attach a darning or free motion quilting foot to your machine for optimal visibility and control.
- Quilting Setup: Use a quilting glove or grip aid to improve grip and maneuverability while quilting. Adjust your machine’s tension and stitch length to accommodate free motion quilting.
- Quilting Technique: With the needle in the down position, move the fabric freely under the needle to create your desired quilting design. Practice control and fluid movements, adjusting your speed and direction as needed to achieve smooth, even stitches.
- Exploring Designs: Experiment with a variety of free motion quilting designs, such as stippling, meandering, loops, feathers, or floral motifs. Start with simple designs and gradually work your way up to more complex patterns as you gain confidence and skill.
- Practice and Patience: Free motion quilting requires practice and patience to master, so don’t be discouraged by initial challenges or mistakes. Take breaks as needed, and celebrate your progress along the way.
By embracing free motion quilting, you’ll unleash your creativity and artistic expression, creating unique and personalized quilts that showcase your individual style and skill.
Appliqué: Appliqué is a versatile quilting technique that involves sewing fabric shapes or motifs onto a quilt top to add embellishment, detail, and visual interest. Here’s how to incorporate appliqué into your quilt:
- Preparing Appliqué Pieces: Cut out fabric shapes or motifs from your chosen appliqué fabric using scissors, a rotary cutter, or appliqué templates. Consider factors like scale, color, and placement when selecting and arranging your appliqué pieces.
- Attaching Appliqué: Position your appliqué pieces onto the quilt top, securing them in place with pins, temporary fabric adhesive, or fusible webbing. Stitch around the edges of each appliqué piece using a straight stitch, zigzag stitch, satin stitch, or decorative stitch.
- Embellishing Appliqué: Enhance your appliqué designs with additional embellishments such as embroidery, beading, or fabric painting. Experiment with different textures, colors, and techniques to add depth and dimension to your appliqué motifs.
- Quilting Around Appliqué: Quilt around appliqué motifs to secure them to the quilt top and add texture and dimension to your quilt. Use a walking foot or free motion quilting foot for even stitching and smooth quilting.
- Finishing Touches: After quilting, trim any excess fabric or threads from your appliqué motifs for a clean, polished finish. Press the quilt top to set the stitches and flatten any wrinkles or creases.
By incorporating appliqué into your quilting projects, you’ll add charm, personality, and artistic flair to your quilts, creating one-of-a-kind pieces that are sure to impress.
Whether you prefer the structured simplicity of straight line quilting, the creative freedom of free motion quilting, or the decorative charm of appliqué, exploring different quilting designs allows you to express your creativity and individuality while enhancing the beauty and character of your quilts. So experiment, explore, and enjoy the journey of quilting design!
Adding Quilt Borders and Binding
Borders and binding are the final finishing touches that frame your quilt and give it a polished, professional appearance. In this section, we’ll explore how to select, attach, and finish borders and binding for your quilt.
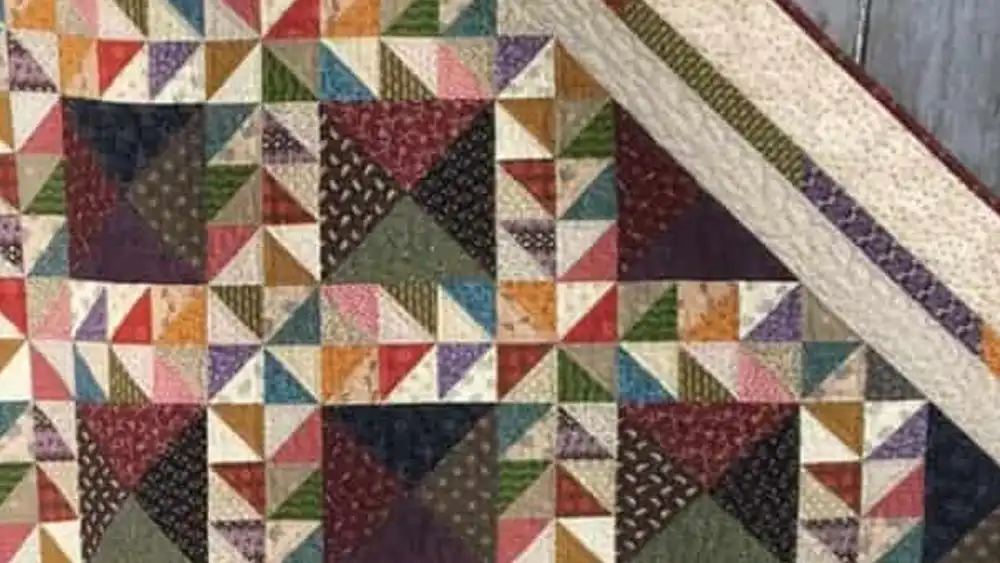
Border Selection: Borders are strips of fabric that are sewn around the edges of your quilt to frame the quilt top and add visual interest. When selecting borders for your quilt, consider factors such as width, color, pattern, and fabric texture to complement your quilt design. Here are some tips for choosing borders:
- Width: Choose border widths that harmonize with your quilt design and proportions. Borders can range from narrow (1-2 inches) to wide (4-6 inches) depending on the desired aesthetic and quilt size.
- Color: Select border fabrics that coordinate with the colors and prints in your quilt top. Borders can match the main colors of your quilt, contrast with them for emphasis, or serve as a neutral frame to tie everything together.
- Pattern: Consider using border fabrics with complementary or contrasting patterns to add visual interest and texture to your quilt. Stripes, plaids, florals, or geometrics can all make striking border choices.
- Fabric Texture: Experiment with different fabric textures, such as solids, prints, or tone-on-tone fabrics, to create depth and dimension in your quilt. Consider using the same fabric for the borders as one of the fabrics in your quilt top for a cohesive look.
Attaching Borders: Once you’ve selected your border fabric, it’s time to attach the borders to your quilt top. Here’s how to attach borders accurately and securely:
- Measure and Cut Borders: Measure the length of your quilt top along the top and bottom edges, as well as the width of your quilt top along the sides. Cut border strips to these measurements, adding seam allowances as needed.
- Pin Borders in Place: With right sides together, pin border strips to the edges of your quilt top, aligning raw edges and matching seam intersections. Pin at regular intervals to distribute any easing or fullness evenly.
- Sew Borders to Quilt Top: Using a 1/4-inch seam allowance, sew border strips to the edges of your quilt top, backstitching at the beginning and end of each seam. Press seam allowances toward the border.
- Trim Excess Border Fabric: After sewing on the borders, trim any excess border fabric and quilt top fabric even with the edges of the borders for a clean, squared-off finish.
Binding Techniques: Binding is the fabric strip that wraps around the edges of your quilt to enclose the raw edges and provide a finished edge. Here’s how to bind your quilt:
- Prepare Binding Strips: Cut binding strips from your chosen fabric, typically 2.5 inches wide, and join them together using diagonal seams to create a continuous strip long enough to go around your quilt.
- Attach Binding to Quilt: Starting in the middle of one side of your quilt, align the raw edges of the binding strip with the raw edges of the quilt top, leaving a tail of binding hanging loose. Sew the binding to the quilt using a 1/4-inch seam allowance, mitering corners as you go.
- Finish Binding: When you reach the starting point, overlap the ends of the binding and trim excess fabric. Fold the binding over the raw edges of the quilt to the back side, mitering corners neatly. Hand stitch or machine stitch the binding to the back of the quilt, securing it in place.
- Press and Finish: Once the binding is attached, press the binding away from the quilt top to create a crisp edge. Give the entire quilt a final press to set the stitches and smooth out any wrinkles.
By adding borders and binding to your quilt, you’ll complete your quilting project with style and precision, framing your masterpiece and providing a durable and beautiful edge. Experiment with different border and binding fabrics, widths, and techniques to create unique and personalized quilts that showcase your creativity and craftsmanship.
Quilting Finishing Touches
The final steps in the quilting process bring your project to completion and prepare it for use or display. Here’s how to add those finishing touches with care.
Trimming Excess Fabric: Trim excess fabric and threads from your quilt edges for a clean, polished finish. Use sharp scissors or a rotary cutter for precise trimming along the binding.
Adding Labels: Labeling your quilt preserves its history and adds a personal touch. Include details like the quilt name, maker’s name, date, and any special notes or dedications.
Washing and Blocking: Wash your quilt to remove any remaining fabric sizing or markings and to reveal its soft, cozy texture. Blocking helps shape and flatten your quilt for a professional presentation.
By attending to these final details, you’ll ensure that your quilt is ready to be enjoyed and cherished for years to come.
Encounter common quilting challenges? Don’t fret! Here are some tips for troubleshooting issues like thread tension, seam accuracy, and fabric distortion.
Thread Tension
Adjust your sewing machine’s thread tension to achieve balanced stitches and prevent thread breakage or looping. Test tension settings on scrap fabric before quilting your project.
Seam Accuracy
Achieving accurate seam allowances ensures precise piecing and smooth assembly of quilt blocks. Use tools like seam guides or specialty presser feet for consistent results.
Fabric Distortion
Prevent fabric distortion during quilting by handling fabric gently and avoiding excessive pulling or stretching. Use techniques like starching or spray basting to stabilize fabric layers.
Advanced Quilting Techniques
Ready to take your quilting skills to the next level? Explore advanced techniques like paper piecing, foundation piecing, and trapunto for intricate and impressive quilts.
Paper Piecing
Paper piecing, also known as foundation piecing, allows for precise piecing of complex designs. Use paper templates as a guide for accurate fabric placement and stitching.
Foundation Piecing
Foundation piecing involves sewing fabric pieces onto a foundation material, such as paper or fabric, to create intricate quilt blocks. Use a stabilizing foundation for precise results.
Trapunto
Trapunto, or stuffed quilting, adds dimension and texture to your quilts by stuffing certain areas with extra batting. Experiment with different stuffing materials and densities for varied effects.
Exploring Quilting Communities
Joining quilting communities connects you with fellow enthusiasts, provides valuable support and inspiration, and offers opportunities for learning and growth.
Online Forums
Participate in online quilting forums and communities to ask questions, share tips and ideas, and connect with quilters from around the world. Platforms like Reddit and QuiltingBoard offer vibrant communities for quilters of all levels.
Local Guilds
Join a local quilting guild or club to meet fellow quilters in your area, attend meetings and events, and participate in workshops and group projects. Local guilds often offer resources, education, and camaraderie for quilters.
Workshops and Classes
Take advantage of quilting workshops and classes to learn new techniques, refine your skills, and connect with experienced instructors and fellow students. Look for classes at local quilt shops, community centers, and online platforms.
Selling Your Quilts
Ready to turn your passion for quilting into a business or side hustle? Here’s how to price, market, and sell your quilts to a receptive audience.
Pricing Your Work
Calculate the cost of materials, time, and labor to determine a fair price for your quilts. Consider factors like size, complexity, and market demand when setting your prices.
Marketing Strategies
Promote your quilts through online platforms, social media, craft fairs, and local markets to reach potential buyers. Showcase your unique style, craftsmanship, and story to attract customers.
Online Marketplaces
List your quilts for sale on online marketplaces like Etsy, eBay, or your own website to reach a global audience of buyers. Use high-quality photos, detailed descriptions, and keywords to optimize your listings for search visibility.
Caring for Your Quilts
Proper care and maintenance ensure the longevity and beauty of your quilts for years to come. Follow these tips to preserve and protect your quilts for future generations to enjoy.
Storage Tips
Store quilts in a cool, dry, and dark environment to prevent fading, discoloration, and mold growth. Avoid storing quilts in plastic bags or containers, which can trap moisture and lead to mildew.
Cleaning and Maintenance
Regularly vacuum or gently shake out quilts to remove dust and debris. Spot clean stains promptly with a mild detergent and cool water, and air dry quilts flat to prevent distortion.
Repairing Damages
Address minor damages like loose stitches, frayed edges, or small tears promptly to prevent further deterioration. Use matching thread and fabric patches for seamless repairs that blend with the original quilt.
FAQs
How do I choose the right batting?
Select batting based on factors like loft, fiber content, and intended use. Consider factors like warmth, drape, and ease of quilting when choosing batting for your project.
What is the best way to quilt fabric by hand?
Hand quilting allows for precise control and creates a timeless, heirloom-quality finish. Use a sharp needle, even stitches, and a thimble for comfortable, efficient hand quilting.
Can I quilt without a sewing machine?
While a sewing machine speeds up the quilting process, it’s possible to quilt entirely by hand. Hand quilting requires patience, practice, and attention to detail but yields beautiful results.
How do I fix puckered fabric after quilting?
Puckered fabric is often caused by incorrect tension, uneven stitching, or fabric distortion. Try adjusting your machine’s tension, using a walking foot, or blocking your quilt to smooth out puckers.
What is the difference between a quilt and a comforter?
Quilts are traditionally made of three layers (top, batting, and backing) and are stitched together through quilting. Comforters are typically one-piece, filled with synthetic or natural materials, and are often machine quilted.
How long does it take to complete a quilt?
The time it takes to complete a quilt depends on factors like size, complexity, and your quilting speed. A small, simple quilt may take a few days to a week, while a large, intricate quilt could take several weeks or even months to finish.
Conclusion
Mastering the art of quilting fabric is a rewarding journey that combines creativity, skill, and passion. Whether you’re a novice quilter or a seasoned pro, the tips and techniques shared in this guide will help you create stunning quilts to cherish for years to come. So gather your materials, unleash your creativity, and start quilting your way to beautiful, handmade masterpieces.