Welcome to our ultimate guide on quilting a fabric panel! Whether you’re a beginner or an experienced quilter looking for new techniques, this article will provide you with detailed instructions, tips, and insights into creating beautiful quilted fabric panels.
From selecting the right materials to finishing touches, we’ve got you covered.
Quilting is a timeless craft that allows you to express your creativity and create functional works of art. Quilting fabric panels adds an extra dimension to your projects, offering a focal point for your design. In this guide, we’ll explore the step-by-step process of quilting a fabric panel, from preparation to assembly.
What Is a Fabric Panel?
A fabric panel is a piece of fabric that typically features a pre-printed design or image. These panels are often used in quilting and sewing projects to add visual interest and serve as a focal point.
Fabric panels come in various sizes and designs, ranging from simple patterns to intricate scenes or motifs. Quilters and sewists can incorporate fabric panels into their projects by surrounding them with coordinating fabrics, adding borders, or quilting them to create unique and personalized creations.
Types of Fabric Panel
Some common types of fabric panels include:
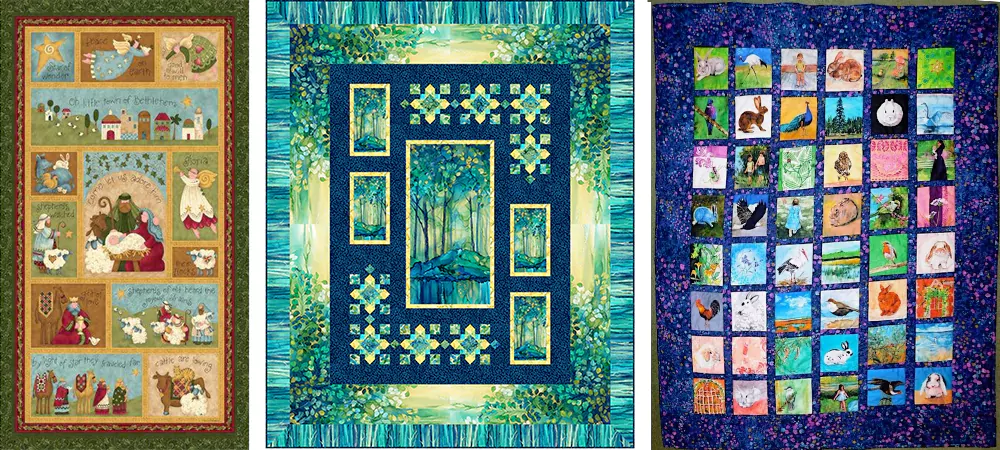
Printed Panels: Printed fabric panels feature pre-printed designs, images, or motifs on fabric. These panels often showcase intricate artwork, scenic landscapes, floral arrangements, or thematic patterns. Printed panels are popular choices for quilting projects, as they provide a focal point and can serve as the centerpiece of a quilt or wall hanging.
Appliqué Panels: Appliqué fabric panels involve the application of fabric shapes or motifs onto a background fabric. Quilters can use various techniques, such as raw-edge or turned-edge appliqué, to attach the appliqué pieces securely to the background fabric. Appliqué panels allow for endless design possibilities, from whimsical shapes to intricate designs.
Panel Kits: Panel kits typically include a fabric panel along with coordinating fabrics and instructions for completing a specific project. These kits are convenient options for quilters who prefer a cohesive look and easy project planning. Panel kits may feature themes like holidays, seasons, or children’s characters, making them popular choices for gifts or themed quilts.
Embroidered Panels: Embroidered fabric panels feature intricate stitching and embellishments applied to fabric to create decorative designs. These panels may showcase intricate embroidery patterns, monograms, or elaborate motifs. Embroidered panels add texture, depth, and visual interest to quilts, garments, or home decor projects.
Photographic Panels: Photographic fabric panels feature digitally printed images or photographs on fabric. These panels often replicate realistic scenes, landscapes, or portraits with stunning clarity and detail. Photographic panels offer a unique way to capture memories, commemorate special occasions, or showcase artistic photography in quilts or wall hangings.
Novelty Panels: Novelty fabric panels feature playful, whimsical, or themed designs that appeal to specific interests or hobbies. These panels may depict animals, sports, hobbies, or cultural motifs, catering to a wide range of preferences and tastes. Novelty panels are popular choices for themed quilts, children’s projects, or unique gifts.
Fabric panels come in a variety of types and styles, allowing quilters and sewists to explore their creativity, experiment with different techniques, and create one-of-a-kind projects that reflect their personal style and interests.
How to Quilt a Panel Fabric?
Follow these steps to quilt a fabric panel successfully:
Step 1: Choose Your Panel
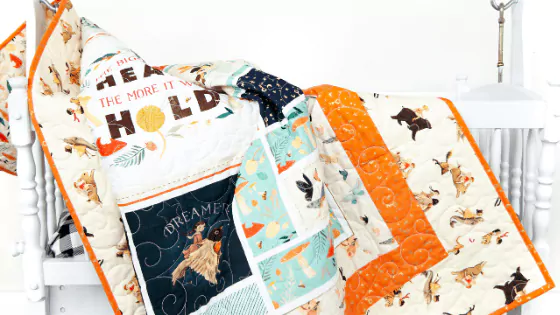
Start by selecting a fabric panel that excites and inspires you. Fabric panels come in a variety of designs, themes, and sizes—ranging from nature scenes to geometric patterns or holiday motifs. Think about the project you’re planning to create. For example, a large, scenic panel might be perfect for a wall hanging, while a smaller panel can be incorporated into a quilt or pillow cover. Consider how the colors and design will complement the room or recipient of the finished piece.
Step 2: Prepare Your Materials
Make sure you have all the materials needed for the project. Here’s a checklist:
- Fabric Panel: The centerpiece of your project.
- Coordinating Fabrics: For borders, backing, or additional quilt blocks.
- Batting: Choose the right thickness based on the desired warmth and loft of your quilt.
- Thread: A color that complements your fabric panel.
- Pins or Basting Spray: To hold your quilt sandwich together.
- Rotary Cutter and Cutting Mat: For precise cutting.
- Ruler: Essential for measuring and keeping straight lines.
- Quilting Tools: Sewing machine with a walking foot (optional), safety pins, and iron.
Before you start, ensure your fabric panel and any coordinating fabrics are pressed, wrinkle-free, and cut to the desired size.
Step 3: Create the Quilt Sandwich (Layering)
Now it’s time to layer the materials to form your quilt sandwich:
- Lay the Backing Fabric: Place the backing fabric wrong side up on a flat surface. Ensure it is slightly larger than your fabric panel.
- Position the Batting: Lay the batting on top of the backing fabric. The batting should also be slightly larger than your fabric panel.
- Add the Fabric Panel: Place your fabric panel right side up on top of the batting, ensuring it’s centered. Make sure there are no wrinkles or puckers in any layer, as this can affect the final look.
Tip: You can tape the edges of your backing fabric to the table to prevent shifting while layering the materials.
Step 4: Pin or Baste Layers Together
To prevent the layers from shifting while quilting, it’s important to baste or pin them together securely.
- Safety Pins: Place safety pins throughout the quilt sandwich at regular intervals (about 4-6 inches apart). Ensure the pins go through all three layers.
- Basting Spray: Alternatively, use a temporary fabric adhesive spray to bond the layers together. Spray lightly and press the fabrics together to smooth out wrinkles.
Step 5: Plan Your Quilting Design
Choosing a quilting design that enhances your fabric panel is a crucial step. The quilting pattern can be as simple or intricate as you like:
- Straight-Line Quilting: Easy for beginners, this involves stitching in straight lines across the quilt. You can follow the lines of the panel design or use a grid pattern.
- Free-Motion Quilting: For more experienced quilters, free-motion quilting allows you to create custom shapes, swirls, or echo quilting that follows the contours of the panel.
- Custom Designs: You can quilt around the images or motifs on the panel itself, like outlining flowers or animals, to add depth and texture.
Decide if you want your quilting to blend into the panel or stand out as a decorative element. Mark the quilt top lightly with washable fabric markers or tailor’s chalk if needed.
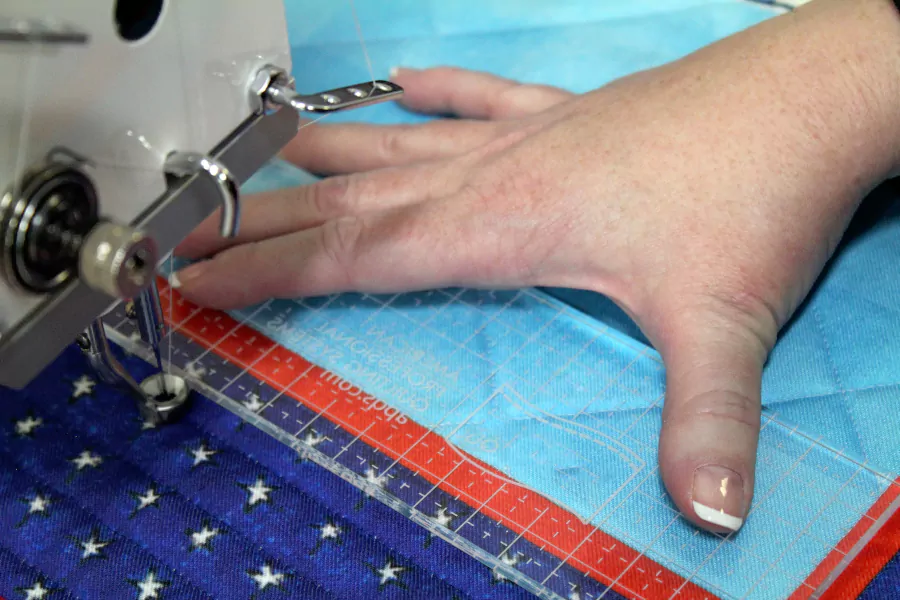
Step 6: Quilt Your Panel
Set up your sewing machine with a walking foot (for straight-line quilting) or free-motion foot (for custom designs). Choose a matching or contrasting thread, depending on the desired effect.
Begin quilting from the center of the fabric panel and work outward. This helps prevent the fabric from bunching or shifting. Sew carefully, following your quilting design, and make sure the stitches are even and consistent. Be mindful of the quilting lines you’ve planned, and take your time to avoid puckering the fabric.
Tip: If you’re quilting by hand, use a quilting hoop and small, even stitches to achieve the best results.
Step 7: Trim Excess Fabric
After quilting is complete, trim the excess batting and backing fabric using a rotary cutter and ruler. Cut the layers evenly, leaving about 1/4 inch from the edge of your fabric panel to ensure a clean finish. Be careful to avoid cutting into your quilted stitches.
Step 8: Bind the Edges
Now that the quilting is done, it’s time to bind the edges:
- Cut Binding Strips: Cut strips of fabric for the binding, usually 2.5 inches wide. The length should be long enough to go around the perimeter of the quilt.
- Attach the Binding: Fold the strips in half lengthwise, wrong sides together. Starting on one side, sew the binding to the front of the quilt, raw edges aligned, using a 1/4 inch seam allowance. Fold the binding over to the back and hand-stitch it in place, ensuring neat, mitered corners.
Binding the quilt gives it a polished and professional finish while protecting the raw edges.
Step 9: Finishing Touches
After binding, give the quilt a final press with a warm iron. This will help smooth any remaining wrinkles and give the quilt a crisp, finished look. You can also add a label to commemorate the creation, especially if it’s a gift or keepsake.
Quilting a fabric panel allows you to unleash your creativity and create unique, personalized pieces that will be cherished for years to come. Enjoy the process and have fun experimenting with different techniques and designs!
What Are The Advantages of Fabric Panel?
Fabric panels are important because of their ability to enhance and elevate quilting and sewing projects. Fabric panels serve several key purposes:
- Visual Impact: Fabric panels often feature intricate designs, vibrant colors, or captivating images that can instantly draw attention. They serve as focal points in quilts, wall hangings, or other sewing projects, adding visual interest and enhancing the overall aesthetic.
- Time-Saving: Using a fabric panel can streamline the quilting or sewing process, especially for beginners or those with limited time. Instead of piecing together multiple fabric pieces to create a design, quilters can simply incorporate a fabric panel and build around it, saving time and effort.
- Versatility: Fabric panels offer versatility in design and application. They can be used in various projects, including quilts, pillows, tote bags, and more. With countless designs and themes available, fabric panels allow quilters and sewists to explore different styles and express their creativity.
- Personalization: Fabric panels provide an opportunity for personalization and customization. Quilters can choose panels that resonate with them or their intended recipients, whether it’s a favorite hobby, scenic landscape, or beloved character. This personal touch adds sentimental value to the finished project.
- Creative Inspiration: Fabric panels can serve as sources of inspiration for quilting and sewing enthusiasts. Seeing a beautifully designed panel can spark ideas for complementary fabrics, quilting patterns, or embellishments, encouraging quilters to explore new techniques and experiment with their creativity.
Fabric panels play a significant role in the quilting and sewing community, offering endless possibilities for creativity, expression, and artistic exploration. They contribute to the beauty, uniqueness, and enjoyment of handmade projects, making them a valuable and cherished component in the world of quilting and sewing.
FAQ
What do people do with fabric panels?
Fabric panels are used in a wide variety of creative projects. They are often incorporated into quilts as focal points, serving as the center of the design or as individual blocks. Fabric panels can also be used to make wall hangings, pillows, tote bags, table runners, and even clothing.
With their pre-printed designs, panels simplify the process of adding detailed artwork or themes to a project without the need for piecing or appliqué, making them perfect for quick yet striking creations.
How big is a panel of fabric?
The size of a fabric panel can vary widely depending on the manufacturer and intended use. Most fabric panels range from about 18 inches by 22 inches (fat quarter size) to 24 inches by 44 inches (a full yard in width), but they can be larger or smaller.
Some panels are designed as single large blocks for quilts, while others may feature multiple smaller images or patterns that can be cut and used individually in different projects. Be sure to check the specific measurements of a panel before purchasing to ensure it fits your project needs.
Conclusion
Quilting fabric panels is a rewarding and fulfilling craft that offers endless creative possibilities. By following the steps outlined in this guide and drawing inspiration from personal stories and expert advice, you can create beautiful fabric panels that showcase your talent and passion for quilting.
Remember to enjoy the process and celebrate your accomplishments along the way.