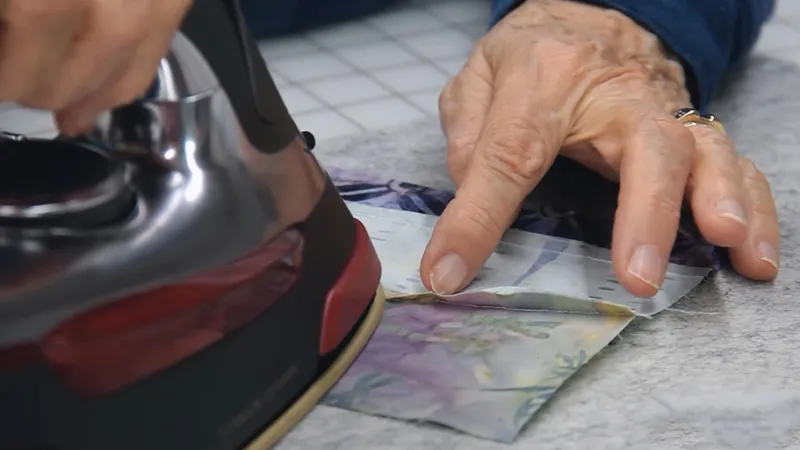
When it comes to quilting, one thing you’ll hear over and over is that pressing is key— but here’s the thing: pressing is not the same as ironing! Ironing involves sliding the iron side-to-side to remove wrinkles, while pressing is all about using a gentle up-and-down motion to flatten your fabric without distorting it.
Whether you’re making your first quilt or you’re a seasoned pro, understanding this simple difference can make a huge impact on your quilt’s overall quality.
Proper pressing isn’t just about getting your fabric flat; it’s about ensuring your seams are crisp, your blocks are square, and your quilt comes together flawlessly. Many quilt patterns gloss over this step, leaving beginners confused about when and how to press. Don’t worry, though—I’m here to clear up any misunderstandings and guide you through how to press your fabric like a pro. Let’s dive in!
What Tools Do You Need for Pressing?

When you’re ready to start pressing, there are a few essential tools you’ll want to have on hand to make everything go a lot smoother. Let’s take a look at them:
Essential Tools
Iron
First thing’s first—you absolutely need an iron, but not just any iron. Look for one with temperature control. Trust me, it makes a huge difference! Steam irons are perfect for quilting. The steam helps loosen the fabric and makes those seams lay flat. A dry iron works, too, but it’s not as forgiving. Personally, I love a steam iron with a sharp point, especially for those tricky seams.
Pressing Mat
You might wonder, “Why not just use my ironing board?” Well, a good pressing mat can make a big difference. It holds heat better and gives your fabric that smooth, even finish. Plus, unlike ironing boards that can leave marks or impressions, a mat gives you a perfectly flat surface to help your blocks stay nice and square.
Water Bottle
A little mist of water or steam can work wonders for pressing. When you lightly spritz your fabric, it helps the fibers relax and flatten out. This is especially helpful for stubborn seams. Some quilters swear by a spray bottle, while others use the steam from their iron. Either way, moisture helps make pressing much easier and more effective.
Pressing Cloths
A pressing cloth might seem small, but it’s essential, especially if you’re working with delicate fabrics. When you press, you’re applying a lot of heat, and a pressing cloth protects your fabric from damage. It also prevents that dreaded shine or gloss that can ruin your quilt. It’s a simple step, but it can save you a lot of frustration, particularly with more fragile fabrics.
Additional Tools
Once you’ve got the basics, there are a couple of extra tools that can really elevate your pressing game.
Tailor’s Clapper
A tailor’s clapper sounds fancy, but trust me, it’s worth it. After pressing a seam, you give it a quick “whack” with the clapper. This helps set the seam flat and gives it a crisp, clean finish. It’s like a secret weapon for anyone looking to get perfect seams every time.
Quilting Ruler
A quilting ruler is perfect for keeping your seams straight while pressing. You can use it to check the width of your seam allowances and make sure everything’s lined up properly. It’s super helpful when pressing more complicated blocks that require a little extra precision.
Why Pressing Before Cutting Matters?
You might be wondering, “Do I really need to press before I cut? I’ll press it later!” And while you will press again as you go, pressing before cutting ensures your lines are sharp and accurate from the start.
If you skip this step, you could end up cutting along wrinkled or bumpy sections, and that can throw off the size and shape of your quilt pieces. By pressing beforehand, you get crisp, precise lines—making sure your blocks fit together just right when you sew them.
In short, pressing before cutting might seem like an extra step, but it’s a simple trick that’ll make your quilt come together perfectly. Trust me, it’s worth it—don’t skip this step!
How to Press Fabric Before Cutting?
Preparing Your Fabric
Before you start cutting, make sure your fabric is ready to go. A simple way to do this is to give it a little steam or a spritz of water. If you’re using a steam iron, just lightly press the fabric, letting the steam work its magic to relax the fibers.
You can also use a spray bottle filled with water—spray your fabric lightly, then press it with your iron. This helps smooth out wrinkles, so your fabric is ready for those clean, sharp cuts.
Pressing Fabric Flat
Once you’ve added a bit of moisture, it’s time to press your fabric flat. Keep in mind: you’re pressing, not ironing! Use a gentle up-and-down motion with your iron—avoid sliding it back and forth, as that can stretch or distort the fabric. Pressing this way helps set the fibers in place, making it easier to cut those perfect, straight lines. Plus, it’ll prevent stretching the fabric, which could mess with your measurements.
Pressing Seams: Why It’s More Than Just a Step
The Importance of Pressing Seams Closed First
Before you get into pressing your seams to one side or opening them up, there’s one crucial step you don’t want to skip: setting the seam. This just means pressing your freshly sewn seam flat, but without sliding your iron back and forth. It’s like prepping the fabric before you press it into its final position.
Setting the seam helps those fabric fibers settle in place, making it way easier to press them into shape without stretching or distorting the fabric. Think of it like priming your canvas—it gets everything nice and smooth for the next step.
How Pressing Ensures Smoother Blocks and Helps with Matching Seams Later?
Once you’ve set the seam, you can press it either open or to one side, depending on the block you’re working on. But don’t forget, pressing your seams is about more than just flattening them—it’s about making sure everything lines up perfectly when you start piecing your blocks together.
Properly pressed seams help keep things from puckering or twisting, so your quilt blocks fit together just right. Plus, because you’ve already set the seam, the fabric will be way easier to work with when you press it into place.
Pressing Seams to One Side vs Pressing Seams Open
When you’re quilting, how you press your seams can make a huge difference in how your quilt comes together. It’s not just about flattening things out—it’s about making sure your blocks fit together perfectly and look sharp. One of the key decisions quilters face is whether to press seams to one side or press them open. Let’s take a closer look at each method so you can choose what works best for you!
Pressing Seams to One Side
Benefits
Pressing seams to one side is the go-to method for a reason. It makes it much easier to match your seams. By pressing to one side, you create a little “lip” where the seam allowance folds over, which helps everything line up neatly. Plus, this technique gives your quilt blocks more structure, making them feel more solid and stable as you sew everything together.
When to Use
This method is perfect when you’re piecing together multiple blocks or working with bulky areas. The extra seam allowance gives your quilt some added support, helping everything stay in place. It’s especially useful for larger quilts or blocks that need extra strength to hold up through all the piecing.
Challenges
The downside? Pressing seams to one side can add bulk, particularly in areas where there are a lot of layers. If you’re working with thicker fabrics, the seams might start to feel a bit bulky or lumpy. But with a little planning and strategic pressing, you can usually manage the bulk without it affecting the final look of your quilt.
Pressing Seams Open
Benefits
Pressing seams open is all about creating the flattest quilt blocks possible. It’s a great option for intricate designs or when you want to reduce bulk in thicker areas. Pressing open gives your quilt blocks a smooth, polished finish and helps prevent the fabric from bunching up. It also results in more even layers, which is key if you’re aiming for a super-sleek look.
When to Use
This method works best when you’re dealing with bulky fabrics like flannel or denim, or when you’re working with intricate patterns that need to lie completely flat. It’s also a good choice if you’re piecing small blocks or using delicate fabrics that could get distorted by too much bulk.
Drawbacks
While pressing open has its perks, it can weaken the structure of your quilt blocks. Because the seams aren’t reinforced as much as they are when pressed to one side, it can make matching seams a little trickier.
Some quilters also find that pressing open takes a bit more time, especially when working with complex patterns. And, when you’re dealing with heavier fabrics, there’s a chance the fabric may not hold together as securely.
How to Press Open Effectively?
Giving your seams a gentle finger press. Just use your fingers to open up the seams before you go in with the iron. This allows the fabric and threads to relax a bit. Then, use the iron to press the seams flat. This method works best when you take your time and carefully press each seam to ensure that perfect, flat finish!
Pressing to the Dark Side
When you’re quilting, you might hear the term “pressing to the dark side.” Sounds a bit mysterious, right? But really, it’s just a helpful technique where you press your seams toward the darker side of your fabric. Why? Well, dark fabrics tend to hide seam allowances better than light ones, so pressing towards the dark side helps keep your quilt looking neat and polished.
Plus, it minimizes the risk of the seam allowances showing through on the right side of your quilt—especially if you’re working with lighter colors.
Step-by-Step Guide
- Set your seam first: Press the seam flat before pressing it to the dark side. This helps set the fibers in place, making it easier to press without distortion.
- Take your time: Press slowly and carefully to ensure neat and consistent seams.
- Use the tip of your iron: Gently press the seam into place with the tip of your iron, making sure the fabric lays flat.
- Be patient: A little patience goes a long way! This technique is all about achieving clean, crisp seams that make your quilt look polished and professional.
Pressing Blocks: Step-by-Step Guide
- Use the Webbing Technique: Pressing all your seams in one go without cutting your threads between blocks. This keeps everything aligned and prevents your seams from shifting, saving you time and frustration.
- Finger-Press the Seams First: Before you bring in the iron, give each seam a quick finger press. This helps the fabric settle into place and ensures your seams are flat and ready for the final press.
- Press After Chain-Piecing: Once all your blocks are chain-pieced, pressing is a must! It ensures everything is straight and aligned, helping to get rid of any puckering or bumps.
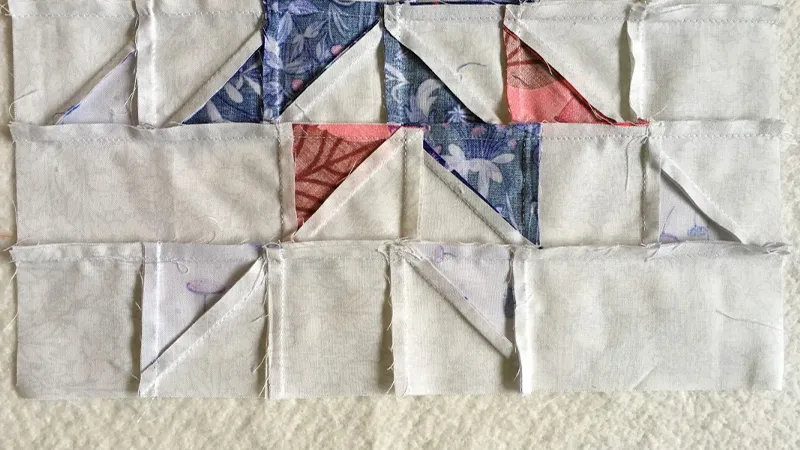
- Nest Your Seams: For smoother, cleaner seams, press them in opposite directions to “nest” them. This helps the blocks line up perfectly when you sew, giving your quilt a much more polished, professional look.
- Take Your Time: Patience is key! Pressing properly is what makes your quilt shine. So, take your time and make sure each seam lays nice and flat for a crisp, finished result.
Advanced Pressing Techniques: For Flatter Blocks
Spinning Seams for Flatter Quilts
This means rotating the seam allowances in opposite directions so they nest into each other. By spinning the seams, you’ll eliminate a lot of the bulk, helping your blocks lie flatter and fit together more neatly. This technique is especially helpful when working with intricate designs or blocks with lots of seams meeting at one point.
Use a Tailor’s Clapper for Perfect Quilt Blocks
This simple wooden tool is a game-changer for getting those seams super flat. After pressing your seams with the iron, use the clapper to apply a little extra pressure and hold the seams in place while they cool. This technique helps the fabric “set,” keeping your seams from popping up once you’ve pressed them. The result? Crisp, perfectly aligned blocks—just what you need for a professional-looking quilt!

Troubleshooting Common Pressing Issues
Fabric Stretches
If your fabric stretches while pressing, reduce the heat and steam settings on your iron. Use a pressing cloth to minimize direct contact with the iron.
Wrinkles Don’t Come Out
Stubborn wrinkles may require a higher heat setting or additional steam. Alternatively, lightly mist the fabric with water before pressing.
Scorch Marks
To avoid scorch marks, always test your iron’s heat setting on a scrap piece of fabric before pressing your quilt pieces. Use a pressing cloth to protect delicate fabrics from direct heat.
Conclusion
Pressing your fabric the right way can make all the difference when it comes to quilting! Whether you’re pressing seams to one side, pressing them open, or using advanced techniques like spinning seams or a tailor’s clapper, each method plays a key role in making your blocks look neat and professional. The bottom line: pressing ensures your quilt pieces stay aligned, flat, and crisp.
Don’t rush through it—practice and patience are essential! Take your time with each seam and experiment with different techniques to find what works best for you. The results will be worth it, giving your quilt the precision and polish it deserves. Ready to start your next project? Visit F&A Fabric for top-quality quilting fabrics that will bring your creative vision to life!