Yes, you can learn how to paint velvet fabric and keep it soft! You just need the right materials and a few simple tricks. Use fabric medium, thin out your paint, and always work in light layers.
If you love diy or want to try upcycling, this is a fun way to refresh your space. Maybe you want a bold living room diy project—F&A offers high-quality velvet that makes painting easy and enjoyable for everyone.
Key Takeaways
- Always mix fabric paint with fabric medium to keep velvet soft and flexible.
- Use soft brushes and apply thin, light layers of paint for smooth, even coverage.
- Lightly dampen the velvet before painting to help the paint glide on without crushing the fabric.
- Let each paint layer dry completely and gently brush the fabric to keep the velvet’s texture soft.
- Test your paint mix and technique on a small velvet scrap before starting your main project.
Materials for Painting Velvet
Fabric Paints and Mediums
When you start painting velvet, you want to pick the right paint. Most artists reach for acrylic paints. In fact, a recent survey shows that 62% of artists prefer acrylics for velvet projects. Specialized velvet paints come in second at 28%. Only 10% use other media like oil paints or dyes. Here’s a quick look:
| Material Type | Percentage of Artists Preferring |
|---|---|
| Acrylic Paints | 62% |
| Specialized Velvet Paints | 28% |
| Other Media (oils, dyes) | 10% |
You should always mix your paint with a fabric medium. This keeps the velvet soft and flexible. Fabric medium helps the paint bond to the fibers without making them stiff. You can find fabric mediums at most craft stores. Just follow the instructions on the bottle for the best results.
Tools and Brushes
You don’t need fancy tools to paint velvet. Here’s what you should gather before you start:
- Soft-bristle brushes (for smooth, even strokes)
- A spray bottle filled with water (to dampen the fabric)
- A mixing bowl or palette (for blending paint and medium)
- Gloves and an apron (to protect your hands and clothes)
- Paper towels or rags (for quick cleanups)
Soft brushes work best because they glide over the velvet pile. A spray bottle helps you keep the fabric slightly damp, which makes the paint go on smoother.
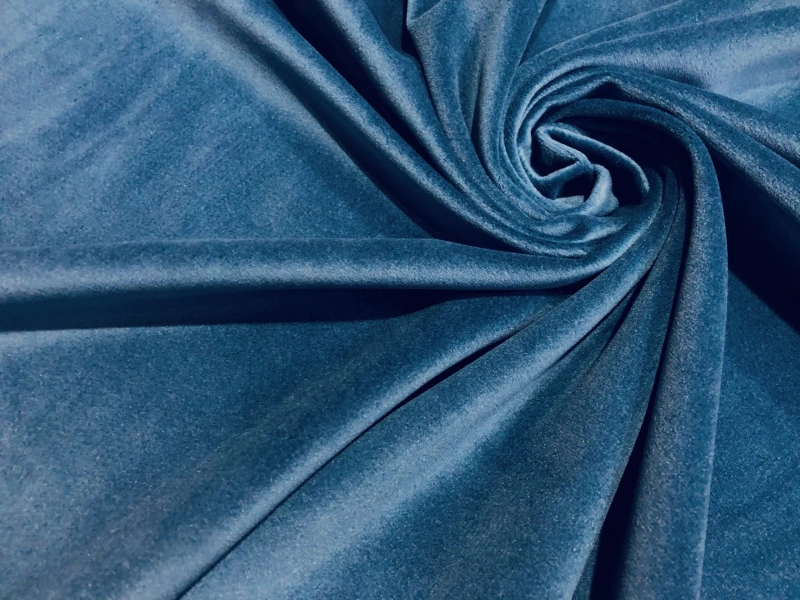
Choosing F&A Velvet Fabrics
If you want your painted project to look and feel amazing, start with high-quality velvet. F&A velvet fabrics stand out for their smooth texture and durability. You get a fabric that takes paint beautifully and stays soft after drying.
F&A uses advanced pre-treatment and printing techniques, so their velvets are ready for any DIY project. Whether you’re painting a pillow, a jacket, or a chair, F&A velvet gives you a reliable canvas for your creativity.
Tip: Always test your paint and medium on a small piece of F&A velvet before starting your main project. This helps you see how the colors look and feel once dry.
How to Paint Velvet Fabric?
Prep and Clean
Start your project by making sure your velvet is clean and ready. Dust, lint, or stains can mess up your paint job. First, vacuum the fabric with a soft brush attachment. This gently removes dirt without harming the fibers. If you spot any stains, blot them with a mild detergent solution.
Never rub, or you might push the stain deeper. For wrinkles, use a fabric steamer. Hold it a few inches away and avoid too much heat. If your velvet is really dirty, use a velvet-safe cleaner on small sections and let it air dry. After drying, brush the fabric in the direction of the pile to bring back its softness and shine.
Before you start painting, wash and dry the fabric to prevent shrinking later. Some crafters like to secure the velvet to a sturdy board with fabric glue. This keeps the fabric stable while you work. Rotate the fabric until the nap looks dark and rich. This helps you see the texture and makes painting easier.
Mix Paint and Medium
Now it’s time to mix the paint. This step is key if you want to keep your velvet soft. Most artists use a 1:1 ratio of fabric medium to acrylic paint as a starting point. This means you add equal parts of each.
If you want a softer finish, add a little more fabric medium. The goal is to get a honey-like consistency. If the mixture feels too thick, add a splash of water, but don’t overdo it. Too much water can make the paint bleed.
Mix the paint and medium in a bowl or on a palette. Stir until the color looks even and smooth. Always test your mixture on a scrap of velvet before you start your main project.
This helps you see how the paint feels and dries. Adjust the ratio if you need to. Using the right mix of paint and medium helps the color stick to the fabric and keeps it flexible. If you skip this step or use too little medium, the paint can dry stiff and rough.
Dampen the Fabric
Before you apply any paint, lightly mist the velvet with water. Use a spray bottle for this step. You want the fabric to feel just a bit damp, not soaked. This helps the paint glide on smoothly and blend better.
It also keeps the velvet pile from getting crushed. If the fabric is too wet, the paint might bleed or spread too much. So, spray lightly and check with your hand.
Apply Thin Layers
When you’re ready to paint, remember to use thin, diluted layers. Dip your soft brush into the paint mixture and gently brush it onto the velvet. Don’t press too hard.
Let the brush glide over the surface. Start with a light coat and let the color build up slowly. If you try to cover everything in one go, the fabric can get stiff and lose its soft feel.
Tip: Always test your paint on a hidden spot or a scrap piece first. This shows you how the color looks and feels once dry.
Let each layer dry before you add the next. This “building up” method gives you more control and keeps the velvet soft. Thin layers also help you avoid streaks and patchy spots. If you want a deeper color, just add more layers, letting each one dry in between.
Dry and Sand Between Coats
After you apply the first layer, let it dry completely. You can speed things up with a fan, but don’t use direct heat. Once dry, gently brush the fabric with a soft brush or even a fine-grit sanding sponge. This step fluffs up the pile and keeps the surface smooth. It also helps the next layer stick better.
Repeat the process: dampen, paint, dry, and brush or sand. Keep your layers thin and even. This method protects the velvet’s texture and helps the paint last longer. If you notice any stiffness, try adding more fabric medium to your paint mix for the next layer.
Learning how to paint velvet fabric takes a little patience, but the results are worth it. Using the right materials and techniques—like cleaning, mixing, and layering—helps you keep your velvet soft and beautiful.
Always test your process on a small area first. This way, you can adjust your approach and get the best results for your project.
How to Paint a Velvet Sofa or Chair?
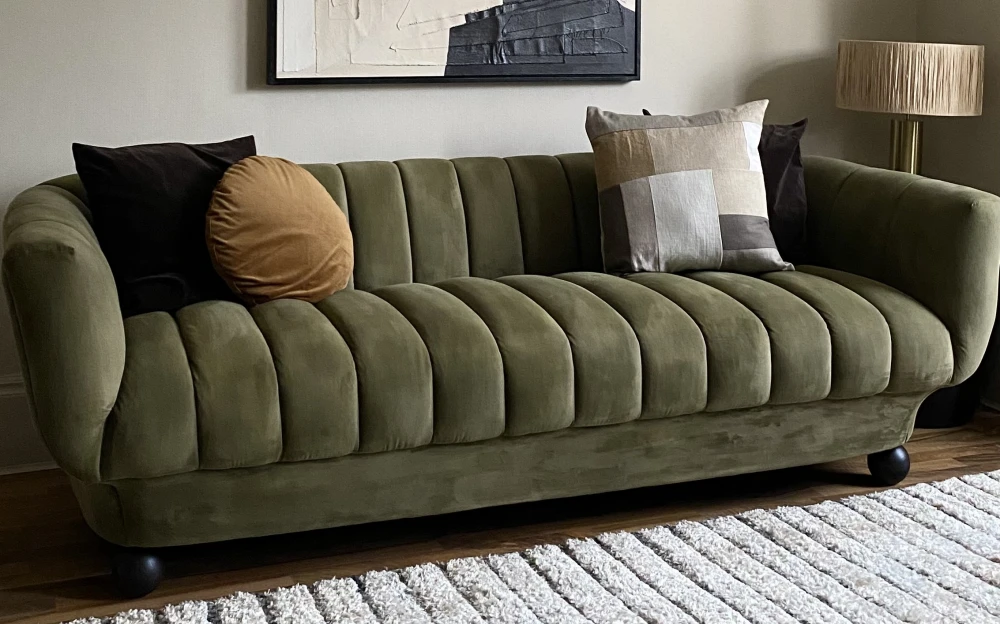
Painting a velvet sofa or chair can transform your living space and give old furniture a fresh, custom look. If you want to know how to paint a velvet sofa or paint a velvet chair, you’ll find the process simple with the right steps.
Let’s walk through the key parts of painting upholstery fabric so your upcycled armchair looks and feels amazing.
Protect Non-Fabric Areas
Before you start, protect the parts of your furniture that you don’t want to paint. Use painter’s tape to cover wood or metal legs, arms, and any trim. Lay down a drop cloth under your sofa or chair to catch drips.
If your upcycled armchair has buttons or decorative studs, cover them with tape or plastic wrap. This step keeps your workspace tidy and your results neat.
Tip: Take a photo of your black velvet chair before you begin. This helps you remember the original look and spot any missed spots later.
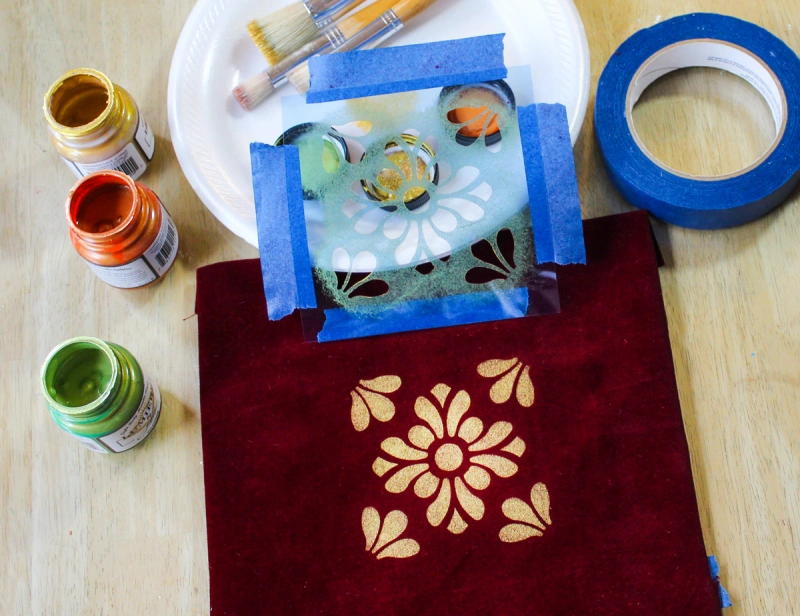
Use Stencils for Design
Want to add a unique touch? Stencils make it easy to create patterns or shapes on your velvet. Secure the stencil flat against the fabric. Use a small sponge or brush to dab paint gently over the stencil. Don’t overload your brush—thin layers work best for velour upholstery.
Let each color dry before moving the stencil to a new spot. You can repeat this process to create a bold design or a subtle accent. Stenciling works great on both sofas and chairs, especially if you want to paint velour upholstery with crisp, clean lines.
Heat-Set for Durability
After you finish painting, you need to heat-set the paint for long-lasting results. Use a hair dryer on a low setting or a clothes iron (with a pressing cloth between the iron and fabric). Move the heat source slowly over the painted areas. This step bonds the paint to the fibers and helps prevent cracking or peeling.
Many crafters use the “test wash” method to check durability. Wash the fabric as you normally would, then inspect for fading or peeling. If the paint stays put, you know the heat-setting worked. This method is the gold standard for making sure your painted velour upholstery stands up to daily use.
F&A’s upholstery-grade velvet is a smart choice for these projects. Recent studies show that high-quality velvet, like the ChiChi fabric, scores 30,000 rubs on the Martindale test and passes strict fire safety standards.
It also has strong tensile strength, making it perfect for painted furniture that gets lots of use. When you paint velour upholstery with F&A fabric, you get beauty, comfort, and durability all in one.
Note: Always let your upcycled armchair dry completely before using it. This helps the paint cure and keeps the fabric soft.
Troubleshooting and Tips
Painting velvet can feel tricky, but you can handle most problems with a few smart moves. Let’s look at the most common issues and how you can fix them.
Preventing Stiffness
You want your velvet to stay soft, not stiff like cardboard. Many crafters say stiffness happens when you use too much paint or skip the fabric medium. Try mixing your paint and fabric medium in equal parts. Some people even recommend using GAC fabric mediums for extra softness and washability.
If you notice the fabric feels rough after painting, you can gently brush it with a soft brush once it dries. Avoid sanding between velvet coats, since this can damage the pile and cause tearing.
Some DIYers have found that chalk-style paint gives a softer finish, but always test first. If your fabric has a protective coating, like Scotchgard, break it down with a gentle cleaner before painting. This helps the paint stick and keeps the texture nice.
Adjusting Paint Mixture
Getting the right paint mix is key for even color and a smooth feel. If your paint looks streaky or patchy, you might need to thin it out with a bit more fabric medium or water. Always aim for a honey-like consistency. Thick paint can crack or make the fabric stiff.
If you see paint bleeding or spreading, try applying a light coat of clear gesso before painting. This helps control the paint and keeps your lines sharp. Remember, thin layers work best.
Build up the color slowly, letting each layer dry before adding the next. This method works great for upcycling pieces like a vintage chair or an upcycled armchair.
Tip: Handle your velvet gently during painting and drying. This keeps the pile soft and prevents damage.
Testing and Curing
Before you dive into your main project, always test your paint mixture on a scrap of velvet. This lets you see how the color dries and feels. If you spot any problems, you can tweak your mix before painting the real thing.
After painting, let your fabric cure for at least 48 hours. This helps the paint bond to the fibers and keeps the finish durable. If you’re painting furniture, wait until it’s fully dry before using it. Patience pays off—your upcycling project will look better and last longer.
Note: A survey by the Craft & Hobby Association found that 62% of artists struggle with texture and even coverage when painting velvet. Using thin layers, the right paint, and gentle handling can help you avoid these common pitfalls.
Conclusion
You now know how to paint velvet and keep it soft. Start with clean fabric, mix your paint with fabric medium, and always use thin layers. F&A’s high-quality velvet makes your project easier and more fun.
Want to show off your results or have a question? Drop a comment below! Try F&A fabrics for your next DIY adventure—you’ll love the results. 🎨✨
FAQ
Can I wash velvet after painting it?
You can hand-wash painted velvet gently with cold water. Avoid harsh scrubbing. Let it air dry. Always test a small area first to make sure the paint stays put.
What kind of paint works best on velvet?
Fabric paint mixed with fabric medium works best. Acrylic paint also works if you add fabric medium. This keeps the velvet soft and flexible.
How do I keep the velvet from getting stiff?
Always use fabric medium and apply thin layers. Let each layer dry before adding the next. Brush the fabric gently after drying to keep the pile soft.
Can I use spray paint on velvet?
Spray paint is not a good choice for velvet. It can make the fabric stiff and uneven. Stick with fabric paint and a soft brush for the best results.