Making patchwork fabric from scraps feels both easy and rewarding. You get to transform leftover pieces into something fresh and beautiful. If you’ve ever wondered how to make patchwork fabric from scraps, you’ll love the creative freedom this process offers.
Using your own scraps or high-quality fabrics from F&A can make your patchwork stand out. You help the planet, too, by reusing materials. Try different colors and patterns—how to make patchwork fabric from scraps lets you express your style in every stitch.
Key Takeaways
- Finish by reinforcing seams, trimming edges, and adding interfacing if needed to make your patchwork durable and ready for projects.
- Gather essential tools like sharp scissors, a sewing machine, pins, and an iron to make patchwork easier and neater.
- Sort and press your fabric scraps before sewing to keep pieces organized and seams smooth for a polished look.
- Trim scraps into even shapes and sizes to help your patchwork fit together perfectly and reduce waste.
- Arrange your scraps creatively, then sew with a ¼-inch seam allowance and press seams flat for strong, neat fabric.
Materials for Patchwork
Essential Tools
Before you dive into your patchwork project, you’ll want to gather a few must-have tools. These make the process smoother and help you get professional-looking results. Here’s a handy checklist:
- Sharp fabric scissors or a rotary cutter for clean cuts
- Cutting mat to protect your work surface
- Quilting ruler for straight, accurate lines
- Sewing machine (or a needle for hand sewing)
- Pins and clips to hold pieces together
- An iron and an ironing board for pressing seams
- Seam ripper for quick fixes
- A measuring tape for checking sizes
- Marking tools like tailor’s chalk or washable markers
Tip: Good tools make a big difference! Research shows that using the right sewing tools and practicing with them can boost your skills and make your patchwork projects come together more easily. Keeping your tools in top shape also helps prevent fabric damage and ensures neat, durable seams.
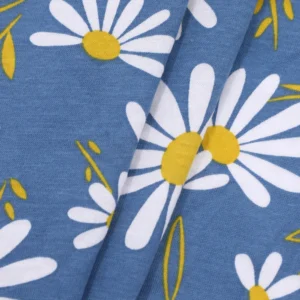
If you want to take your patchwork to the next level, consider using high-quality fabrics from F&A. Their fabrics feature vibrant colors, intricate designs, and a tight weave, which means less fraying and longer-lasting results.
Choosing Fabric Scraps
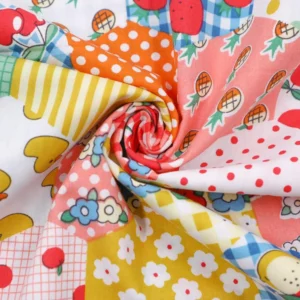
Now comes the fun part—picking your fabric scraps! You can use anything from leftover sewing scraps to offcuts from other projects. Mixing different colors, textures, and shapes adds personality and charm to your patchwork. Many crafters love using cotton, linen, or even denim for a unique look.
- Embrace a mix of fabric scraps for a one-of-a-kind design.
- Try combining squares, strips, triangles, and odd shapes for eye-catching patterns.
- Using fabric scraps is eco-friendly and helps reduce textile waste.
- Carefully chosen scraps can turn into quilts, cushions, bags, or gifts that feel personal and meaningful.
Medium-weight or lightweight fabric scraps work best. They’re easier to sew and press, and they help your finished fabric lay flat. High-quality fabric, like F&A’s, holds up well to sewing and washing, so your patchwork stays beautiful for years.
Prepare Fabric Scraps
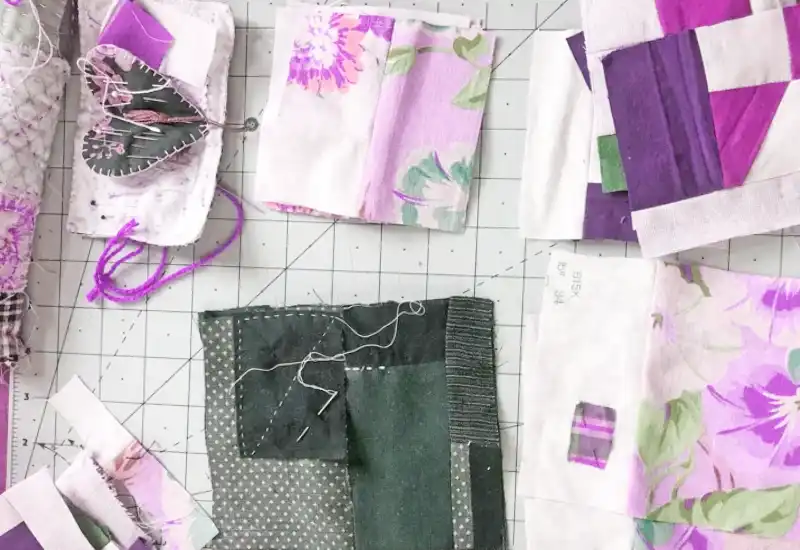
Sort and Press
Before you start sewing, take a little time to sort your fabric scraps. This step makes everything easier later on. You can group your scraps by color, size, or fabric type. Some people like to sort by pattern or texture, too.
Sorting helps you see what you have and plan your patchwork design. It also makes it easier to find matching pieces when you need them.
A study in Kumasi showed that sorting fabric scraps by type, size, shape, and color made it possible to use more material and create better-looking patchwork. When you sort, you can spot the best pieces for your project and avoid wasting time searching for the right scrap. Sorting also helps you create a design with balance and harmony.
Once you’ve sorted your scraps, grab your iron. Pressing each piece smooths out wrinkles and makes the fabric easier to handle. Pressed scraps lay flat, which means your seams will line up better and your finished patchwork will look more polished.
Even tiny fabric scraps benefit from a quick press. If you have a lot of small or oddly shaped pieces, pressing them now saves you trouble later.
Tip: Press your scraps on the wrong side to avoid shiny marks on the fabric.
Trim and Match Sizes
Now it’s time to trim your fabric scraps. Use a rotary cutter, ruler, and cutting mat for the best results. Precision cutting helps each piece fit together neatly. When your scraps are all the same size, sewing becomes much easier, and your patchwork lines up perfectly.
- Cut your scraps into squares, rectangles, or strips.
- Trim away frayed edges or uneven sides.
- Group similar sizes together for quick assembly.
Arranging and trimming your tiny fabric scraps before sewing lets you see how your design will look. This step also reduces waste and helps you use every bit of material. Clean, even pieces make your patchwork stronger and more attractive.
Remember: Careful preparation now means less frustration and a better-looking finished project later!
Arrange and Sew Scraps

Layout for Patchwork
Now comes the creative part—laying out your patchwork. You get to decide how your fabric scraps come together. Some people love a neat, organized look with repeating patterns. Others prefer a more random, playful style. Both ways work, so trust your eye and have fun with it.
Here’s a simple process to help you plan your patchwork design:
- Spread your fabric scraps on a flat surface, like a table or the floor.
- Group pieces by color, pattern, or size. This makes it easier to spot what works well together.
- Arrange the scraps into rows or blocks. Try different combinations until you find a look you love.
- Mix in irregular shaped scraps for extra personality. These pieces can break up straight lines and add movement.
- Step back and look at your layout from a distance. Sometimes a new angle helps you spot the perfect arrangement.
Tip: Take a quick photo of your layout before you start sewing. This way, you can remember your favorite arrangement if pieces get moved around.
You can follow a classic grid, create stripes, or go for a totally freestyle look. There’s no wrong way to arrange your patchwork. The key is to experiment and enjoy the process.
Sewing Techniques
Once you’re happy with your layout, it’s time to sew the pieces together. Start by joining two scraps, right sides facing each other. Use pins or clips to hold them in place. For most patchwork, a ¼-inch seam allowance works best. This size gives you enough fabric for strong seams without adding bulk.
Many quilting experts recommend a scant ¼-inch seam allowance. This means you sew just a hair under ¼ inch. It helps your finished patchwork fit together perfectly, especially after pressing the seams. You can use a special presser foot or a seam guide to keep your stitching straight and even.
Here’s a quick checklist for neat, durable seams:
- Sew straight lines and backstitch at the start and end to lock your stitches.
- Press each seam flat after sewing. This step keeps your patchwork smooth and helps the pieces line up.
- Use a ruler and rotary cutter to trim edges as you go. Straight edges make it easier to join rows or blocks.
- For extra strength, finish raw edges with a zigzag stitch or serger if you have one.
| Technique | Benefit | When to Use |
|---|---|---|
| ¼-inch seam allowance | Precise, easy-to-match seams | Most patchwork projects |
| Scant ¼-inch seam | Compensates for fabric fold when pressing | Quilts, detailed patchwork |
| Zigzag/serger finish | Prevents fraying | Lightweight or fray-prone fabrics |
| Pressing seams | Keeps fabric flat and neat | After every seam |
Some crafters use ultrasonic welding for patchwork, especially with synthetic fabrics. This method fuses pieces together without thread, creating strong, waterproof seams. It’s fast and eco-friendly, but most home sewists stick with traditional sewing for cotton and linen scraps.
Turn Scraps Into Usable Fabric
You might wonder how to make patchwork fabric from scraps when you have lots of small or irregularly shaped scraps. Here’s where a little extra help comes in. Fusible interfacing can turn even the tiniest pieces into a sturdy, usable fabric.
To use fusible interfacing:
- Arrange your scraps on a piece of interfacing, overlapping edges slightly.
- Place a pressing cloth on top and use a hot iron to fuse the scraps in place.
- Once fused, sew along the edges of each scrap to secure them. This step keeps everything together, even after washing.
- Trim the finished patchwork to square up the edges.
This method works especially well for irregular-shaped scraps that don’t fit neatly into rows or blocks. You can create a mosaic effect, blending colors and shapes for a one-of-a-kind look. When you turn scraps into usable fabric, you open up endless possibilities for new projects.
Note: Always check the care instructions for your interfacing and fabric. Some types need a lower iron temperature.
If you want to know how to make patchwork fabric from scraps that lasts, focus on seam strength and stability. Press seams flat, trim edges, and stabilize with interfacing if needed. Your finished patchwork will look neat and hold up to everyday use.
Finish Patchwork Fabric
Reinforce Seams
You want your patchwork to last, so reinforcing the seams is a smart move. When you sew each piece together, go over the seams again with a second line of stitching or use a zigzag stitch along the raw edges.
This extra step keeps the fabric from fraying and helps your patchwork hold up to lots of use and washing. If you want to get fancy, try a French seam for a super neat finish.
Even centuries-old patchwork, like the Impruneta Cushion, stayed strong because the seams were reinforced. Taking time here means your project will look great for years.
Trim Edges
After you finish sewing all your pieces, you’ll notice some uneven edges. Grab your rotary cutter and ruler to trim the sides so everything lines up. Straight edges make your patchwork easier to use in other projects, like quilts or bags.
If you want a really polished look, add a border around your patchwork. Use a precise seam allowance and press the seams flat. This frames your design and gives it a crisp, professional edge.
Tip: Always press your patchwork after trimming. A hot iron smooths out seams and helps the fabric lay flat.
Stabilize if Needed
Sometimes your patchwork needs a little extra support, especially if you used lots of small or stretchy pieces. You can add a layer of fusible interfacing to the back. Just follow the instructions and use a pressing cloth to avoid scorching.
For bigger projects, like quilts, layer your patchwork with batting and a backing fabric. Baste the layers together, then quilt them by hand or machine. This not only adds texture but also keeps everything in place.
| Step | Why It Matters |
|---|---|
| Reinforce seams | Increases durability |
| Trim edges | Creates a neat, usable fabric |
| Stabilize layers | Adds structure and prevents shifting |
When you finish, give your patchwork one last press. This final touch makes the colors pop and gives your fabric a professional look. Choosing quality materials, like natural fibers or F&A’s high-quality fabrics, also helps your finished project stand out.

Use Your Patchwork Fabric
Project Ideas
You have a beautiful piece of patchwork fabric—now what? There are so many ways to use it! People have made patchwork quilts for centuries, adding warmth and style to their homes. Today, you can use your patchwork in both classic and modern projects. Here are some ideas to get you started:
- Make a cozy scrappy quilt for your bed or couch.
- Sew a tote bag or zipper pouch with your new fabric.
- Create cushion covers or wall hangings to brighten up your space.
- Try patchwork jackets, skirts, or even hats for a bold fashion statement.
- Craft scrap fabric flowers for brooches, hair clips, or gifts toppers.
Modern patchwork quilts often use digital printing and eco-friendly materials, so you can mix tradition with innovation. Artists now explore styles like art quilts and improvisational piecing, pushing patchwork beyond the basics.
Tip: Patchwork fabric works great for visible mending. Cover holes in jeans or jackets with colorful patches for a fun, sustainable fix.
Tips and Troubleshooting
Patchwork projects sometimes bring challenges, but you can solve most problems with a few simple steps.
- If your machine skips stitches, change the needle and rethread everything.
- For thread bunching, check if it happens above or below the fabric. Adjust the top or bobbin tension as needed.
- Clean your sewing machine and oil it regularly to keep it running smoothly.
- Always test your stitches on a scrap before working on your main project.
- Choose the right stabilizer and thread for your fabric to avoid puckering or stretching.
| Problem | Quick Fix |
|---|---|
| Skipped stitches | Change needle, rethread, adjust tension |
| Thread bunching | Adjust the tension, check the bobbin |
| Uneven seams | Use a ruler, press seams flat |
Note: Manufacturer tips and regular maintenance help you avoid most sewing issues.
Fabric Scraps and Offcuts Inspiration
You can turn even the smallest fabric scraps and off-cuts into something amazing. Tutorials show how to arrange scraps on fusible interfacing, press them with an iron, and sew the joins to create new fabric. This method lets you make quilt blocks, bag panels, appliqué shapes, and more. Some crafters use this technique for soft toys, doll clothes, or even jacket panels.
A custom pixelation quilt project shows how you can cut hundreds of tiny squares from scraps, arrange them by color, and use interfacing to keep the layout in place. This process turns leftover pieces into a work of art. Patchwork quilts celebrate creativity and sustainability, letting you reuse materials in fresh ways.
F&A supports this creative spirit by offering high-quality, eco-friendly fabrics. Their commitment to sustainability and innovation inspires you to try new techniques and make every patchwork project unique.
Conclusion
You now know how to make patchwork fabric from scraps. Gather, prepare, arrange, sew, and finish—each step brings you closer to a unique creation. Many quilters say patchwork turns scraps into something beautiful and meaningful.
You help the planet and join a creative community. Try new layouts or fabrics, like those from F&A, and see what you can make. Got questions or want to share your patchwork project? Drop a comment below!
FAQ
What types of fabric scraps work best for patchwork?
Cotton and linen scraps work great. You can also use lightweight denim or blends. Try to avoid thick or stretchy fabrics. These can be hard to sew and may not lay flat.
Can I sew patchwork by hand instead of using a machine?
Yes, you can! Hand sewing gives you more control over small pieces. Use a simple running stitch or backstitch. Take your time and enjoy the process.
How do I keep my patchwork fabric from fraying?
Press your seams flat and use a zigzag stitch along the raw edges. You can also add fusible interfacing to the back for extra stability.
Should I wash my fabric scraps before sewing?
You should wash and dry your scraps first. This helps prevent shrinking or color bleeding later. Press the fabric after washing for smooth, easy sewing.
Do I need to use interfacing for all patchwork projects?
No, you don’t need interfacing for every project. Use it if your scraps are thin, stretchy, or very small. Interfacing adds strength and helps your patchwork hold its shape.