Whether you’re a seasoned quilter or a beginner looking to embark on a new crafting adventure, this article is your go-to resource for mastering the timeless art of rag quilting.
How to Make a Rag Quilt With Cotton Fabric?
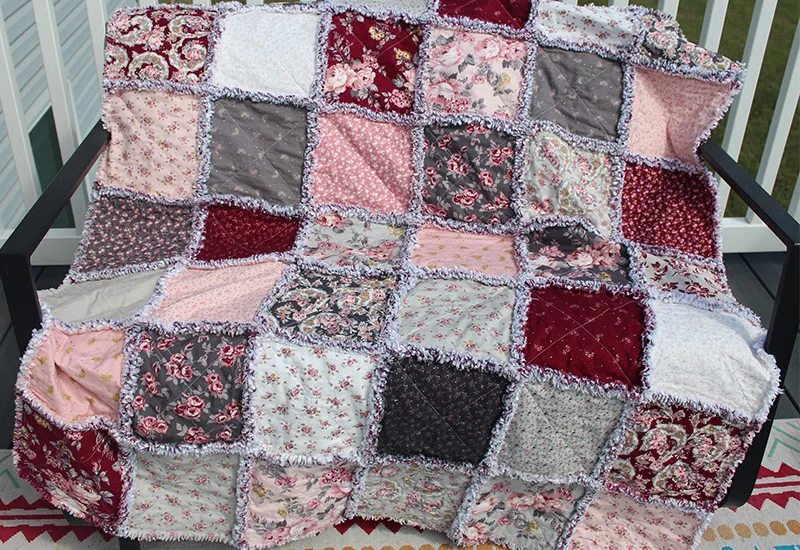
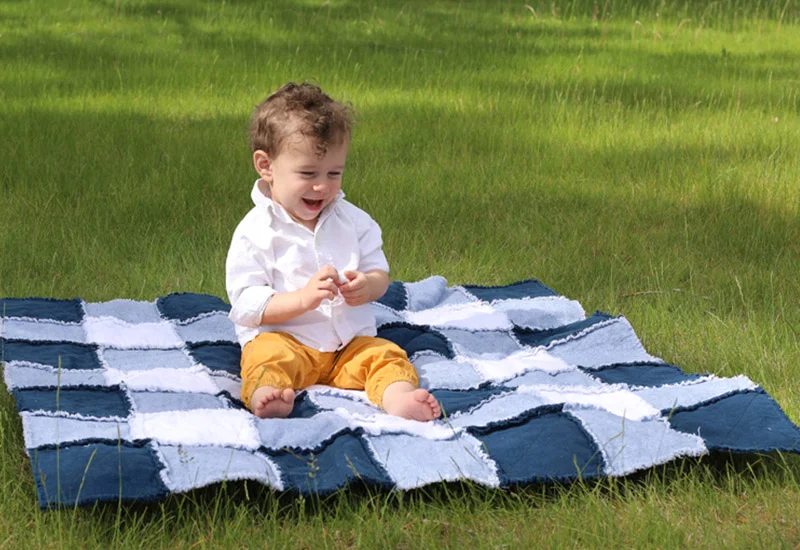
This Simple Tutorial Will Teach You How to Make a Rag Quilt With Cotton Fabric In No Time! A rag quilt is one of the crafter’s favorite things to make.
It’s time to roll up your sleeves and dive into the quilting process! Follow these step-by-step instructions to create your very own rag quilt masterpiece using quilting cotton fabric
So below, we will learn in detail how to make a Rag Quilt With Cotton Fabric step by step
Step 1: Cutting Fabric Squares


Start by cutting your cotton fabric into uniform squares, ensuring precise measurements and straight edges for seamless quilting.
To calculate your yardage for the amount of fabric you’ll need for your quilt, you need to decide what size quilt you want to make and how many fabrics you will use.
This step is the key to How to Make a Rag Quilt With Cotton Fabric and plays a decisive factor in the shaping of the quilt.
Step 2: Creating Quilt Blocks
Assemble your fabric squares into quilt blocks, experimenting with different patterns and arrangements to achieve your desired design.
Step 3: Sewing Quilt Blocks Together
Join your quilt blocks together with sturdy seam allowances, using a durable thread and a reliable sewing machine for professional-quality results.
Step 4: Adding Batting and Backing
Layer your quilt blocks with batting and backing fabric, sandwiching them together to create a cozy and durable quilt sandwich.
Step 5: Quilting and Stitching
Explore various quilting techniques, from simple straight-line stitching to intricate free-motion designs, to add texture and dimension to your rag quilt.
TIP: Make sure that the exposed seams are all facing up so they will be on the same side of the quilt.
Step 6: Clipping and Fraying
Embrace the beauty of rag quilting by clipping and fraying the seam allowances, creating a soft and fluffy texture along the edges of your quilt.
Step 7: Washing and Drying
Give your rag quilt its signature cozy charm by washing and drying it to encourage further fraying and softening of the fabric.
Step 8: Enjoying Your Masterpiece
Wrap yourself in the warmth and comfort of your handmade rag quilt, knowing that every stitch was made with love and creativity.
How Much Fabric Do I Need for a Rag Quilt?
| Quilt Type and Approx Finished Size(size will vary slightly) | Approx Number of 5″ Fabric Squares Required | Approx Number of 6″ Fabric Squares Required | Approx Number of 10″ Fabric Squares Required | |
| Small Size | 32″ x 56″ | 288 squares (9 sq x 16 sq) | 168 squares (7 sq x 12 sq) | not recommended |
| Twin | 70″ x 91″ | 1040 squares (20 sq x 26 sq) | 600 squares (15 sq x 20 sq) | 176 squares (8 sq x 11 sq) approx. 15 yds |
| Full | 84″ x 91″ | 1248 squares (24 sq x 26 sq) | 760 squares (19 sq x 20 sq) | 220 squares (10 sq x 11 sq) approx. 19 yds |
| Queen | 91″ x 95″ | 1404 squares (26 sq x 27 sq) | 840 squares (20 sq x 21 sq) | 242 squares (11 sq x 11 sq) approx. 18-20 yds |
| King | 108″ x 108″ | not recommended | 1152 squares (24sq x 24sq) | 338 squares (13sq x 13sq) approx.26-28 yds |
1 yard = 90 four-inch quilt square 1 yard = 36 six-inch quilt squares
1 yard = 12 ten-inch quilt squares 2 yards = 28 ten-inch quilt squares
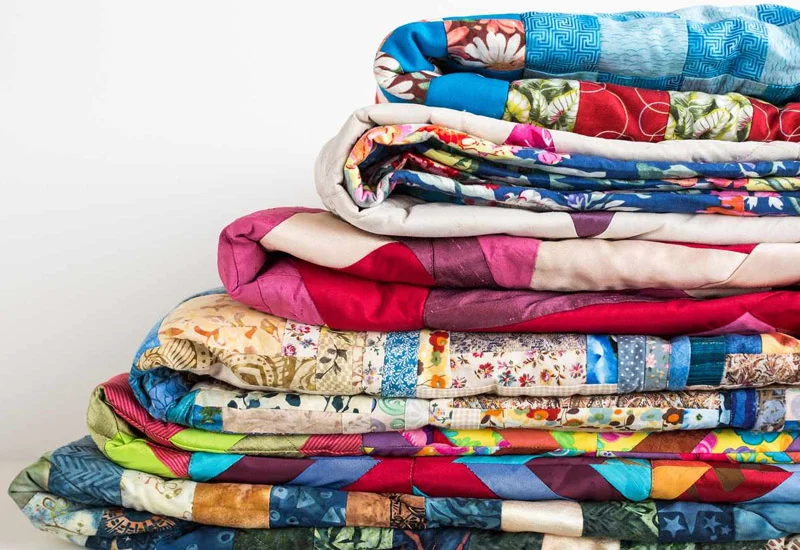
History of Make a Rag Quilt With Cotton Fabric?
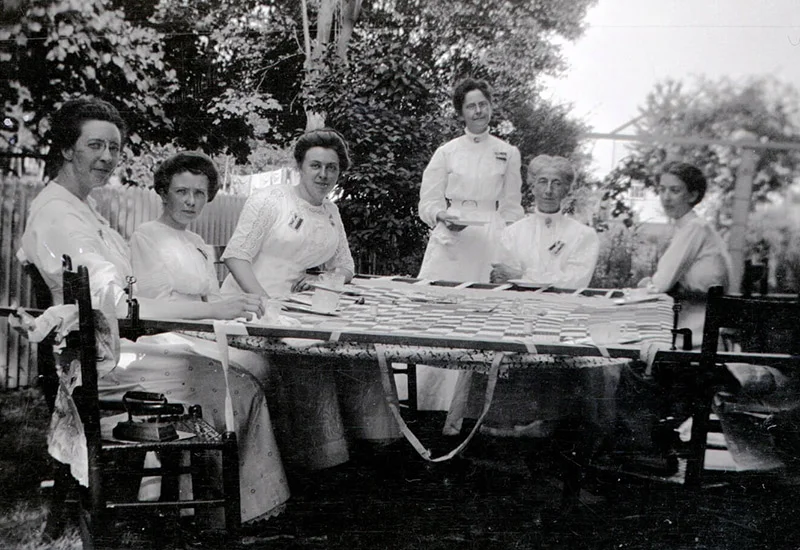
The history of rag quilting is a fascinating journey that dates back to the early days of American settlers. These resourceful pioneers, faced with the challenges of frontier life, ingeniously repurposed worn-out clothing and fabric scraps into warm and functional quilts.
As the years passed, rag quilting evolved from a necessity into an art form. Quilters began to experiment with different fabrics, colors, and patterns, creating unique and personalized designs that reflected their individuality and creativity. Today, rag quilting remains a beloved tradition cherished by quilters of all ages, preserving the rich history and heritage of this timeless craft.
Benefits of Making a Rag Quilt With Cotton Fabric
Making a rag quilt with cotton fabric offers a multitude of benefits, making it a popular choice among quilters of all skill levels. Let’s explore some of the key advantages:
Cozy Comfort :
Cotton fabric is renowned for its softness and breathability, making it an ideal choice for creating quilts that are both cozy and comfortable. When crafted into a rag quilt, cotton fabric provides a warm and inviting feel that is perfect for snuggling up on chilly nights.
Durability :
Cotton is known for its durability and resilience, making it well-suited for quilting projects that are designed to withstand the test of time. Rag quilts made with cotton fabric can endure years of use and washing without losing their shape or quality, making them a practical and long-lasting investment.
Easy Maintenance :
Cotton fabric is relatively easy to care for, making it a low-maintenance option for quilting projects. Rag quilts made with cotton can be machine washed and dried without worrying about shrinkage or damage, allowing for hassle-free maintenance and upkeep.
Versatility :
Cotton fabric comes in a wide range of colors, prints, and patterns, allowing quilters to unleash their creativity and customize their rag quilts to suit their personal style and preferences. Whether you prefer vibrant florals, classic plaids, or modern geometric designs, there’s a cotton fabric to match every aesthetic.
Budget-Friendly :
Cotton fabric is often more affordable than other quilting materials, making it a budget-friendly option for quilters who want to create beautiful and functional rag quilts without breaking the bank. With a wide range of options available at varying price points, cotton fabric allows quilters to stretch their creativity without stretching their budget.
Beginner-Friendly :
Rag quilting is a beginner-friendly quilting technique that is perfect for those who are new to the craft. With its simple construction and forgiving nature, rag quilting allows beginners to hone their sewing skills and create impressive quilts with minimal frustration. Cotton fabric’s ease of handling and versatility make it an excellent choice for novice quilters looking to embark on their quilting journey.
Overall, making a rag quilt with cotton fabric offers a host of benefits, from its cozy comfort and durability to its versatility and affordability. Whether you’re a seasoned quilter or a beginner looking to try your hand at a new craft, cotton fabric rag quilting is sure to delight and inspire.
Make a Rag Quilt With Cotton Fabric How do you choose the right cotton fabric?
Understanding Cotton Fabric Types
Before you start shopping, it’s essential to understand the different types of cotton fabric available. From flannel to muslin, each type offers unique qualities that can impact the look and feel of your quilt.
Factors to Consider When Choosing Cotton Fabric
When selecting cotton fabric for your rag quilt, consider factors such as thread count, weave, and colorfastness. These elements will ensure durability and longevity for your finished masterpiece.
| Aspect | Description |
|---|---|
| Thread Count | Refers to the number of threads per square inch of fabric. Higher thread counts generally indicate finer and more durable fabric. |
| Weave | Describes the pattern in which the threads are woven together. Common weaves include plain, twill, and satin, each offering different textures and appearances. |
| Colorfastness | Indicates the fabric’s ability to retain its color without fading or bleeding when exposed to water, sunlight, or washing. Higher colorfastness ensures long-lasting vibrancy and appearance of the fabric. |
Optimal Fabric Width and Length
Ensure you purchase enough fabric for your project by calculating the optimal width and length required. This prevents running short mid-project and ensures consistency in your quilt’s appearance.
For example, take the baby rag quilt;
Pre-Washing Your Fabric
Pre-washing your cotton fabric is crucial to prevent shrinkage and color bleeding after your quilt is complete. Follow manufacturer instructions for best results and enjoy a worry-free quilting experience.
Cutting and Assembling Your Fabric
With your fabric selected and prepped, it’s time to move on to the cutting and assembling phase.
Cutting Fabric Strips and Blocks
Use a rotary cutter and cutting mat to cut your fabric into strips and blocks of equal size. Precision is key here to ensure seamless assembly and a professional-looking finished product.
Layering Your Quilt
Layer your fabric blocks with batting and backing fabric to create the quilt sandwich. This step adds volume and warmth to your quilt while maintaining its soft, cozy texture.
Securing Layers with Pins or Basting Spray
Before sewing, secure your quilt layers together with pins or basting spray. This prevents shifting during the sewing process and ensures even stitching throughout.
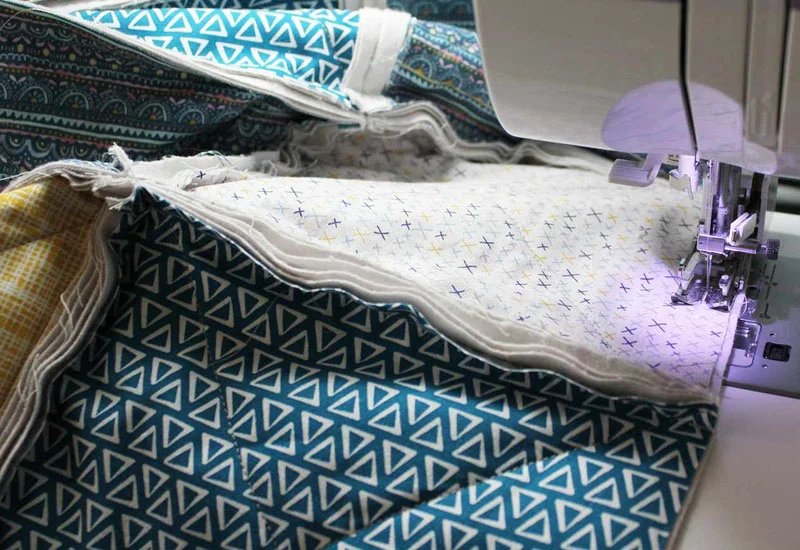
Sewing Your Rag Quilt
Now that your fabric is prepped and layered, it’s time to bring your rag quilt to life with some stitching magic.
Choosing the Right Stitch
Select a durable stitch, such as a simple straight stitch or a secure zigzag stitch, to join your quilt layers. This ensures longevity and stability for your finished quilt.
Sewing Blocks Together
Piece your quilt blocks together with a consistent seam allowance, ensuring smooth transitions between blocks and rows. Take your time to maintain accuracy and precision throughout the sewing process.
Adding Decorative Stitching (Optional)
For added flair, consider incorporating decorative stitching patterns into your quilt design. This personal touch adds character and charm to your finished creation.
Ragging Your Quilt
The final step in creating your rag quilt is to give it that signature frayed edge for a cozy, rustic look.
Snipping Fabric Edges
Using sharp scissors or a ragging tool, carefully snip the edges of your quilt blocks to create frayed seams. Be sure to space your cuts evenly for a uniform fringe effect.
Washing and Drying Your Quilt
After ragging, wash and dry your quilt to further enhance the frayed edges and soften the fabric. This step adds to the cozy charm of your finished rag quilt.
Enjoying Your Cozy Creation
Congratulations! You’ve successfully made a rag quilt with cotton fabric. Curl up with your masterpiece and enjoy the warmth and comfort of your handmade creation.
How to Fold and Store Rag Quilt With Cotton Fabric?
In fact, it is similar to How to Fold Quilting Fabric for Storage
Clean and Dry :
Before folding, ensure your rag quilt is clean and completely dry. Washing and drying it according to the manufacturer’s instructions will remove any dirt or debris and prevent mold or mildew growth during storage.
Flat Folding :
Lay your rag quilt flat on a clean, dry surface, such as a bed or table. Smooth out any wrinkles or creases to ensure the quilt lays flat and evenly.
Fold in Thirds :
Starting from one edge, fold the quilt into thirds lengthwise, bringing one-third of the quilt over the middle third, then fold the remaining third over the top. This creates a long, narrow strip of folded quilt.
Rolling Option :
Alternatively, you can roll the quilt instead of folding it. Starting from one edge, roll the quilt tightly to form a compact cylinder. Rolling can help prevent creases and wrinkles in the fabric.
Storage Containers :
Once folded or rolled, place your rag quilt in a breathable storage container or fabric bag. Avoid using plastic bags or containers, as they can trap moisture and lead to mildew growth.
Avoid Compression :
Store your rag quilt in a cool, dry place away from direct sunlight and moisture. Avoid compressing the quilt under heavy objects or in tightly packed storage spaces, as this can distort the fabric and affect its appearance.
Labeling :
If you have multiple quilts in storage, consider labeling each container or bag with the quilt’s name, size, and date of creation. This makes it easier to locate specific quilts when needed.
Air Circulation :
Periodically check on your stored quilts to ensure they are not being affected by humidity or moisture. Allow for adequate air circulation around the storage containers to prevent mildew growth.
Conclusion
In conclusion, mastering the art of how to make a rag quilt with cotton fabric opens up a world of creativity and warmth. From selecting the perfect fabric to stitching each seam with care, every step in the process contributes to the charm and coziness of the final quilt.
Whether you’re a seasoned quilter or a beginner, the satisfaction of completing a rag quilt with cotton fabric is unparalleled.
龙