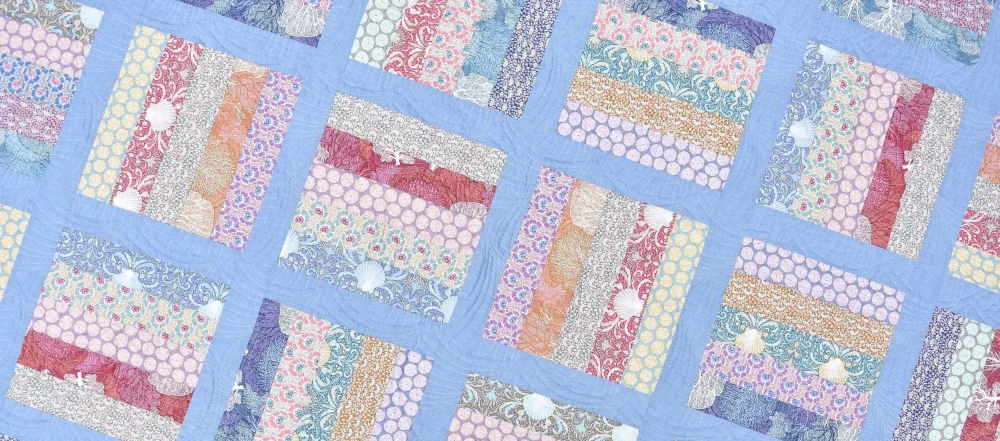
Wondering how to make a jelly roll quilt? You grab Fanda Fabrics Jelly Roll Quilt Fabric and skip the hassle of cutting strips from yardage. When you want to know how to make a jelly roll quilt, open your pack and start arranging your strips. Making a jelly roll quilt feels easy when the fabric is pre-cut and coordinated.
You spend less time prepping and more time sewing, so how to make a jelly roll quilt becomes all about your creativity. If you want to learn how to make a jelly roll quilt without stress, Fanda Fabrics gives you a head start.
Pre-cut strips save you time and effort.
You focus on design instead of cutting.
Ready to try something new? Explore Fanda Fabrics for your next quilt project.
Key Takeaways
Using pre-cut jelly roll strips saves time and effort, allowing you to focus on creativity.
Gather essential tools like a sewing machine, rotary cutter, and quilting ruler before starting your quilt.
Pressing seams is crucial for a neat finish; take your time to ensure accuracy.
Explore different quilt layouts to find a design that suits your style and preferences.
Caring for your quilt properly will help it last longer and stay looking fresh.
Jelly Roll Quilt Materials

Essential Tools
Before you start your jelly roll quilt, gather a few basic tools. You want to make sure you have everything ready so you can focus on the fun part—sewing and designing. Here’s what you’ll need:
Sewing machine (with a 1/4-inch foot if possible)
Rotary cutter and cutting mat
Quilting ruler
Iron and ironing board
Thread (cotton works best)
Pins or clips
Seam ripper (just in case)
These tools help you sew straight seams, press your fabric, and keep your project organized from start to finish.
Fanda Fabrics Jelly Roll Quilt Fabric
The star of your project is the Fanda Fabrics Jelly Roll Quilt Fabric. These pre-cut strips make quilting easy for everyone, whether you’re new or experienced. Each jelly roll includes about 40 strips, each measuring 2.5 inches wide and 44-45 inches long. The strips come in a bundle, rolled up and ready to use.
A Jelly Roll is a collection of fabric pre-cut into strips 2.5″ by about 42″ and rolled into a circle. Typically, 40 strips of fabric contain all the fabrics in one collection.
You get a wide range of colors and prints, so your quilt looks vibrant and coordinated. Fanda Fabrics uses high-quality cotton, which feels soft and lasts a long time. You don’t need to spend hours cutting fabric. Just open the roll and start sewing.
Benefit | Description |
|---|---|
Quick Cutting | Fast, easy cutting speeds up your quilting process. |
Color Variety | Wide range of colors for eye-catching designs. |
Ease of Use | Pre-cut pieces make quilting simple for everyone. |
Using pre-cut strips also helps reduce fabric waste and supports sustainable crafting. Many strips use eco-friendly cotton, so you can feel good about your project.
Optional Supplies
You might want to add a few extras to make your quilting experience even smoother:
Fabric marking pen or chalk
Extra bobbins
Quilting gloves for better grip
Spray starch for crisp seams
Walking foot for your sewing machine
These items aren’t required, but they can help you get a more professional finish and make the process more enjoyable.
How to Make a Jelly Roll Quilt?
Ready to dive into your jelly roll quilt tutorial? You’ll find that making a jelly roll quilt is fun and straightforward, especially with Fanda Fabrics Jelly Rolls Quilting Fabric. Let’s walk through each step together.
Prepare Jelly Roll Strips

Start your jelly roll quilt tutorial by opening your jelly roll and laying out all the jelly roll strips. You’ll see a beautiful mix of colors and patterns. Take a moment to press each strip with a hot, dry iron. This helps remove any wrinkles and sets the fabric for sewing. If you want extra crispness, use a quilting starch like Best Press.
Tip: Handle the jelly roll strips gently while pressing and cutting. This keeps them aligned and prevents fraying.
Common beginner mistakes include using a dull rotary blade or skipping the pressing step. Always use a sharp blade for clean cuts. If you notice any snagging, swap out your blade before you start sewing.
Arrange Quilt Layout
Now comes the creative part of your jelly roll quilt tutorial. Arrange the jelly roll strips in the order you like. You can follow a pattern or go with your instincts. Popular layouts include Hot Cross Buns, Sprinkles on Top, Chatterbox, Kaleidoscope, and Star Crossed. Each pattern gives your quilt a unique look.
Lay out the strips on a flat surface. Move them around until you’re happy with the color flow. Double-check your arrangement before you start sewing. This step helps you avoid surprises later.
Note: If you’re unsure about which pattern to choose, try sewing a few strips together and see how they look. You can always rearrange before committing to the full layout.
Sew Strips Together
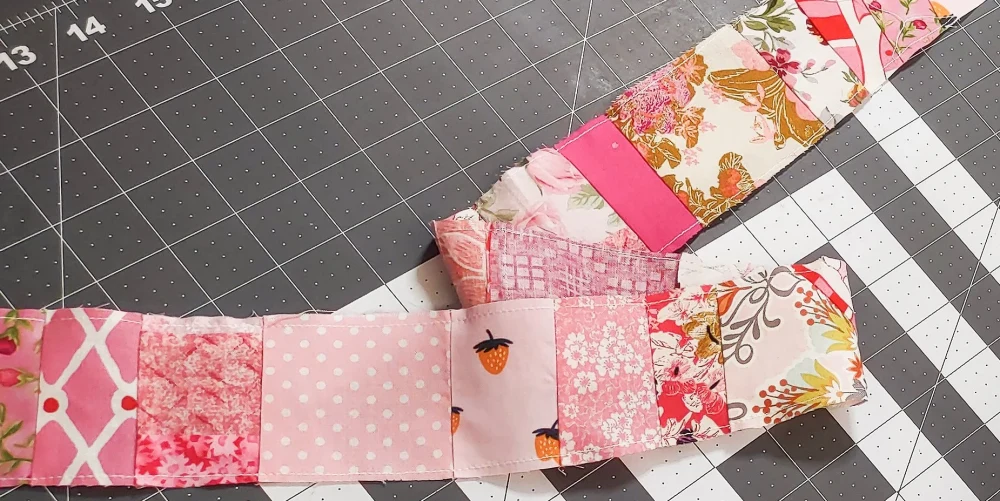
You’re ready to sew! Begin by joining the jelly roll strips end to end. Use a consistent 1/4-inch seam allowance for every seam. This keeps your quilt blocks even and neat. Pin or clip the strips together before sewing to prevent shifting.
Here’s a simple set of instructions for this part of the jelly roll quilt tutorial:
Sew two strips together along the long edge.
Press the seam flat.
Add the next strip, sewing it to the previous one.
Continue until you’ve joined all the strips into one long piece.
Periodically check your seams for alignment. If you spot a misalignment, unpick the stitches, realign the fabric, and sew again. For minor issues, gently stretch or ease the fabric to fit. Adjust your seam allowance if needed.
Troubleshooting: Sewing all pieces in the same direction can cause wavy or puckered fabric. Alternate the direction you sew each strip to keep your quilt flat.
Don’t worry about small imperfections. Quilting often hides tiny flaws, and your finished quilt will look fantastic.
Press Seams
Pressing is key in every jelly roll quilt tutorial. After sewing each seam, press it flat with your iron. You can press seams open to reduce bulk or press to the darker side to avoid visible lines. Some quilters like to use a clapper for extra flat seams.
Give each seam a “warm hug” with your iron before pressing. This helps set the stitches and keeps your quilt top smooth. Pressing seams open also helps avoid dark shadows and improves accuracy.
Tip: Take your time with pressing. Well-pressed seams make sewing the next steps easier and give your quilt a professional finish.
Once you’ve sewn and pressed all the strips, fold the long strip in half, right sides together, and sew along the long edge. Repeat the folding and sewing process until you reach the desired number of rows for your quilt. Press the finished quilt top flat.
You’ve completed the main steps of your jelly roll quilt tutorial! Your quilt top is ready for batting, backing, and finishing touches.
Finish Quilt
Add Batting and Backing

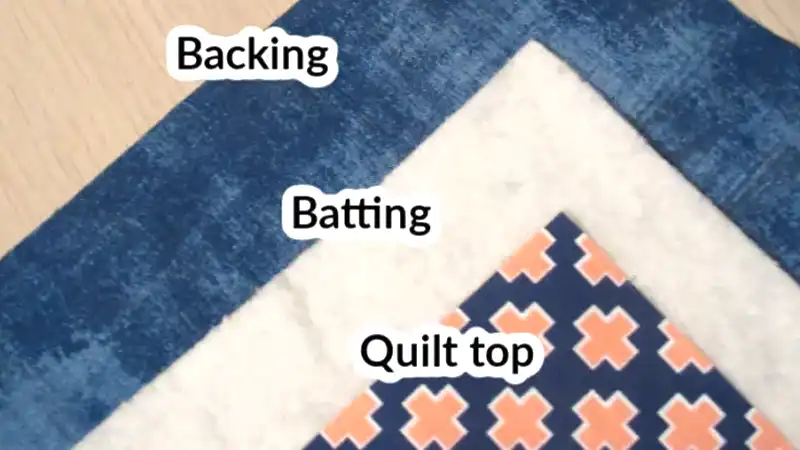
You’re almost done with your jelly roll quilt. Now, you need to add batting and backing. Batting gives your quilt softness and warmth. Many quilters choose Warm-N-Natural cotton batting because it’s high quality and has a right and wrong side. Make sure you layer it correctly for the best results.
For backing, you can get creative. Some people use leftover jelly roll blocks and extra fabric to make an artistic backing. This adds personality and makes your quilt unique. Before layering, spray starch both the quilt top and backing. This helps stabilize the fabric and prevents stretching, distortion, or puckering.
Warm-N-Natural cotton batting is a popular choice.
Artistic backing can use leftover blocks or coordinating fabric.
Heavy spray starching helps keep everything smooth.
Quilting Techniques
When you start quilting, you want neat stitches and smooth seams. Use a sharp needle, like size 80/12, to avoid puckering. Measure each strip to make sure it’s 2 ½” wide. Trim any pinked edges so fuzz doesn’t get into your sewing machine.
Technique | Description |
|---|---|
Needle Type | Use a sharp 80/12 needle to prevent puckering when sewing jelly roll strips. |
Pressing Seams | Press towards the darker fabric or open the seam. A scant ¼” seam reduces bulk. |
Strip Preparation | Measure strips and trim pinked edges for clean sewing. |
You can quilt by hand or machine. Try straight-line quilting for a classic look or free-motion quilting for something bold. If you’re making the quilt for a gift, add a personal touch with decorative stitches.
Bind Edges
Binding finishes your quilt and protects the edges. Double-fold binding works best for durability. Fold a strip in half and sew it around the edge. For rounded corners or extra stretch, use bias grain binding. Both methods give your quilt a professional look.
Binding Method | Description |
|---|---|
Double Fold Binding | Folds a strip of fabric in half, creating a thicker and more durable binding. |
Bias Grain Binding | Cut along the bias for more stretch, suitable for rounded edges, and generally more durable. |
Double-fold binding is preferred for strength.
Bias grain binding is great for curves.
You can use leftover jelly roll strips for binding. This keeps your one-block jelly roll quilt coordinated and colorful.
Care Tips
Your quilt will last longer if you care for it properly. Wash it gently in cold water and use a mild detergent. Air dry or tumble dry on low. Store your quilt flat or rolled to avoid creases. If you see any loose threads, trim them with sharp scissors.
Tip: Always use a color catcher sheet when washing your quilt for the first time. This helps prevent color bleeding and keeps your quilt looking fresh.
Enjoy your finished quilt! You’ve put in the work, and now you have a cozy, handmade treasure.
How to Make a Jelly Roll Rug?
If you love quilting, you’ll enjoy learning how to make a jelly roll rug. This project uses the same Fanda Fabrics jelly rolls you use for quilts, but you turn them into a colorful, cozy rug for your home. The process is simple, and you don’t need many supplies. You can finish your jelly roll rug in a weekend, even if you’re new to sewing.
Materials Needed
To get started, gather these items:
1 Fanda Fabrics jelly roll (about 40-42 strips, 2.5″ x 42″)
1 jelly roll rug pattern you like
2 rolls of pre-cut batting (2.5″ x 25 yards) or 1 roll (2.25″ x 50 yards)
2 medium spools of neutral thread (or 1 large spool)
Binding clips
Sewing machine with a zig-zag stitch
Tip: You don’t need as many materials as you do for a quilt. The jelly roll rug focuses on pre-cut strips and batting, so it’s less complicated and faster to make.
Step-by-Step Process
Wondering how to start a jelly roll rug? Begin by sewing each jelly roll strip to a strip of batting. Fold the fabric around the batting and stitch along the edge. This creates a long, padded strip. Keep going until you finish all your strips.
Next, follow your jelly roll rug pattern to coil the padded strip into an oval or rectangle. Use binding clips to hold the shape. Sew the edges together with a zig-zag stitch as you coil, joining the rows side by side. Take your time and keep the rug flat as you sew.
Note: The jelly roll rug is a great way to use up leftover strips or try new color combinations. You can make rugs for the kitchen, bathroom, or even as a gift.
The jelly roll rug shows how versatile jelly roll quilt fabric can be. You can use it for quilts, rugs, table runners, and more. Since Moda introduced the jelly roll precut, crafters have created endless patterns and projects.
If you want a fun, practical project, try this jelly roll rug tutorial and see what you can make with your favorite Fanda Fabrics jelly rolls.
Conclusion
You can make a jelly roll quilt or rug with ease when you use Fanda Fabrics. The pre-cut strips save you time and let your creativity shine. Many quilters love Fanda Fabrics for their quality and variety. Take a look at what sets them apart:
Feature | Why You’ll Love It |
|---|---|
100% Cotton | Durable, smooth, and easy to sew |
Pre-Cut Options | Quick to start, no cutting needed |
Great Prices | Budget-friendly for every quilter |
Trusted Brand | Over 20 years of quilting expertise |
Try your own project and see how simple and fun quilting can be!
FAQ
How many jelly roll strips do I need for a quilt?
You usually need one standard jelly roll (about 40 strips) for a throw-size quilt. For larger quilts, grab two rolls. Always check your pattern for exact requirements.
Do I need to pre-wash Fanda Fabrics jelly roll strips?
No need to pre-wash! The pre-cut strips from Fanda Fabrics come ready to use. Pre-washing can cause fraying. If you worry about color bleeding, toss a color catcher in with your first wash.
Can I mix jelly roll strips with other fabrics?
Absolutely! You can combine jelly roll strips with charm packs, layer cakes, or your own fabric stash. Mixing fabrics lets you create unique designs and use up leftovers.
What’s the best way to press seams in a jelly roll quilt?
Press each seam after sewing. You can press seams open for less bulk or to one side for speed. Use a hot, dry iron. Spray starch helps keep everything crisp and flat.
Can I use jelly roll strips for quilt binding?
Yes, you can! Jelly roll strips are the perfect width for double-fold binding. Just sew the strips end to end, fold, and attach around your quilt’s edge for a colorful finish.
