Velvet fabric, renowned for its opulent texture and luxurious feel, has long been a staple in fashion and interior design.
However, working with this sumptuous material requires finesse, particularly when it comes to cutting. In this guide, we’ll delve into the intricacies of cutting velvet fabric, from understanding its unique properties to mastering advanced cutting techniques.
Whether you’re working with cut velvet damask fabric, vintage cut velvet upholstery fabric, or any other variety, this guide will equip you with the skills needed to handle cut velvet fabric with confidence and precision.
What is Velvet Fabric?
Velvet fabric is distinctively characterized by its soft pile, which is created by weaving two layers of fabric together and then cutting the loops that form. This process results in a dense, plush surface that reflects light in varying directions, giving velvet its signature shimmer and depth.
Traditionally made from silk, velvet can also be crafted from synthetic fibers such as polyester or blends of natural and synthetic materials. Understanding the composition of velvet is crucial as it can affect how the fabric behaves during cutting and sewing.
Tools and Materials Needed To Cut Velvet Fabric

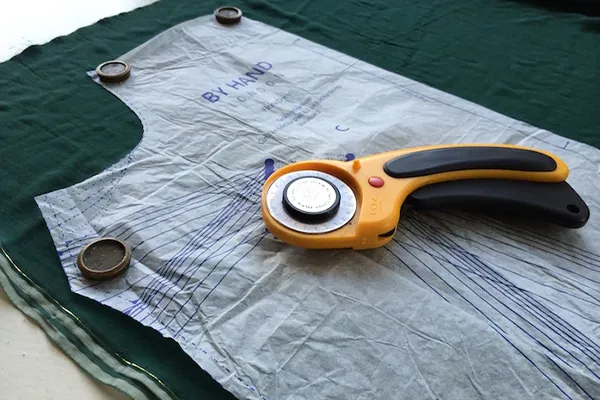
Selecting the appropriate tools is key to achieving clean, precise cuts when working with velvet fabric. Sharp scissors or a rotary cutter with a fresh blade are essential for cutting through the dense pile without causing damage.
Additionally, consider using pattern weights or pins to hold your pattern pieces securely in place while cutting. If you’re working with delicate or intricate patterns, a pair of fine-pointed scissors can be helpful for cutting curves and small details with precision.
To cut velvet fabric, you will need the following tools and materials:
- Sharp rotary cutter or scissors
- Cutting mat
- Pattern pieces
- Tailor’s tacks or pins
- Fabric weights
- Velvet cutting board (optional)
Preparing Your Workspace
Lay your chosen velvet fabric—be it cut velvet stripe fabric or uncut velvet fabric—on a flat, clean surface. Securing it firmly with weights or pins prevents shifting, ensuring accuracy in your cuts.
If necessary, use weights or pins to secure the fabric in place and prevent shifting during cutting. Additionally, make sure your cutting tools are sharp and in good condition, as dull blades can crush the delicate fibers of the velvet and result in uneven cuts.
Preparing The Fabric
Before you start cutting velvet, it is important to prepare the fabric properly. This will help to ensure that you get clean, accurate cuts.
- Lay the fabric out on a flat surface. Make sure that the fabric is smooth and wrinkle-free. If you are using a rotary cutter, you will also want to make sure that the fabric is laying on a cutting mat.
- Place the pattern pieces on the fabric. If you are using pattern pieces, place them on the fabric according to the instructions on the pattern. Make sure that the pattern pieces are aligned with the grain of the fabric.
- Secure the pattern pieces to the fabric. Use tailor’s tacks or pins to secure the pattern pieces to the fabric. This will help to prevent the fabric from shifting while you are cutting.
- Place fabric weights on the pattern pieces. Fabric weights will help to keep the fabric from shifting while you are cutting.
Cutting The Velvet Fabric
Cutting velvet fabric requires a delicate touch and a steady hand to achieve smooth, even edges without crushing the pile. Here are some essential techniques to master:
Use a sharp blade: Dull blades can tear or crush the delicate fibers of the velvet, resulting in jagged edges. Always ensure your cutting tools are sharp and in good condition before starting.
Cut with the nap: Velvet fabric has a directional nap, meaning it appears darker or lighter depending on the angle of the fibers. To maintain consistency in color and texture, always cut with the nap direction, following the natural flow of the pile.
Avoid long, continuous cuts: Instead of making long, sweeping cuts, opt for short, precise strokes with your scissors or rotary cutter. This helps prevent the pile from shifting and ensures clean, even edges.
Secure your fabric: To prevent slipping or shifting while cutting, use pattern weights or pins to hold your fabric securely in place. This will help maintain accuracy and precision throughout the cutting process.
When cutting velvet upholstery fabric by the yard or vintage cut velvet fabric, short, precise strokes are preferable to long, sweeping motions. Always cut with the nap to preserve consistency in texture and appearance.
Finishing The Edges
Once you’ve cut your velvet fabric, take care to finish the edges to prevent fraying and ensure a polished, professional-looking result. Here are some finishing touches to consider:
Seam finishes: Depending on the project, you may choose to finish the raw edges of your velvet fabric with a serger, zigzag stitch, or bias binding to prevent fraying. Consider using French seams for a clean, elegant finish for lightweight velvet fabrics.
Pressing: Use a low-heat setting on your iron to press the cut edges of your velvet fabric gently. Avoid pressing directly on the pile, as this can flatten or crush the fibers. Instead, place a pressing cloth or piece of muslin between the fabric and the iron to protect the pile.
Steam: Steam can be used to remove wrinkles and creases from velvet fabric without flattening the pile. Hang your velvet garment or fabric piece in a steamy bathroom or use a handheld steamer to gently steam the surface, taking care not to saturate the fabric.

Tips For Cutting Velvet Upholstery Fabric
Here are a few additional tips for cutting velvet fabric:
- Cut the fabric with the nap going down. This will help to prevent the nap from being cut and will make the fabric easier to work with.
- Use a velvet cutting board. A velvet cutting board is a special type of cutting board that has a raised surface. This will help to prevent the velvet from being crushed while you are cutting.
- Use a light touch. Velvet is a delicate fabric, so it is important to use a light touch when handling it.
- Be patient. Cutting velvet can be a bit tricky, so it is important to be patient. Take your time and follow the instructions carefully.
Conclusion
Cutting velvet fabric requires patience, precision, and attention to detail, but the results are well worth the effort. By understanding the unique properties of velvet, mastering essential cutting techniques, and handling the nap with care, you can achieve professional-quality results in your sewing projects.
With the tips and techniques provided in this guide, you’ll be well-equipped to tackle any velvet fabric project with confidence and skill. Whether you’re creating a sumptuous evening gown, elegant draperies, or luxurious home décor items, mastering the art of cutting velvet fabric will elevate your sewing projects to new heights of sophistication and style.