Changing the color of velvet fabric can breathe new life into old furniture, clothing, or decor items. Whether you want to refresh a faded velvet couch, transform a vintage velvet dress, or create a unique DIY project, understanding the process is essential.
In this guide, we’ll walk you through how to change the color of velvet fabric safely and effectively, using techniques that work for different types of velvet and ensuring beautiful, long-lasting results. We’ll cover everything from prepping the fabric to choosing the right dyes and maintaining the new color. Let’s dive in!
Understanding Velvet Fabric and Dye Compatibility

Before you start changing the color of your velvet fabric, it’s crucial to identify the type of velvet you’re working with. Velvet can be made from natural fibers (cotton, silk, wool) or synthetic materials (polyester, rayon). The fiber content determines which dyes will work best:
- Natural fibers (cotton, silk, wool): These absorb dyes well and are ideal for vibrant, long-lasting color changes. Use fiber-reactive dyes (for cotton) or acid dyes (for silk/wool) for the best results.
- Synthetic fibers (polyester, rayon): Dyeing synthetic velvet is trickier. They require dispersed dyes (for polyester) or high heat to bond with the fabric. Results may be less vibrant, and colorfastness can vary.
Always check the fabric’s care label for fiber content. If unsure, perform a burn test: natural fibers burn with a natural smell, while synthetics melt or produce plastic-like odors.
Preparing Your Velvet Fabric for Dyeing
Proper preparation is key to achieving an even, long-lasting color. Follow these steps before dyeing:
Clean the Fabric
Dirty or oily residues can prevent dye from absorbing evenly. Gently clean the velvet using the methods outlined in our velvet upholstery cleaning guide. For stained areas, spot-clean with a mild detergent, then air-dry completely. Avoid harsh chemicals that may damage the pile.
Test Color Absorption
Before dyeing the entire piece, test the dye on a small, inconspicuous section (e.g., under a cushion or hem). This helps you:
- Ensure the dye works with the fabric type.
- Adjust dye concentration for your desired shade (e.g., lighter or darker tones).
- Check for colorfastness (how well the dye stays after washing).
Gather Supplies
Depending on your dyeing method, you’ll need:
- Dye: Choose based on fiber type (e.g., Rit Dye for cotton, Jacquard Acid Dye for silk).
- Containers: Stainless steel or plastic bins (avoid aluminum, which reacts with dyes).
- Gloves, masks, and old towels: Protect your skin and work area from staining.
- Salt or vinegar (for natural fibers): Helps set the dye.
- Steamer or iron: For post-dyeing pile restoration (optional).
How to Change the Color of Velvet Fabric
There are several techniques to dye velvet, each suited for different projects and fabric types. Below are the most effective methods:
Method 1: Hand Dyeing for Small Items (Natural Fibers)
Ideal for clothing, cushions, or small upholstery pieces made from cotton or silk velvet.
Steps:
Prepare the dye bath:
- For cotton velvet: Dissolve fiber-reactive dye in warm water with 1 cup of salt (enhances color absorption).
- For silk/wool velvet: Mix acid dye with warm water and 1/2 cup of white vinegar (sets the color).
- Stir well to ensure the dye is fully dissolved.
Submerge the fabric:
Gently place the velvet into the dye bath, ensuring it’s fully submerged. Use a wooden spoon to agitate the fabric slowly and evenly for 20–30 minutes. Avoid vigorous stirring, which can mat the pile.
Rinse and dry:
- Once the desired color is achieved, rinse the fabric in cool water until the water runs clear.
- Press gently with a towel to remove excess water (never wring velvet).
- Air-dry flat or hang in a shaded area. Avoid direct sunlight, which can fade the new color.
Tip: For ombre or gradient effects, dip only part of the fabric into the dye bath and gradually lower it over time.
Method 2: Spray Dyeing for Upholstery and Large Surfaces
Great for refreshing a velvet couch, chair, or curtains without removing the fabric.
Steps:
Dilute the dye:
- Mix fabric spray dye (e.g., Rit Spray Dye) or watered-down liquid dye in a spray bottle. Start with a 1:1 dye-to-water ratio and adjust for intensity.
Prep the area:
- Lay down plastic sheeting to protect floors and furniture. Use clamps or pins to secure loose fabric (e.g., curtain hems).
Apply the dye:
- Hold the spray bottle 6–8 inches from the fabric and mist evenly in light, overlapping strokes. Work in sections, following the direction of the velvet pile to avoid streaks.
- Let the first coat dry completely (2–3 hours), then apply additional coats until the desired color is reached.
Set the color:
- For cotton velvet, lightly steam the fabric after dyeing to lock in the color. For synthetic velvet, use a low-heat iron (with a cloth barrier) to heat-set the dye.
Method 3: Overdyeing to Darken or Correct Color
If your velvet is faded or you want to shift from a light to dark color (e.g., from pink to navy), overdyeing is effective.
Tips:
- Darkening light velvet: Use a deep-colored dye (e.g., black, burgundy) and follow the hand-dyeing method above. The new color will cover the old shade completely.
- Correcting uneven color: If the fabric has stains or patchy areas, overdyeing can create a uniform tone. Test on a small area first to ensure the dye masks imperfections.
Method 4: Tie-Dye or Batik for Creative Designs
For artistic projects like velvet pillow covers or clothing, try tie-dye or batik techniques:
- Tie-dye: Use rubber bands to create patterns, then apply multiple dye colors. Rinse and dry as usual.
- Batik: Use wax to resist dye in specific areas, creating intricate designs. This works best on cotton or silk velvet.
Post-Dyeing Care and Maintenance
To preserve the new color and texture of your velvet fabric, follow these tips:
1. Restore the Pile
After dyeing, the velvet pile may look flattened or matted. Gently brush the fabric with a soft velvet brush or a dry toothbrush in the direction of the nap to fluff it up. For stubborn areas, use a steamer held 6 inches away to relax the fibers, then brush again.
2. Ensure Colorfastness
- For natural fibers: Wash dyed items separately in cold water with a mild detergent only if necessary. Avoid washing frequently to prevent fading.
- For synthetic fibers: Spot-clean stains with a damp cloth. Machine washing is generally not recommended, as it can damage the pile and cause color loss.
3. Protect from Sunlight
Direct sunlight is the biggest enemy of dyed velvet. Place dyed furniture away from windows or use UV-blocking curtains. For clothing, store in a cool, dark place to prevent fading.
How to Dye Different Colors of Velvet Fabric
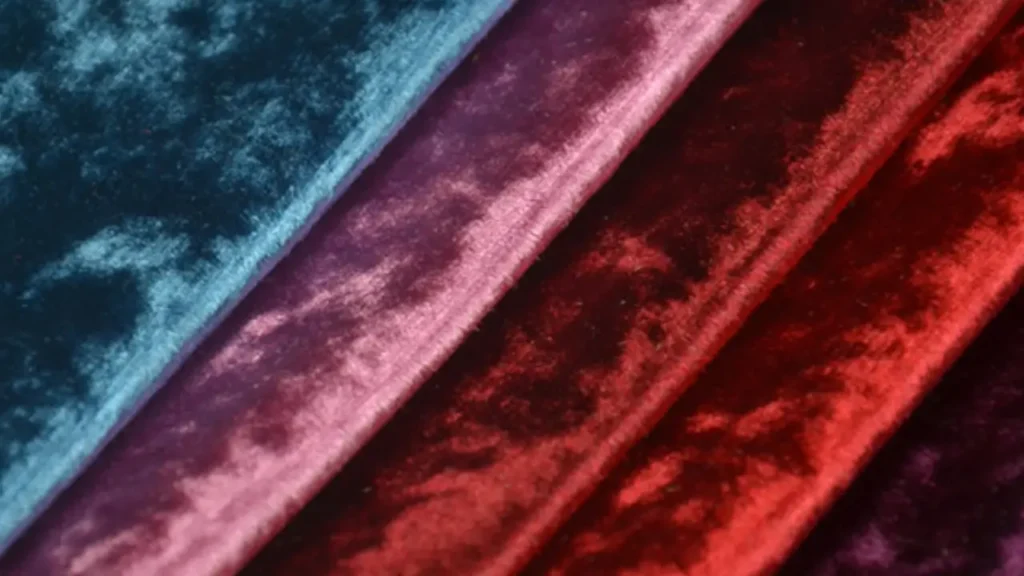
Dyeing velvet fabric can transform its appearance, allowing you to achieve a vast spectrum of vibrant or subtle hues to suit any design need. The process requires careful attention due to velvet’s unique pile and fiber content, which often dictates the type of dye needed for successful color absorption and even results across the luxurious surface.
Step 1: Prepare Your Workspace and Fabric
Before beginning, set up a well-ventilated area, preferably outdoors or in a room with open windows, and cover surfaces with plastic sheeting to protect against spills. Ensure your velvet fabric is clean and free of any sizing, finishes, or dirt, as these can interfere with dye absorption. Pre-wash the fabric according to its fiber content if possible, and make sure it is damp before dyeing, which helps the dye penetrate the fibers more evenly.
Step 2: Choose the Right Dye and Method
The type of dye you use is crucial and depends entirely on the fiber content of your velvet. For natural fibers like cotton or silk velvet, fiber-reactive dyes are generally recommended for vibrant, long-lasting color. For synthetic velvets like polyester or acetate, disperse dyes or specialized synthetic dyes designed for those fibers will be necessary. Research the fabric content and select a dye specifically formulated for it, following the manufacturer’s instructions regarding method, temperature, and safety precautions.
Step 3: Prepare the Dye Bath
Prepare the dye bath according to the dye manufacturer’s instructions, ensuring the water temperature is correct for the chosen dye type and fabric. For most dyeing processes, you will need a large container that allows the fabric to be fully submerged and moved freely. Add the dye powder or liquid, along with any required auxiliaries such as salt or soda ash, which help the dye fix to the fibers. Stir the bath thoroughly to ensure the dye is completely dissolved and evenly distributed.
Step 4: Dyeing the Fabric
Carefully submerge the damp velvet fabric into the prepared dye bath, making sure it is fully immersed without overcrowding the container. Gently agitate the fabric continuously or at regular intervals to ensure the dye penetrates the pile and base fabric evenly, preventing splotchiness or uneven coloring. The duration in the dye bath will depend on the desired depth of color and the specific dye instructions, but typically ranges from 30 minutes to an hour, or as recommended by the dye manufacturer.
Step 5: Rinsing and Washing
Once the desired color is achieved, carefully remove the fabric from the dye bath. Rinse the velvet thoroughly under cool running water until the water runs clear. This removes any excess or unfixed dye. After rinsing, wash the fabric in cool to lukewarm water with a mild detergent specifically designed for dyed fabrics or a professional textile soap to remove any remaining residual dye and auxiliaries. Rinse again until all soap is removed.
Step 6: Drying and Finishing
After washing, gently squeeze out excess water without wringing or twisting the fabric, as this can damage the velvet pile. For best results and to maintain the pile’s direction and luster, hang the velvet to air dry away from direct heat or sunlight. Some types of velvet may benefit from being dried flat or on a velvet drying rack. Once dry, you may need to gently steam or use a cool iron on the back of the fabric (never directly on the pile) to smooth out wrinkles and help restore the pile’s appearance, following care instructions for the specific fiber.
Conclusion
Changing the color of velvet fabric is a rewarding project that allows you to personalize your decor or wardrobe. By choosing the right dye for your fabric type, prepping carefully, and following gentle dyeing techniques, you can achieve stunning results.
Remember to test dyes on small areas first, protect the pile during the process, and maintain the new color with proper care. Whether you’re refreshing a vintage piece or creating a bold new design, our guide has you covered.
Luxurious wholesale velvet fabric in a rainbow of colors awaits! Elevate your creations with sumptuously soft texture. Discover our vibrant selection and inquire today to get wholesale velvet fabric with different colors from us.