Cutting fabric accurately is a fundamental skill for any quilter. Precise cuts ensure your quilt pieces fit together seamlessly, resulting in a beautiful and well-constructed finished product.
This comprehensive guide will equip you with all the knowledge and techniques you need to master fabric cutting for quilting, from essential tools to expert tips.
Fabric Cutting Tools for Quilting
Before diving into cutting techniques, let’s explore the essential tools that will make your quilting journey smoother:
- Rotary Cutter: This is the workhorse of fabric cutting for quilters. It features a sharp circular blade that glides effortlessly through fabric layers.
- Cutting Mat: A self-healing cutting mat protects your work surface and prevents the rotary cutter blade from dulling. Choose a mat with a grid for accurate measuring and alignment.
- Ruler: A clear acrylic ruler with a grid is ideal for measuring and marking fabric.
- Square: A quilting square, typically 6″x6″ or 12″x12″, ensures perfect right angles and square cuts.
Optional Tools:
- Fabric Shears: While not ideal for precise patchwork piecing, fabric shears are handy for trimming and shaping fabric.
- Sewing Gauge: This small tool helps measure seam allowances and fabric strips accurately.
- Marking Pen: A water-soluble fabric pen allows you to mark cutting lines on fabric without leaving permanent marks.
Cutting Quilt Fabric: Essential Techniques
Now that you’re equipped with the right tools, let’s explore some key cutting techniques:
- Rotary Cutting Basics: Place your fabric on the cutting mat, align the ruler with the desired cutting line, and hold it firmly in place. Use a safe cutting motion with the rotary cutter, guiding it along the ruler’s edge.
- Measuring and Cutting Strips: Use the ruler to measure the desired strip width on the cutting mat. Align the fabric selvage (finished edge) with a parallel line on the mat for straight cuts. Use the rotary cutter to cut the strip along the ruler’s edge.
- Cutting Squares: Align the fabric with the grid lines on the cutting mat. Use the ruler and square to ensure perfect 90-degree angles. Cut along the ruler’s edge with the rotary cutter.
- Cutting Fabric on the Bias: Bias refers to cutting fabric diagonally across the grain. This is often used for quilt binding to create a softer, more flexible edge. To cut on the bias, fold your fabric diagonally, aligning the selvages. Measure and cut strips along the folded edge.
Tips for Cutting Fabric for Quilts
Here are some valuable tips to elevate your fabric cutting game:
- Sharpen Your Rotary Cutter: A dull blade can cause uneven cuts and frayed edges. Invest in a rotary cutter blade replacement or sharpener to maintain optimal performance.
- Starching Fabric (Optional): For slippery fabrics like silk or rayon, starching can add temporary stiffness, making them easier to cut accurately. Remember to pre-wash starched fabric before quilting.
- Organize Your Workspace: Having a designated cutting area with all your tools readily available will streamline your workflow.
- Cut Multiple Layers: A rotary cutter can efficiently cut through several layers of fabric simultaneously. This saves time when cutting identical quilt pieces. However, ensure your cutting mat is thick enough to accommodate multiple layers.
How Wide to Cut Fabric for Quilt Binding
The width you cut fabric for quilt binding depends on your desired finished binding size and whether you’re cutting on the bias or not. Here’s a breakdown:
- Finished Binding Width:
- Standard finished binding width is typically ½ inch.
- Cutting Width:
- Cutting Straight: If you’re not cutting on the bias (which is less common for binding), you would cut strips exactly the desired finished width (in this case, ½ inch).
- Cutting on the Bias (Recommended): For most quilt binding, fabric is cut on the bias for more flexibility and a smoother finish when wrapping around curves. To achieve a finished ½ inch binding with bias cut strips, you’ll need to:
- Cut strips approximately 2.25 – 2.5 inches wide. This extra width accounts for folding during application.
Here are some additional points to consider:
- Seam Allowances: Some quilters prefer to add a seam allowance when cutting binding strips. This can be helpful for adjusting the final size if needed. If you’re incorporating a seam allowance, account for that when calculating your cutting width.
- Double-Fold Binding: Double-fold binding is a popular technique that encloses raw edges twice for a professional look. If using this method, you’ll typically cut wider strips (around 2.75 inches) to accommodate the double folding.
Remember, experimenting with a scrap piece of fabric can help you determine the perfect cutting width for your desired finished binding size and technique.
How to Cut Quilt Fabric
There are two main approaches to cutting quilt fabric: the traditional method using a rotary cutter and a more modern approach using a fabric cutting machine. Here’s a breakdown of both methods:
Using a Rotary Cutter:
- Gather your tools: You’ll need a rotary cutter, cutting mat, ruler, square (optional), fabric shears (optional), and a water-soluble fabric pen (optional).
- Prepare your fabric: Unfold your fabric and ensure it’s wrinkle-free. If using slippery fabrics like silk or rayon, consider starching them for easier cutting (remember to pre-wash starched fabric before quilting).
- Mark cutting lines (optional): For intricate cuts or following quilt patterns, use a water-soluble fabric pen to mark cutting lines on your fabric.
- Rotary cutting basics: Place your fabric on the cutting mat, aligning the ruler with the desired cutting line. Hold the ruler firmly in place. Use a safe cutting motion with the rotary cutter, guiding it along the ruler’s edge.
- Cutting strips: Measure the desired strip width on the cutting mat using the ruler. Align the fabric selvage (finished edge) with a parallel line on the mat for straight cuts. Use the rotary cutter to cut the strip along the ruler’s edge.
- Cutting squares: Align the fabric with the grid lines on the cutting mat. Use the ruler and square to ensure perfect 90-degree angles. Cut along the ruler’s edge with the rotary cutter.
- Cutting on the bias: Fabric on the bias refers to cutting diagonally across the grain. For quilt binding (often cut on the bias), fold your fabric diagonally, aligning the selvages. Measure and cut strips along the folded edge.
Tips for rotary cutting:
- Sharpen your blade: A dull blade can cause uneven cuts and frayed edges. Invest in a replacement blade or sharpener for optimal performance.
- Organize your workspace: Having a designated cutting area with all your tools readily available will streamline your workflow.
- Cut multiple layers: A rotary cutter can handle several fabric layers simultaneously for identical quilt pieces. Ensure your cutting mat is thick enough for multiple layers.
Using a Fabric Cutting Machine:
Fabric cutting machines like AccuQuilt or Cricut Maker offer an alternative to rotary cutting. These machines use templates or digital cutting files to precisely cut fabric shapes.
- Pros: Ideal for intricate shapes, repetitive cuts, and using digital quilt patterns.
- Cons: Can be a significant investment compared to a rotary cutter. Consider the complexity of your quilt patterns and personal preference when deciding.
No matter which method you choose, remember:
- Precision is key: Accurate cutting ensures your quilt pieces fit together seamlessly.
- Practice makes perfect: Don’t be discouraged if your first cuts aren’t perfect. With practice, you’ll become a confident fabric cutter.
- Most importantly, have fun! Experiment with different fabrics, colors, and patterns to bring your quilt vision to life.
How to Cut Fabric Strips for Quilting
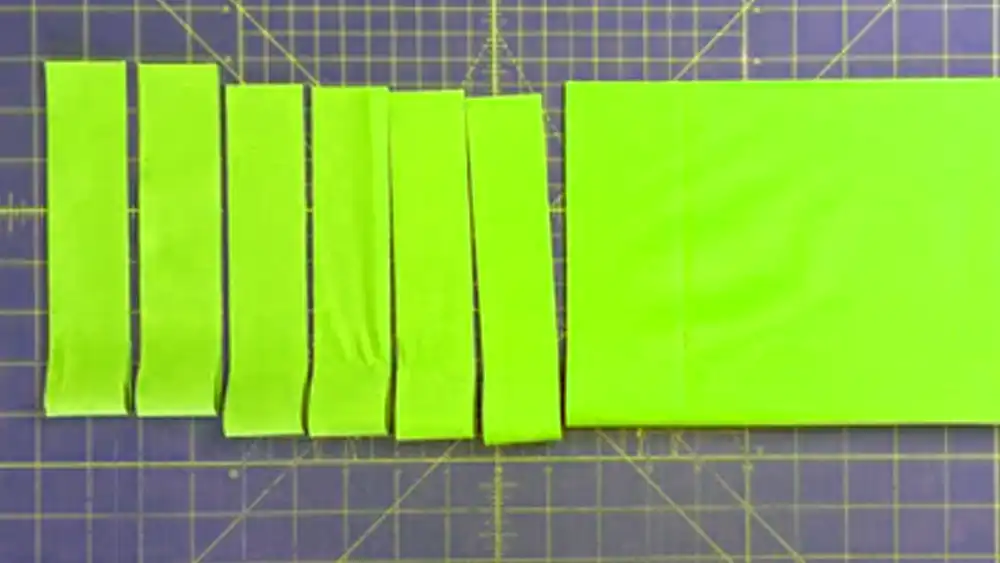
Here’s a detailed guide on how to cut fabric strips for quilting using the traditional rotary cutter method:
Tools and Materials:
- Rotary cutter
- Cutting mat
- Ruler with a clear grid (preferably at least 12″ long)
- Fabric (washed and ironed, starched for slippery fabrics – optional)
- Fabric shears (optional)
- Water-soluble fabric pen (optional)
Steps:
- Prepare your workspace: Clear a flat, well-lit area for cutting. Unfold your fabric and lay it flat on the cutting mat, ensuring it’s wrinkle-free.
- Determine strip width: Refer to your quilt pattern or desired finished size for the strip width.
- Mark cutting lines (optional): For intricate cuts or following complex quilt patterns, use a water-soluble fabric pen to mark the cutting lines on the fabric.
- Align ruler and fabric: Place the ruler on the cutting mat with the desired strip width measurement lined up against the fabric’s selvage (finished edge).
Tip: The selvage is the pre-finished edge that typically won’t fray. Using the selvage as a guide helps ensure straight cuts.
- Secure the ruler: Hold the ruler firmly in place with one hand. You can use your other hand to gently smooth out any fabric wrinkles near the cutting line.
- Rotary cutting: With your free hand, hold the rotary cutter and position the blade directly on the ruler’s edge, aligning it with your marked cutting line (if using).
- Cutting motion: Use a smooth, controlled cutting motion with the rotary cutter. Glide the blade along the ruler’s edge, applying gentle pressure.
Tip: It’s best to use a “pulling” motion with the rotary cutter, rather than a pushing motion, for better control.
- Repeat cutting: Slide the ruler along the mat, maintaining the desired strip width, and repeat steps 5-7 to cut additional strips of the same size.
Additional Tips:
- Sharpen your rotary cutter blade: A dull blade can cause uneven cuts and frayed edges. Invest in replacement blades or a sharpener to maintain optimal performance.
- Cutting multiple layers: If your fabric is thin and the cutting mat is thick enough, you can cut several layers of fabric simultaneously to save time when cutting identical strips.
- Cutting on the bias (for quilt binding): For quilt binding, you’ll typically cut strips on the bias for more flexibility. To do this, fold your fabric diagonally, aligning the selvages. Measure and cut strips along the folded edge, following steps 4-7.
- Practice on scrap fabric: Before diving into your main fabric, practice cutting strips on a scrap piece to get comfortable with the rotary cutter and ensure your technique is accurate.
By following these steps and tips, you’ll be well on your way to cutting precise and clean fabric strips for your quilting projects!
How to Cut Fabric Squares for Quilting

Here’s a comprehensive guide on cutting fabric squares for quilting using a rotary cutter:
Tools and Materials:
- Rotary cutter
- Cutting mat with a grid
- Ruler (at least 12″ long, with a clear grid for easy measurement)
- Square quilting ruler (optional, but helpful for ensuring perfect 90-degree angles)
- Fabric (washed and ironed, starched for slippery fabrics – optional)
- Fabric shears (optional)
- Water-soluble fabric pen (optional)
Steps:
- Prepare your workspace: Clear a flat, well-lit area for cutting. Unfold your fabric and lay it flat on the cutting mat, ensuring it’s wrinkle-free.
- Determine square size: Refer to your quilt pattern or desired finished size for the square dimensions.
- Mark cutting lines (optional): For complex quilt patterns or intricate cuts, use a water-soluble fabric pen to mark the cutting lines on the fabric for each square.
- Align ruler and fabric: Place the ruler on the cutting mat, aligning the desired square size measurement with the fabric’s selvage (finished edge).
Tip: Similar to cutting strips, the selvage acts as a guide for straight cuts.
- Square up the fabric (optional): If your fabric isn’t perfectly square, you can use the ruler and rotary cutter to trim a straight edge along the selvage before proceeding.
- Secure the ruler: Hold the ruler firmly in place with one hand. You can use your other hand to smooth out any wrinkles near the cutting line.
- First cut: Using your free hand, hold the rotary cutter and position the blade directly on the ruler’s edge, aligning it with your marked cutting line (if using). Make the first cut along the ruler’s edge, ensuring a straight line.
- Second cut: Rotate the fabric 90 degrees so the cut edge is now aligned with the ruler’s desired square size measurement. Hold the ruler firmly in place and repeat step 7 to make a second cut along the ruler’s edge.
Tip: You’ve essentially created a long rectangle with the desired square dimensions on one end.
- Cutting squares: Using the square ruler (if using) or the grid on your cutting mat for reference, align the ruler along the long edge of the rectangle you just created. Ensure the markings on the ruler or grid match the desired square size. Hold the ruler firmly and make cuts along the ruler’s edge to create individual squares.
- Repeat cutting: Slide the ruler down the remaining fabric, maintaining the square size measurement, and repeat steps 6-9 to cut additional squares.
Additional Tips:
- Sharpen your rotary cutter blade: A dull blade can cause uneven cuts and frayed edges. Regularly replace blades or use a sharpener for optimal performance.
- Cutting multiple layers: If your fabric is thin and the cutting mat is thick enough, you can cut several layers of fabric simultaneously to save time when cutting identical squares.
- Practice on scrap fabric: Before diving into your main fabric, practice cutting squares on a scrap piece to get comfortable with the rotary cutter and ensure your technique is accurate.
Using a Square Ruler:
A square ruler simplifies ensuring perfect 90-degree angles. Simply place the square ruler on the fabric, aligning the markings with your desired square size. Use the rotary cutter to cut along the outer edges of the ruler.
By following these steps and tips, you’ll be efficiently cutting precise and perfect fabric squares for your quilting projects!
Popular Fabric Cutting Machines for Quilting
While rotary cutters are a traditional and effective method, there are alternative fabric cutting machines available:
- AccuQuilt Fabric Cutter: This electric die-cutting machine uses templates to precisely cut fabric shapes. It’s ideal for quilters who work with intricate shapes or repetitive cuts.
- Cricut Maker: This versatile cutting machine can handle various materials, including fabric with a stabilizer backing. It’s suitable for quilters who enjoy using digital cutting patterns.
Consider these factors when choosing a fabric cutting machine:
- Budget: Die-cutting machines tend to be a significant investment.
- Complexity of Quilt Patterns: For simple quilt blocks, a rotary cutter may suffice. For intricate piecing, a machine can save time and ensure accuracy.
- Personal Preference: Some quilters enjoy the tactile experience of rotary cutting, while others prefer the automation of a machine.
Cutting Fabric for Different Quilt Elements
- Cutting Fabric for Quilt Borders: (continued) Measure the perimeter of your quilt top to determine the total border yardage needed. Border strips typically range from 2″ to 6″ in width. Cut the strips to the desired width and length, ensuring all sides are straight.
- Cutting Fabric for Quilt Backing: The backing fabric should be slightly larger than your quilt top to account for shrinkage during washing. Measure your quilt top and add 2-4 inches to each side for cutting the backing piece.
- Cutting Fabric for Log Cabin Quilt: Log cabin quilts feature squares and rectangles sewn in a specific pattern to create a log cabin illusion. Cut strips of fabric in varying widths based on your quilt pattern’s instructions. Then, sub-cut these strips into squares and rectangles for piecing the log cabin blocks.
- Cutting Fabric for Quilt Binding: Quilt binding encloses the raw edges of your quilt, providing a finished look. Binding strips are typically cut on the bias for added flexibility. The standard finished width of quilt binding is ½ inch, so cut strips approximately 2.5 inches wide to account for folding during application.
Cute and Fun Quilting Fabrics
While mastering cutting techniques is essential, choosing the perfect fabric is equally important for creating a visually appealing quilt. Here are some resources to spark your creativity:
- Serendipity Quilts Cutting Loose Fabric Collage: Explore Serendipity Quilts’ website or social media channels for inspiration on using fabric scraps and playful prints in your quilt designs.
- Cute Quilting Fabric Shops: Numerous online and local quilt fabric shops offer a wide variety of colors, patterns, and themes. Look for fabrics featuring florals, geometrics, novelty prints, or colors that suit your personal taste.
Conclusion
Cutting fabric for quilting may seem daunting at first, but with the right tools, techniques, and a bit of practice, you’ll be a pro in no time. Remember, precision is key, but don’t be afraid to experiment and have fun with your fabric choices. Now that you’re armed with this comprehensive guide, unleash your creativity and embark on your quilting journey!