Quilting is a timeless art form that allows crafters to create beautiful, functional pieces that stand the test of time. One crucial element that can take a quilt from ordinary to extraordinary is the choice of border fabric. Border fabric not only frames your quilt and gives it a polished look but also adds personality and charm to your creation.
In this post, we will explore the importance of border fabric for quilting and provide valuable tips on effectively selecting and using it in your projects.
Border Fabrics For Quilting
When it comes to quilting, the use of border fabrics can truly enhance the overall aesthetic and design of your quilt project. Border fabrics serve as the frame for your quilt, adding a finishing touch that can tie the entire piece together. Selecting the right border fabric is crucial in achieving a cohesive and visually appealing quilt.
Here are some popular types of border fabrics for quilting and how they can elevate your projects:
Solid fabrics are versatile and can work well as border fabrics for quilts. They provide a clean, modern look and can help emphasize the colors and patterns within the quilt center. Solid fabrics in neutral shades can create a classic frame, while bold solids can add a pop of color and contrast.
Tonal Fabrics:
Tonal fabrics feature subtle variations in color that create a textured look without an overwhelming pattern. Tonal fabrics are great for adding depth and interest to the borders of your quilt while maintaining a cohesive appearance with the quilt top.
Striped fabrics can add movement and visual appeal to your quilt borders. Depending on the direction of the stripes, they can create a sense of width or height in your quilt. Vertical stripes can elongate a quilt, while horizontal stripes can add width.
Print Fabrics:
Printed fabrics with small-scale or medium-scale prints can be used as border fabrics to complement the quilt design. You can choose prints that pick up colors from the quilt blocks or feature motifs that align with the theme of the quilt.
Blender Fabrics:
Blender fabrics are subtle, often tone-on-tone or small-scale prints that can blend different elements of a quilt together. They are great for adding interest to borders without overpowering the overall design.
Border Panel Fabrics:
Border panel fabrics feature continuous designs that are specifically made for quilt borders. These fabrics can save time and effort by providing a ready-made border with coordinating motifs that enhance the theme of your quilt.
Border Print Fabric Quilt Patterns
Border print fabrics can add a fun and interesting element to your quilt projects. Here are some quilt patterns for border print fabric ideas for quilt patterns that can showcase these fabrics:
Highlight the border: Choose a quilt pattern where the border print can be the star of the show. Simple strip piecing patterns like Rail Fence or Log Cabin quilts can be a great way to do this.
Set off blocks: Use border print fabric to create sashing or cornerstones that set off pieced blocks in your quilt. This can add a pop of color and pattern to your quilt top.
Create a scrappy look: If your border print fabric has a lot of colors and patterns, you can use it to create a scrappy quilt top. Look for quilt patterns that use a variety of fabrics, such as the Irish Chain or Trip Around the World patterns.
Here are some resources that you can use to find quilt patterns that use border print fabric:
- Websites: Many quilting websites offer free quilt patterns, including patterns that are specifically designed for border print fabrics. Try searching for “border print quilt patterns” or “sashing quilt patterns”.
- Books: There are also many quilting books that feature patterns that use border print fabric. Look for books on strip piecing or scrappy quilts.
- Magazines: Quilting magazines often feature articles and patterns that use border print fabric.
No matter what quilt pattern you choose, using border print fabric can add a unique and personal touch to your project.
Fabric Calculator for Quilt Borders
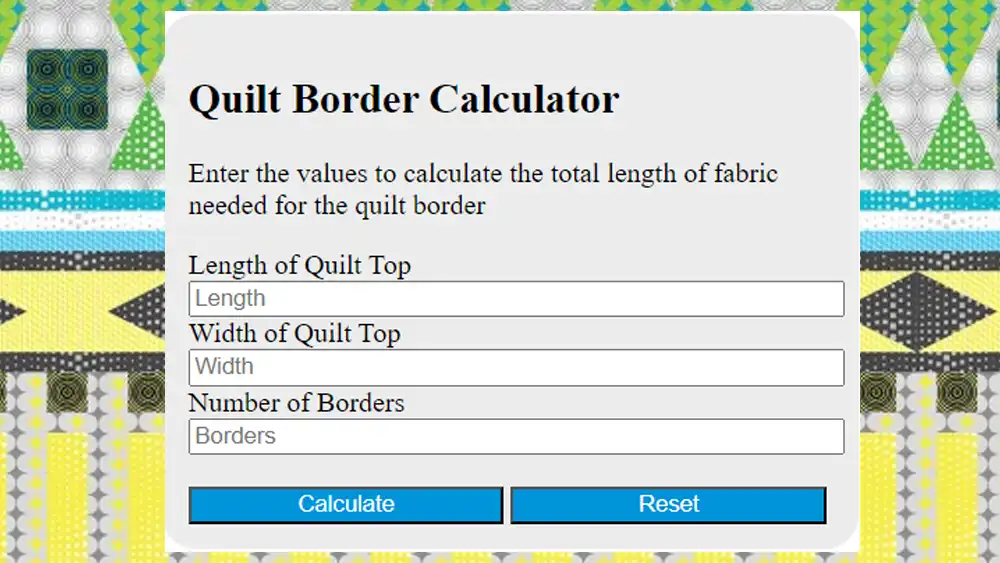
There are two main ways to calculate fabric needed for quilt borders: manual and online calculators. Here’s a breakdown of both methods:
Manual Calculation:
Measure your quilt top: Get the exact width and length of your finished quilt top in inches.
Determine border width: Decide on the desired width of your finished borders (without seam allowances).
Calculate total border length: Add the width of all your borders together. For example, if you have a 2-inch border on all sides, you’ll add 2 (top) + 2 (bottom) + 2 (left) + 2 (right) = 8 inches total border width.
Account for seam allowances: Add seam allowance (usually ¼ inch) to each border width. So, if your border is 2 inches wide, with seam allowance it becomes 2 + (2 x ¼) = 2.5 inches.
Calculate total fabric length: Add the total border length (from step 3) to both the width and length of your quilt top (from step 1). This will give you the total finished size of your quilt with borders.
Consider fabric width: Standard quilt backing fabric comes in two widths: 44″ and 108″.
- 44″ wide fabric: Divide the total fabric width (from step 5) by 44 inches. This will give you the number of strips you need to cut from the fabric. Since there might be slight variations in cutting and piecing, round this number up to the nearest whole number.
- 108″ wide fabric: If your total fabric width is less than 108 inches, you’ll need one piece of fabric. If it’s wider than 108 inches, you’ll need multiple pieces. Factor in some extra fabric for trimming and sewing (around ½ yard).
Calculate fabric yardage: Once you know the number of strips needed (for 44″ wide fabric) or the total fabric width (for 108″ wide fabric), divide it by the usable fabric width (36 inches for 44″ fabric, or 108 inches for 108″ fabric). Round up to the nearest quarter yard.
Additional Tips:
- Always buy a little extra fabric than you think you’ll need. This allows for pattern matching, errors, and future projects with leftover scraps.
- Consider fabric repeats when choosing border prints. Make sure the pattern placement works well with the size of your borders.
- Think about how the direction of the print will look on your quilt. You might want the stripes or other motifs to run horizontally, vertically, or diagonally.
By following these tips and using a fabric calculator, you can ensure you have enough fabric to create beautiful borders for your quilt!
Tips for Choosing Border Fabrics:
- Consider the Quilt Design: Choose a border fabric that complements the style and theme of your quilt. Consider the colors, patterns, and overall aesthetic of the quilt when selecting a border fabric.
- Balance and Contrast: Aim for a balance between the quilt center and the border fabric. Contrast can add interest, but be mindful of how it interacts with the rest of the quilt.
- Coordinate with Binding: The border fabric should complement the binding fabric to create a harmonious finish for your quilt.
- Experiment: Don’t be afraid to experiment with different types of border fabrics. Mix and match fabrics to see what works best for your quilt design.
By carefully selecting border fabrics for your quilting projects, you can enhance the beauty and impact of your creations. Whether you opt for solids, tonals, prints, or specialized border panel fabrics, the right choice of border fabric can elevate your quilt and showcase your quilting skills in the best possible light. Enjoy the creative process of choosing border fabrics and watch as your quilts transform into stunning works of art.
Why Border Fabric Matters
Border fabric plays a crucial role in the overall aesthetic of a quilt. It can tie together the different elements of your design, create a sense of balance, and highlight the central focus of your quilt. The right border fabric can complement your quilt top, enhance its visual appeal, and bring your design vision to life.
Choosing the Right Border Fabric
When selecting border fabric for your quilt, there are several factors to consider:
- Color: The color of your border fabric should complement the colors used in the quilt top. You can opt for a color that contrasts with the quilt top to make it pop, or choose a color that blends harmoniously for a more cohesive look.
- Pattern: Consider the scale and design of the border fabric’s pattern. A subtle or simple pattern can provide a nice frame for intricate quilt blocks, while a bold pattern can add drama and visual interest.
- Width: The width of your border fabric will impact the overall look of your quilt. A wider border can create a more substantial frame, while a narrower border can give a more delicate finish.
- Fabric Quality: Choose high-quality fabric for your borders to ensure durability and longevity. Quilts are meant to last, so investing in good fabric will pay off in the long run.
Tips for Using Border Fabric Effectively
- Measure Twice, Cut Once: Take precise measurements before cutting your border fabric to ensure a perfect fit. Accuracy is key when adding borders to your quilt.
- Audition Your Fabrics: Lay out different border fabric options next to your quilt top to see how they look together. This will help you visualize the final result and make an informed decision.
- Experiment with Borders: Don’t be afraid to get creative with your border fabric choices. Mix and match colors, patterns, and textures to find the perfect combination that complements your quilt design.
- Finish Strong: Properly finish the edges of your quilt with binding that complements your border fabric. A well-executed binding will complete the overall look of your quilt.
How Much Fabric for Quilt Border
Calculating the amount of fabric needed for quilt borders is an essential step in the quilting process to ensure a seamless and well-proportioned finish. The amount of fabric required for borders depends on various factors such as the size of the quilt, the width of the borders, and any additional considerations like mitered corners.
Here’s a guide to help you estimate how much fabric you will need for quilt borders:
1. Determining Border Width:
Before calculating the fabric requirements, decide on the width of the borders you want to add to your quilt. Common border widths range from 1 inch to 6 inches or more, depending on the design aesthetic you are aiming for.
2. Calculate Border Length:
To calculate the length of fabric needed for the quilt borders, follow these steps:
- Measure the length and width of your quilt top.
- Add twice the width of the border to the length and width measurements to account for borders on all sides of the quilt.
- This formula accounts for side borders (length) and top and bottom borders (width).
3. Calculate Fabric Requirements:
Once you have the measurements for the border lengths, use the following formula to determine the fabric requirements:
- For side borders: Width of the border x Length of the quilt top (+ 4 inches for seam allowances and adjustments).
- For top and bottom borders: Width of the border x Width of the quilt top (+ 4 inches for seam allowances and adjustments).
- Total fabric needed = Side borders fabric + Top and bottom borders fabric.
4. Seam Allowances and Adjustments:
Remember to include additional fabric for seam allowances and any adjustments that may be required during the quilting process. It’s recommended to add at least 4 inches to each border length to accommodate seam allowances, trimming, and potential variations in measurements.
5. Mitered Corners Consideration:
If you plan to create mitered corners on your borders, you will need to factor in extra fabric for the diagonal seam. The amount will depend on the width of your borders and the size of the mitered corner seam allowance.
6. Final Check:
It’s always a good idea to double-check your measurements and calculations before cutting your fabric to ensure you have enough to complete the borders with some margin for error.
By following these guidelines and calculations, you can accurately determine the amount of fabric needed for your quilt borders. Proper planning and measurement will not only help you achieve a polished finish but also prevent any fabric shortages or miscalculations that could affect the final outcome of your quilt project.
How to Cut Fabric for Quilt Border
Cutting fabric for quilt borders is an important step in the quilting process and requires accuracy to ensure that the borders fit perfectly and enhance the overall look of your quilt. Here is a step-by-step guide on how to cut fabric for quilt borders:
Materials Needed:
- Fabric for the borders
- Cutting mat
- Rotary cutter
- Quilter’s ruler
- Fabric scissors
- Iron and ironing board
Steps to Cut Fabric for Quilt Borders:
1. Calculate Measurements:
- Use the measurements you determined earlier to calculate the length and width of the borders needed for your quilt. Add extra fabric for seam allowances and adjustments.
- Ensure your fabric is pressed and wrinkle-free before cutting.
2. Cut the Length of the Border Strips:
- Use a rotary cutter and a quilter’s ruler to cut strips of fabric according to the length needed for the side borders and top and bottom borders.
- Align the ruler along the fabric edge and make a clean, straight cut using the rotary cutter.
3. Trim the Width of the Border Strips:
- Determine the width of the borders, and use the quilter’s ruler and rotary cutter to trim the strips to the desired width.
- Make sure the edges are square and even to ensure a neat finish.
4. Join Strips if Necessary:
- If your border strips are not long enough for the entire length needed, you may need to join multiple strips together.
- Align the strips with right sides together, sew a straight seam with a 1/4-inch seam allowance, and press the seam open.
5. Attach Borders to Quilt Top:
- Pin the border strips to the quilt top, aligning the edges carefully. Start by attaching the side borders first, followed by the top and bottom borders.
- Sew the borders to the quilt using a 1/4-inch seam allowance. Press the seams toward the border fabric.
6. Mitered Corners (Optional):
- If you are creating mitered corners, mark the corner where the seams will meet at a 45-degree angle.
- Fold the quilt at the corner to form a diagonal seam, align the edges, and sew. Trim excess fabric and press the seam open.
7. Trim Excess Fabric:
- Once the borders are attached to the quilt, trim any excess fabric along the edges to ensure a clean and even finish.
8. Final Pressing:
- Press the quilt top and borders with an iron to set the seams and create a crisp, professional look.
By following these steps and taking care to measure accurately and cut with precision, you can successfully cut fabric for quilt borders and achieve a polished finish that enhances the overall appearance of your quilt project.
Conclusion
In conclusion, border fabric is a key element in quilting that can elevate your projects to new heights. By choosing the right fabric and applying it strategically, you can create quilts that are not only visually stunning but also infused with your unique style and creativity. So, the next time you embark on a quilting project, remember the impact that border fabric can have and make it a priority in your design process. Happy quilting!