Quilting is an art form that combines creativity, precision, and craftsmanship. Among the various elements that go into making a quilt, the binding fabric plays a crucial role. It not only secures the edges but also adds a finishing touch to the quilt, enhancing its overall appearance and durability.
This guide delves into the nuances of binding fabric for quilts, exploring its types, uses, and techniques to help both novice and experienced quilters.
Importance in Quilting
Binding is often the final step in the quilting process, and it plays a significant role in the quilt’s durability and finished look. A well-chosen and well-applied binding can elevate the quilt’s craftsmanship, making it look polished and professional.
Types of Quilt Binding Fabrics
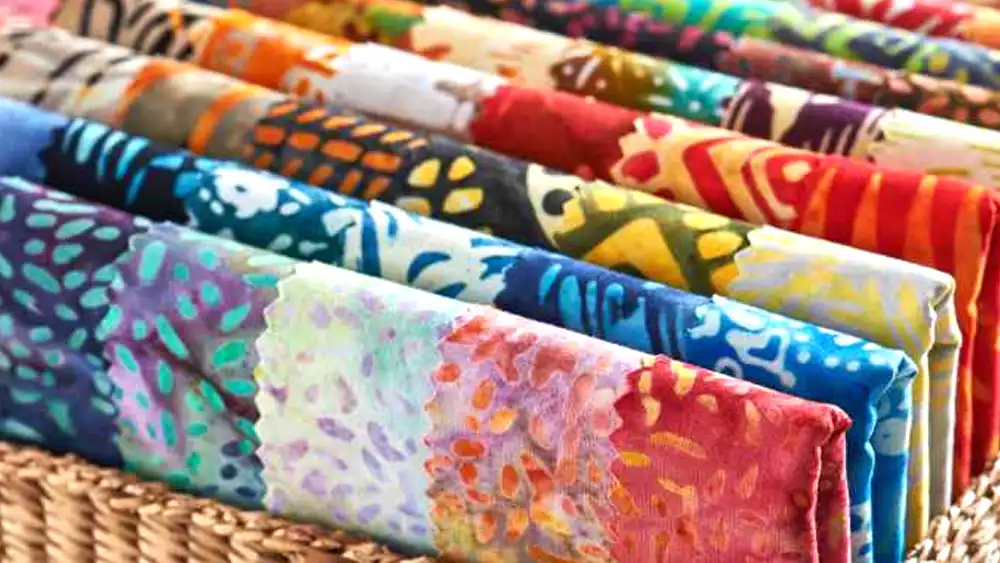
Cotton
Cotton is the most common fabric used for quilt binding. It’s durable, easy to work with, and comes in a wide range of colors and patterns. Cotton binding is ideal for most quilts, especially those meant for everyday use.
Polyester
Polyester binding is less common but offers some advantages, such as higher resistance to wrinkling and stretching. It’s often used for quilts that require a bit more durability, such as those intended for heavy use or outdoor activities.
Linen
Linen binding provides a unique texture and a slightly rustic look. It’s a great choice for quilts with a vintage or farmhouse aesthetic. However, linen can be more challenging to work with due to its tendency to fray.
Silk
Silk binding is luxurious and adds a touch of elegance to any quilt. It’s best used for decorative quilts that aren’t subjected to heavy use. Silk binding requires careful handling and precise sewing due to its delicate nature.
Blended Fabrics
Blended fabrics, such as cotton-polyester blends, offer a balance of the qualities found in natural and synthetic fibers. These blends can provide added durability while maintaining the soft feel and ease of handling typical of natural fibers.
Binding a Quilt With Backing Fabric
Binding a quilt with the backing fabric is a technique that allows you to use the excess backing fabric as the binding for the quilt. This method simplifies the process and can create a cohesive look. Here’s a step-by-step guide on how to do it:
Materials Needed
- Quilted quilt (top, batting, and backing)
- Rotary cutter and mat or scissors
- Ruler
- Pins or clips
- Iron
- Sewing machine and thread
Steps
Prepare the Quilt:
Ensure your quilt is fully quilted, including the top, batting, and backing.
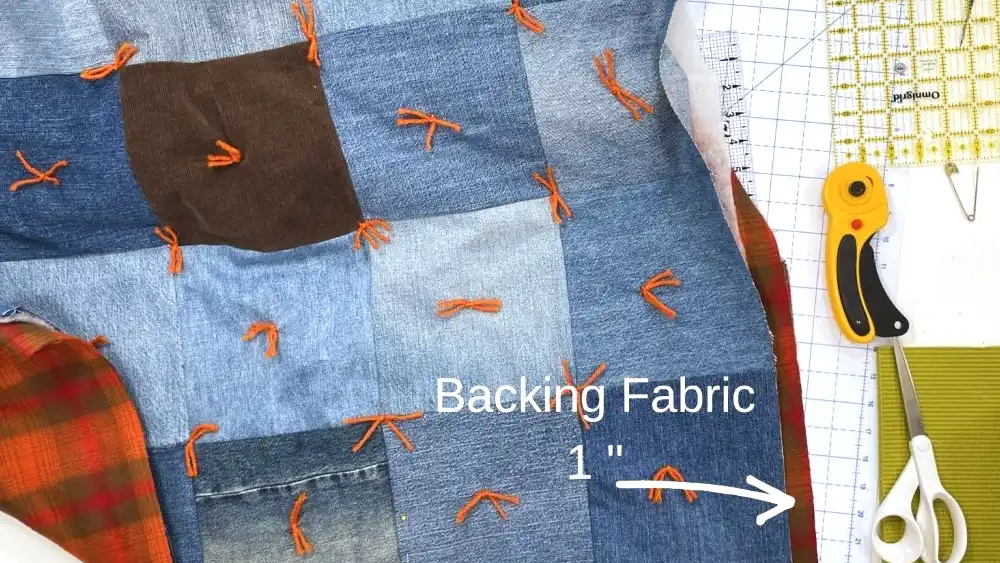
Trim the Quilt:
Trim the batting and quilt top so they are flush with each other, but leave the backing fabric extending 1 to 2 inches beyond the edge of the quilt top.
Cut the Backing Fabric:
Decide how wide you want the binding to be (typically ½ inch to 1 inch when finished).
Measure and cut the backing fabric, leaving enough excess to fold over and cover the raw edges of the quilt top and batting. For example, if you want a ½ inch finished binding, leave 1 inch of backing fabric beyond the edge of the quilt top.
Fold the Binding:
Starting on one side of the quilt, fold the excess backing fabric towards the quilt top. First, fold it in half so the raw edge meets the edge of the quilt top. Then fold it over the edge of the quilt top to create the binding.
Use an iron to press the folds, making a crisp edge.
Pin or Clip the Binding:
Pin or clip the folded backing fabric in place along the edge of the quilt, making sure it covers the raw edges of the quilt top and batting.
Create Mitered Corners:
When you reach a corner, fold the excess backing fabric up to create a 45-degree angle, then fold it down along the next edge of the quilt. This creates a neat, mitered corner.
Pin or clip the corner in place.
Sew the Binding:
Use a sewing machine to sew the binding in place. Stitch close to the inside edge of the binding, making sure to catch the folded edge underneath.
Sew slowly and remove pins or clips as you go.
Finish the Binding:
- Continue sewing around the entire quilt, including the corners.
- Once you reach the starting point, backstitch a few stitches to secure the thread, and trim any excess thread.
Final Pressing:
- Give the quilt one final press to ensure the binding is neat and flat.
Tips
- Make sure your backing fabric coordinates well with your quilt top since it will be visible as the binding.
- Practice folding and sewing a small sample piece to get comfortable with the process before working on your quilt.
By using the backing fabric for the binding, you simplify the binding process and ensure that the binding matches your quilt perfectly.
Choosing the Right Binding Fabric
Considerations Based on Quilt Type
The choice of binding fabric should be influenced by the type of quilt you’re making.
For example, a baby quilt that will be washed frequently may benefit from a durable cotton binding, while a decorative wall quilt might be enhanced by a luxurious silk binding.
Matching Binding Fabric to Quilt Fabric
It’s important to choose a binding fabric that complements the quilt top. This doesn’t necessarily mean matching the fabrics exactly, but rather selecting a binding that enhances the quilt’s colors and patterns. Consider the overall color scheme and style of your quilt when selecting your binding fabric.
Color and Pattern Coordination
When choosing a binding fabric, consider how it will frame your quilt. Solid colors can provide a clean, modern look, while patterned bindings can add interest and complexity. Contrast can be striking, but coordinating colors can also create a harmonious effect.
Preparing Binding Fabric
Measuring and Cutting
Accurate measuring and cutting are crucial for creating binding that fits well. Typically, binding strips are cut to a width of 2.5 inches, but this can vary based on personal preference and the specific quilt. Use a rotary cutter and a ruler to ensure straight, even cuts.
Pressing and Folding
After cutting, press your binding strips to prepare them for sewing. Fold the strips in half lengthwise with the wrong sides together and press again. This creates a double-fold binding that is strong and easy to work with.
Binding Techniques
Straight Grain Binding
Straight grain binding is cut along the fabric’s lengthwise or crosswise grain. It’s suitable for quilts with straight edges and is easier to handle than bias binding. However, it’s not as flexible for curves.
Bias Binding
Bias binding is cut at a 45-degree angle to the fabric’s grain. This gives it more stretch and flexibility, making it ideal for quilts with curved edges. Bias binding is also more durable than straight grain binding.
Continuous Binding
Continuous binding involves joining strips of fabric end-to-end to create one long strip. This method is efficient and ensures that the binding will be long enough to go around the entire quilt.
Double-Fold Binding
Double-fold binding is made by folding a strip of fabric in half lengthwise, resulting in a double layer of fabric. This type of binding is strong and durable, making it suitable for quilts that will be used and washed frequently.
Single-Fold Binding
Single-fold binding involves a single layer of fabric. It’s less bulky than double-fold binding and is often used for smaller projects or quilts that will not be subjected to heavy use.
Step-by-Step Guide to Binding a Quilt
Tools and Materials Needed
- Binding fabric
- Rotary cutter and ruler
- Iron and ironing board
- Sewing machine
- Thread
- Pins or clips
- Scissors
Preparing the Quilt Edge
Trim the edges of your quilt to make sure they are straight and even. Remove any excess batting and backing fabric.
Attaching the Binding
- Start Binding: Begin by sewing the binding to the quilt top, aligning the raw edges. Leave a tail of about 10 inches at the start.
- Mitering Corners: When you reach a corner, stop sewing 1/4 inch before the edge, fold the binding up, and then back down, creating a mitered corner.
- Continuing: Continue sewing until you reach the starting point, then overlap the ends of the binding and sew them together.
Finishing the Binding
Fold the binding over to the back of the quilt and hand-stitch it down, covering the previous seam. Use small, even stitches to ensure a neat finish.
Creative Binding Ideas
Decorative Stitches
Adding decorative stitches to your binding can give your quilt a unique touch. Use your sewing machine’s decorative stitch settings to create patterns along the edge.
Embroidered Binding
Embroidering designs onto your binding fabric before attaching it to the quilt can add a personal and artistic touch. This is especially effective on solid-colored bindings.
Using Contrasting Colors
Using a binding fabric in a contrasting color can create a bold and eye-catching frame for your quilt. This technique works well with quilts that have a lot of color and pattern variation.
Pieced Binding
Pieced binding involves sewing together strips of different fabrics to create a binding with a patchwork look. This technique is a great way to use up leftover fabric scraps and adds a whimsical touch to your quilt.
Common Mistakes and How to Avoid Them
Uneven Binding Width
Ensure that your binding strips are cut to a consistent width and that you maintain an even seam allowance while sewing. This will prevent uneven binding widths.
Wrinkling and Bunching
To avoid wrinkles and bunching, press your binding strips thoroughly before attaching them. Use pins or clips to hold the binding in place while sewing, and sew slowly and carefully.
Binding Too Tight or Too Loose
Binding that is too tight can cause the edges of the quilt to curl, while binding that is too loose can look sloppy. Aim for a snug but not tight fit when attaching the binding.
Caring for Quilts with Binding
Washing and Drying
To keep your quilt and its binding in good condition, wash it in cold water on a gentle cycle and dry it on a low heat setting. Avoid using bleach, as it can weaken the fabric fibers.
Storing Quilts
Store quilts in a cool, dry place away from direct sunlight. Folding them loosely and storing them in breathable bags can help prevent creases and fabric damage.
Repairing Binding
Over time, the binding on a quilt may show signs of wear, especially along the edges and corners. Here are steps to repair or replace the binding:
- Assess Damage: Determine whether the entire binding needs replacement or if you can patch small sections.
- Remove Old Binding: Carefully cut away the damaged binding with a seam ripper.
- Prepare New Binding: Cut new binding strips to match the original binding in width and length.
- Attach New Binding: Follow the same steps as when initially binding the quilt—sew the new binding to the quilt, miter the corners, and finish by folding it over and hand-stitching it in place.
How to Calculate Fabric Yardage for Quilt Binding
Calculating fabric yardage for quilt binding is essential to ensure you have enough fabric to complete your quilt. Here’s a step-by-step guide on how to do it:
Steps to Calculate Fabric Yardage for Quilt Binding
Measure the Perimeter of the Quilt:
Measure all four sides of your quilt and add them together to get the total perimeter.
For example, if your quilt is 60 inches by 80 inches, the perimeter is:
Determine the Width of Your Binding Strips:
The most common binding width is 2.5 inches, but it can vary based on personal preference.
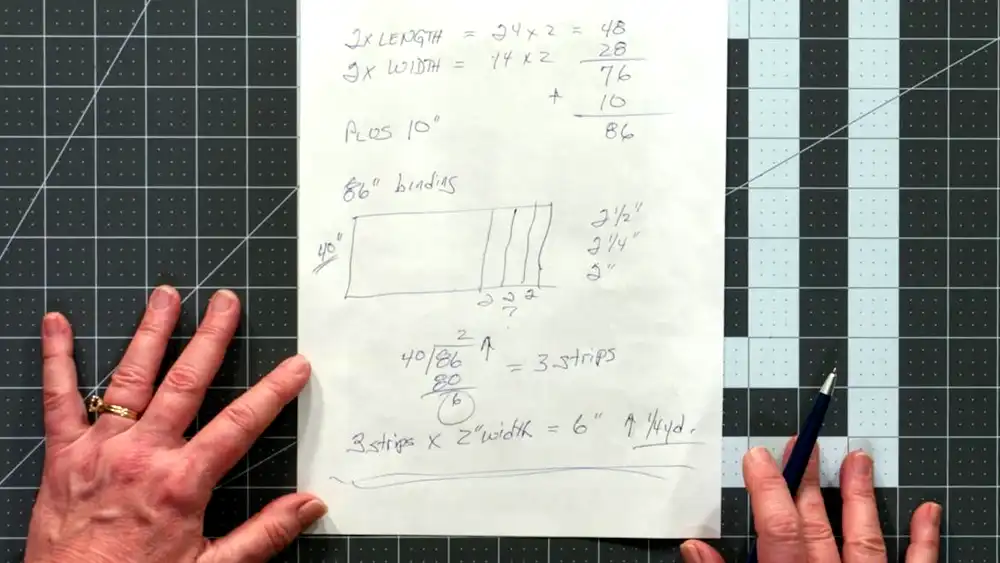
Calculate the Total Length of Binding Needed:
Add 10-20 inches to the perimeter to account for mitered corners and joining the ends of the binding.
Using the previous example with a 280-inch perimeter, add 20 inches
So, you need 300 inches of binding.
Calculate the Number of Binding Strips Required:
Most fabric is 40-44 inches wide, so you can generally assume 40 inches of usable width after trimming selvages.
Divide the total length of binding needed by the usable width of the fabric:
Round up to the nearest whole number since you can’t use a partial strip:
Calculate the Total Fabric Yardage:
Multiply the number of strips by the width of each strip to find the total inches of fabric needed.
For 2.5-inch wide strips:
Convert inches to yards (since fabric is typically sold by the yard):
Round up to ensure you have enough fabric:
For a quilt with a perimeter of 280 inches, you will need 5/8 yards of fabric to make 2.5-inch wide binding strips.
Tips
- Always round up to the nearest 1/8 yard to ensure you have enough fabric.
- If you are using bias binding (cut on the bias), you may need more fabric.
- Double-check your measurements before cutting the fabric to avoid errors.
By following these steps, you can accurately calculate the fabric yardage required for your quilt binding.
FAQs on Quilt Binding Fabric
What is the best fabric for quilt binding?
The best fabric for quilt binding is typically 100% cotton. It’s durable, easy to work with, and available in many colors and patterns. However, the best choice can vary depending on the quilt’s intended use. For decorative quilts, silk or linen might be preferred, while polyester is good for heavy-use quilts.
Can I use leftover fabric for binding?
Yes, leftover fabric can be used for binding. This is a great way to make use of scraps and can add a unique, pieced look to your quilt. Ensure the fabric is of suitable quality and durability for binding.
How wide should quilt binding be?
Quilt binding strips are typically cut to a width of 2.5 inches. However, you can adjust the width based on your preference and the quilt’s requirements. Wider binding may be easier to work with, while narrower binding can give a sleeker look.
How do I bind a quilt with curves or angles?
For quilts with curves or angles, bias binding is recommended. Bias binding has more flexibility than straight grain binding and can conform to the quilt’s edges more easily. Carefully pin the binding around curves and use smaller stitches to maintain smoothness.
What are some advanced binding techniques?
Advanced binding techniques include:
- Scalloped Binding: Used for quilts with scalloped edges, requiring careful measuring and cutting.
- Flange Binding: Adds a small, contrasting flange (strip) between the quilt and the binding.
- Prairie Points: Small folded triangles sewn into the binding, adding a decorative touch.
- Piped Binding: Involves inserting a cord or piping into the binding for added texture and dimension.
Conclusion
Binding fabric is an essential element in quilting that combines functionality with aesthetics. Whether you’re a novice quilter or an experienced one, understanding the different types of binding fabrics, techniques, and creative ideas can significantly enhance your quilting projects. Properly chosen and applied binding not only protects the quilt’s edges but also adds a beautiful finishing touch. By following the steps and tips outlined in this guide, you can achieve professional-quality binding for your quilts.