You can learn how to make a quilt sleeve by sewing a fabric tube to the back top edge of your quilt, allowing you to slide a rod through for easy display. Adding a hanging sleeve keeps your quilt safe by evenly distributing its weight, preventing stretching or tearing when hanging it up.
Many people love hanging their quilts in galleries or at home, using sleeves because they help your quilt hang straight and look great for years.
Key Takeaways
Use strong cotton fabric like muslin or premium quilting cotton to make a durable quilt sleeve that supports your quilt well.
Measure your quilt’s full width and cut the fabric strip wide enough to create a 4-inch finished sleeve for proper hanging.
Sew the fabric into a tube, finish the edges to prevent fraying, and press seams carefully for a neat, professional look.
Attach the sleeve about half an inch below the quilt’s top edge, making it slightly shorter than the quilt’s width to hide the rod.
Choose hand stitching for delicate quilts or machine stitching for speed, and always use a sturdy rod to prevent sagging.
Materials for a Hanging Sleeve
Choosing Fabric
Picking the right fabric for your hanging sleeve makes a big difference in how your quilt hangs and lasts over time. You want something strong but easy to sew. Most quilters recommend 100% cotton muslin for a hanging sleeve.
Cotton muslin is lightweight, durable, and holds up well, even if you display your quilt for years. You can also use premium cotton fabrics from Fanda Fabrics, like those in the Quilting Collection. These fabrics have a smooth texture and high thread count, which means your sleeve will look neat and feel sturdy.
Tip: If you’re working on a large quilt, try the 118 Inch Wide Quilt Backing Fabric from Fanda Fabrics. The extra-wide size lets you create a seamless hanging sleeve, saving you time and giving your quilt a professional finish.
When you choose natural cotton, you help the environment too. Cotton is biodegradable and eco-friendly, especially if you pick organic or sustainably sourced options. Some quilters use leftover scraps for zero-waste quilting, which reduces fabric waste and makes your project even greener.
Tools and Supplies
You don’t need a lot of fancy tools to make a hanging sleeve. Here’s a quick list to get you started:
Cotton fabric (muslin or premium quilting cotton)
Scissors or rotary cutter
Ruler or measuring tape
Pins or clips
Sewing machine (or needle and thread for hand sewing)
Iron and ironing board
Thread that matches your quilt
Using high-quality supplies helps your hanging sleeve last longer and keeps your quilt looking its best. Fanda Fabrics offers curated bundles, so you can easily match colors and prints to your quilt. Reliable tools and strong fabric mean your quilt will hang straight and stay secure, whether you display it at home or in a gallery.
How to Make a Quilt Sleeve?
Measure and Cut
You want your hanging sleeve to fit perfectly and support your quilt when hanging. Start by measuring the width of your quilt from edge to edge, including the binding. Most quilting guilds, like the UV Quilters Guild, require a sleeve that is 4 inches wide.
The American Quilter’s Society suggests cutting your fabric 8½ inches wide, which gives you room for seams and folding. Cut the length to match the full width of your quilt.
Tip: If you use Fanda Fabrics’ 118 Inch Wide Quilt Backing Fabric, you can cut a seamless strip for even the largest quilts. This makes your sleeve look professional and keeps the back smooth.
Lay your fabric flat. Use a ruler or measuring tape to mark the width and length. Cut the fabric with sharp scissors or a rotary cutter. Double-check your measurements before you move on. You want the sleeve to run the entire width so your quilt hangs straight and doesn’t sag.
Sew the Sleeve
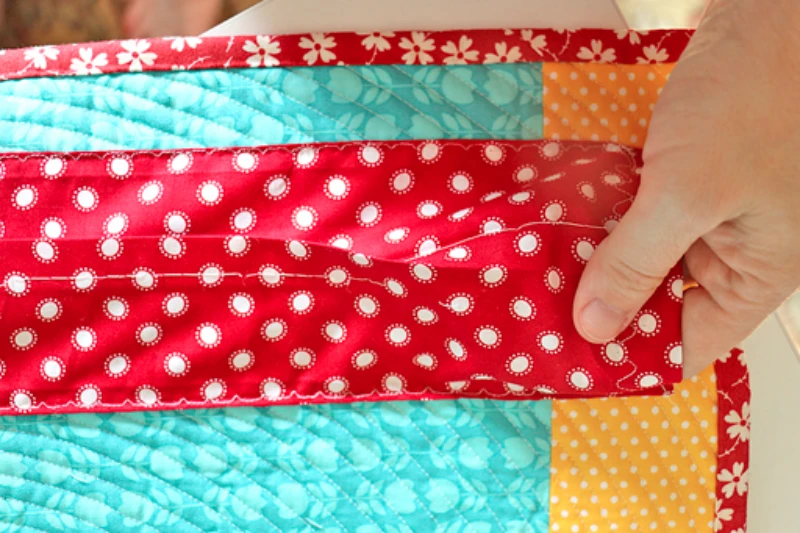
Now you’re ready to sew. Fold the fabric strip in half lengthwise, with the right sides together. Pin or clip the long edge to keep it in place. Sew a straight seam along the long edge, leaving the short ends open. Use a ¼-inch seam allowance for a neat finish.
Once you finish sewing, turn the tube right side out. Press the seam flat with an iron. This helps the sleeve lay smooth against your quilt. If you want a crisp look, press the seam open before turning.
Note: A well-pressed seam makes your hanging sleeve easier to attach and helps your quilt hang evenly.
Finish the Edges
You need to finish the short edges of your sleeve so they don’t fray over time. There are several ways to do this, and you can pick the one that works best for you:
Use a serger to sew, cut, and finish the edges in one step. This gives a strong, clean finish.
Sew a zigzag stitch along the raw edges with your regular sewing machine. Add a few reverse stitches at the start and end to secure the thread.
Cut the edges with pinking shears for a jagged edge that resists fraying. You can also dab on a little fabric glue or Fray Check for extra protection.
Hand-stitch a whipstitch close to the edge. Make sure your stitches aren’t too tight so the fabric doesn’t pucker.
Some quilters prefer double-fold binding for the edges. This method is very durable and keeps your hanging sleeve looking good for years. Bias cut binding is another sturdy option, especially if your quilt will be displayed often.
Callout: The quality of your fabric matters. Premium cotton from Fanda Fabrics stands up to frequent hanging and washing, so your sleeve stays strong and your quilt looks its best.
When you finish the edges, your sleeve is ready to attach. You’ve learned how to make a quilt sleeve that will support your quilt and keep it looking beautiful every time you hang it up.
Make a Hanging Sleeve: Step-by-Step
Fold and Press
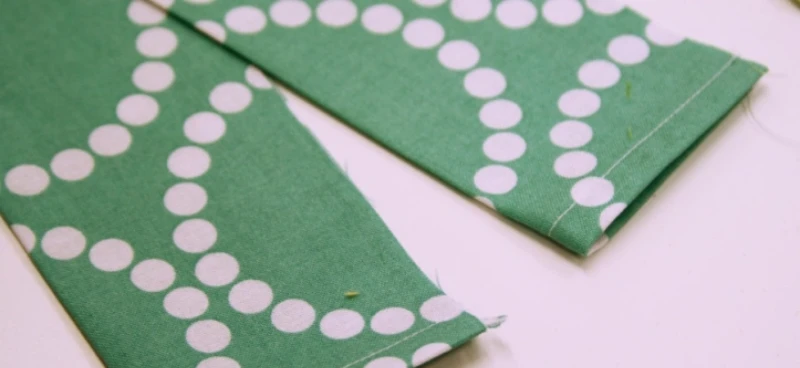
Start by laying your fabric strip flat on your ironing board. Fold each short end under about 1/4 inch, then fold it under again. Press these folds with your iron to create a neat edge. Stitch along the folded edges to keep them from fraying. This step gives your hanging sleeve a clean look and helps it last longer.
Next, fold the entire strip in half lengthwise with the wrong sides together. Press along the fold to make a sharp crease. Open the strip and fold the top and bottom raw edges just above the crease line, pressing to form two new creases. These creases will help you shape the tube and make the next steps easier.
Tip: Taking your time with pressing makes your hanging sleeve look crisp and professional.
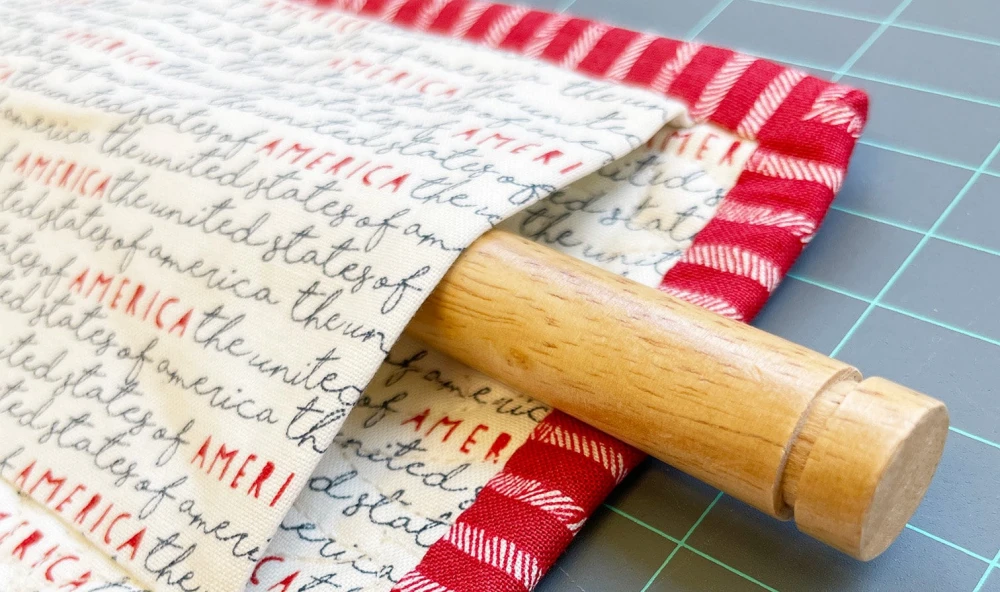
Create the Tube
With the fabric strip still open, align the long raw edges together. Sew a 1/4-inch seam along the long edge to form a tube. Press the seam open. Turn the tube right side out, then adjust it so the seam sits in the center of one side. Press the tube flat again. This step helps your quilt hang smoothly and keeps the sleeve from twisting.
If you want to try a loop method for hanging, cut smaller strips, sew them into tubes, and attach them evenly across the back of your quilt. Slide a dowel through the loops for a rustic look. Both methods let you make a hanging sleeve that fits your style.
Prepare for Attachment
Before you attach the sleeve, measure your quilt’s width and subtract about two inches. This makes sure the hanging sleeve is slightly shorter than the quilt, so the rod won’t peek out from the sides. Place the tube on the back of your quilt, about half an inch below the binding. Center it carefully.
Pin the sleeve in place. Make small adjustments to keep it straight and avoid puckers. When you’re ready, you can hand-stitch or use a machine to secure the sleeve.
Keep your stitches hidden on the front for a neat finish. Now your quilt is ready for hanging, and you’ve mastered how to make a quilt sleeve that looks great and works perfectly.
Attach a Quilt Sleeve
Placement on the Quilt
You want your quilt to hang straight and look its best, so placement matters. Most quilt shows and galleries recommend sewing the sleeve right along the top back edge of your quilt. This spot gives your quilt the support it needs and keeps the weight evenly distributed while hanging.
Make sure your sleeve sits about 1/2 inch below the top binding. This small gap helps the quilt hang flat against the wall and prevents the rod from showing above the quilt.
When you measure, cut your sleeve just a bit shorter than the width of your quilt—usually about 1/2 inch to 1 inch less on each side. This way, the ends of the sleeve stay hidden, and the rod or dowel fits perfectly inside. The standard height for a hanging sleeve is 4 inches, which works well for most rods used in quilt shows.
Leave a little extra room (about 1/4 to 1/2 inch) between the sleeve and the quilt’s edge. This space lets the rod slide in easily and keeps the front of your quilt smooth, with no bulges or puckers.
Tip: A well-placed quilt hanging sleeve helps your quilt meet show standards and hang beautifully at home.
Hand or Machine Stitching
Now you’re ready to attach a quilt sleeve. You can choose between hand stitching and machine stitching. Each method has its strengths, so pick the one that fits your project and your style.
Here’s a quick comparison to help you decide:
Stitching Method | Pros | Cons |
|---|---|---|
Hand Stitching | Portable, needs little space, no electricity, precise for delicate fabrics, relaxing | Takes more time, stitches may vary in length |
Machine Stitching | Fast, strong, works on all fabrics, even heavy ones, consistent stitches | Needs setup, electricity, and some practice |
Hand stitching gives you control, especially if your quilt has delicate fabrics or detailed work. You can make tiny, almost invisible stitches that won’t show on the front. Many quilters find hand sewing relaxing and satisfying. If you want to work on your quilt while watching TV or sitting outside, hand stitching is perfect.
Machine stitching works great if you want to finish quickly or if your quilt is large and heavy. The stitches are strong and even, and you can attach the sleeve in minutes. Just make sure to use a matching thread and sew close to the edge of the sleeve so the stitches stay hidden from the front.
Note: For show quilts or heirloom pieces, many quilters prefer hand stitching for a nearly invisible finish. For everyday quilts or quick projects, machine stitching saves time and still looks neat.
Using Fanda Fabrics Wide Backing
If you’re working on a large quilt, you know how tricky it can be to keep the back smooth and seamless. Fanda Fabrics’ wide back quilting fabric makes this step much easier.
The extra-wide fabric (up to 118 inches) means you don’t have to piece together smaller sections, so your quilt back stays flat and professional-looking. This smooth surface gives you the perfect foundation for attaching your hanging sleeve.
When you use Fanda Fabrics’ wide back quilting fabric, you get strong, even backing that supports both your quilt and the sleeve. The fabric’s high quality ensures your stitches hold well, and the sleeve stays secure, even if you hang your quilt for years.
You can match the color and pattern of your backing to your quilt top, creating a seamless look from front to back.
Callout: For a truly professional finish, use Fanda Fabrics’ wide back quilting fabric. It makes attaching a quilt sleeve simple and gives your quilt a gallery-ready appearance.
You can find a variety of colors and patterns in the Fanda Fabrics collection, so it’s easy to coordinate with your quilt. Whether you’re making a showpiece or a cozy throw, starting with the right backing fabric helps your quilt hang straight and look its best every time.
Tips and Troubleshooting
Sizing and Placement
Getting the size and placement right is key if you want a perfect hanging sleeve. You should always make your sleeve at least 4 inches wide when finished. This size fits most standard rods used in quilt shows and home displays.
Measure the full width of your quilt, including the binding, before you cut your fabric. Cut your fabric strip 8½ inches wide to allow for folding and seam allowances.
When you sew the sleeve, press the seams open and make sure the seam sits against the quilt back. Fold the short ends under twice and stitch them down to hide raw edges.
Tip: After you sew the sleeve, fold the bottom edge up about ¼ to ½ inch. This little space lets the rod slide in easily and helps your quilt hang straight. Pin the sleeve about ½ inch below the top binding for best results.
Preventing Sagging
No one wants a saggy quilt! You can prevent sagging by sewing a tube-shaped sleeve across the entire back of your quilt. Place the sleeve about 1½ to 2 inches below the binding. Some quilters like to add a small pleat at the top of the sleeve—this is called a “D sleeve.”
The pleat gives extra room for the rod and keeps it from pressing against the quilt, which helps your quilt hang flat and smooth. Always use a dowel or rod that fits snugly inside the sleeve. For smaller quilts, corner pockets work well, but avoid hanging by just the corners.
Never use nails, pins, or staples to hang your quilt. These can damage the fabric and cause sagging.
Stitch through at least two layers of the quilt for strength.
Distribute the weight evenly by using a sleeve that runs the full width.
Common Mistakes
Even experienced quilters make mistakes, but you can avoid the most common ones:
Mistake | How to Avoid It |
|---|---|
Sleeve too narrow | Always finish at 4 inches wide |
Sleeve too short | Measure the full quilt width, including binding |
Stitches show on quilt front | Use a whip stitch, catching only the sleeve/back |
Rod too tight in sleeve | Add a ¼–½ inch fold at the bottom |
Hanging by corners | Use a full-width sleeve or corner pockets |
When you store your quilt, avoid basements or attics. These places have unstable temperatures and humidity. Use clean white sheets to cover your quilt and fold it on the bias to reduce creasing.
If you hang your quilt for long periods, rotate or refold it now and then to prevent permanent marks. Clean hands are a must when handling your quilt to keep it looking fresh.
Remember, a little extra care goes a long way in keeping your quilt display-ready. With these tips, you’ll have a perfect hanging sleeve every time!
Conclusion
You’ve learned how to make and attach a quilt sleeve with confidence. Here’s a quick recap:
Cut and hem a sturdy fabric strip.
Fold, press, and sew to create a tube.
Pin and hand stitch the sleeve to your quilt back.
Choosing quality fabrics from Fanda Fabrics keeps your sleeve strong and looking sharp.
Displaying your quilt with a proper sleeve brings real pride and respect for your hard work. Enjoy seeing your quilt hang beautifully and securely!
FAQ
How do I know what size to make my quilt sleeve?
Measure the width of your quilt, including the binding. Cut your sleeve fabric to match this width. Most quilt shows want a finished sleeve that is 4 inches tall.
Can I use leftover fabric for my hanging sleeve?
Yes! You can use leftover cotton fabric as long as it is sturdy and matches your quilt’s quality. Just avoid stretchy or thin materials. Scraps from Fanda Fabrics work great.
Should I wash the fabric before making a sleeve?
You should wash and press your fabric before sewing. Pre-washing helps prevent shrinking or color bleeding later. This step keeps your quilt and sleeve looking their best.
Can I attach a sleeve to a finished quilt?
Absolutely! You can hand-stitch a sleeve to the back of any finished quilt. Use small, hidden stitches so they don’t show on the front. It’s a simple way to add a sleeve anytime.
What’s the best way to hang a heavy quilt?
Use a full-width sleeve and a sturdy rod. Make sure your sleeve is strong and securely attached. Fanda Fabrics’ wide back quilting fabric gives extra support for large or heavy quilts.