Starting your first quilted blanket can be both exciting and a bit overwhelming. Whether you’re inspired by cherished family heirlooms or want to create a heartfelt gift, beginner-friendly sewing projects like quilts offer a unique sense of accomplishment.
Choosing high-quality quilting fabric, such as the soft and durable cotton from Fanda Fabrics, makes the process of learning how to make a quilted blanket much smoother and more enjoyable. Following a clear, step-by-step guide on how to make a quilted blanket will help you avoid common pitfalls like fabric distortion or color bleeding.
Keep in mind that every quilted blanket tells its own story, and even small mistakes add character and charm. Take your time—most beginners spend a few extra hours finishing their first project, but watching your progress is incredibly rewarding.
Are you ready to learn how to make a quilted blanket and savor every step of the creative journey?
Key Takeaways
Choose high-quality, coordinated fabrics like Fanda Fabrics bundles to make quilting easier and your blanket look professional.
Prepare your fabric by washing and pressing it to prevent color bleeding and keep your quilt squares accurate and neat.
Cut fabric carefully using sharp tools and organize pieces by color or pattern to simplify the sewing process.
Sew your quilt in rows with consistent ¼-inch seams, press seams properly, and join rows carefully for a smooth, flat quilt top.
Layer your quilt top, batting, and backing evenly, baste securely, and use simple quilting methods to finish your blanket with confidence.
Materials & Tools
Fabric Selection: Fanda Fabrics Quilting Bundles
Choosing the right fabric sets the stage for your quilt project. You want materials that are easy to work with and look great together. Fanda Fabrics offers quilting fabric bundles, the Quilting Collection, cotton quilting fabric, wide back quilting fabric, and double sided quilted fabric. These options give you plenty of choices for your first quilt.
Pre-cut bundles, like fat quarters, make quilting much simpler for beginners. You get pieces that measure about 18 by 22 inches, which are easier to handle than long, narrow strips. These bundles come color-coordinated or themed, so you don’t have to worry about matching fabrics yourself.
You can focus on the fun part—designing your quilt. Pre-cut bundles also let you experiment with different patterns without buying lots of yardage. You’ll find that using high-quality cotton from Fanda Fabrics helps your quilt hold its shape and last longer.
Tip: Start with a bundle that catches your eye. The coordinated colors and patterns make your quilt look professional, even if it’s your first try.
Essential Tools for Quilting
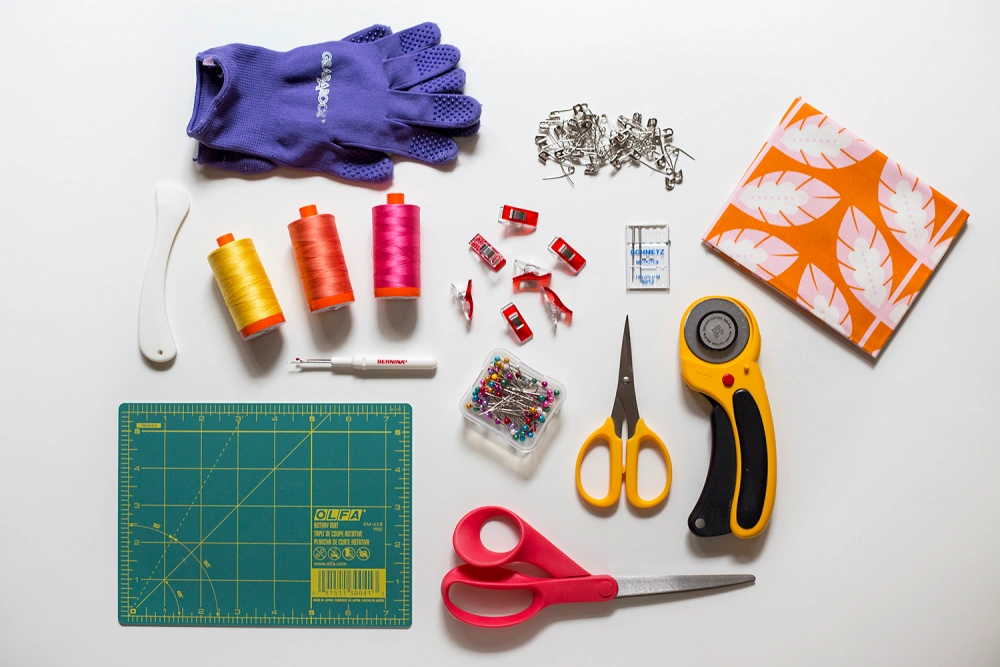
You don’t need a fancy setup to start quilting. Here’s a list of tools that make the process easier:
Sewing machine (a walking foot helps keep layers even)
Rotary cutter (45 mm is a good size for beginners)
Cutting mat (self-healing mats last longer)
Ruler (a 24 x 8½ inch ruler works for most quilt blocks)
Iron and ironing board (press seams flat for a neat quilt)
Sewing clips or sharp pins (hold pieces together while you sew)
Batting (the soft layer inside your quilt)
Thread (cotton for piecing, polyester for quilting)
Universal sewing machine needles (size 80/12 or 90/14)
With these tools and Fanda Fabrics’ bundles, you’re ready to start your quilting journey. You’ll find that having the right materials makes each step of your quilt easier and more enjoyable.
How to Make a Quilted Blanket?
Preparing Fabric
Getting your fabric ready is the first real step in the quilt-making process. If you want your patchwork baby quilt to look great and last for years, you need to start with clean, stable fabric. Here’s a quick tutorial to help you prepare:
Decide if you want to pre-wash your fabric. Pre-washing removes dust, dirt, and extra dye. It also helps prevent color bleeding and shrinkage later. If you’re using Fanda Fabrics’ high-quality cotton, you can trust the colors, but pre-washing is still a good habit—especially for a baby quilt project.
Sort your fabrics by color before washing. Wash darks and lights separately in cold water. Use a mild detergent or skip detergent if you’re worried about fading.
To avoid fraying, you can baste the edges or use a mesh laundry bag.
Dry your fabric the same way you’ll wash your finished quilt. This helps keep your patchwork baby quilt the right size.
Once dry, press your fabric on both sides. Use the right heat setting for cotton and avoid steam. Pressing removes wrinkles and helps you cut your fabric into squares accurately.
Tip: Pre-washing and pressing your fabric helps your quilt keep its shape and color, even after many washes. This step is especially important for a patchwork baby quilt, where you want every square to look perfect.
Cutting & Organizing Pieces
Now you’re ready to cut your fabric into squares or strips. This part of the tutorial is where your quilt starts to take shape. If you use Fanda Fabrics’ pre-cut bundles, you can skip a lot of measuring and just start arranging your pieces. For everyone else, here’s how to make a quilted blanket with confidence:
Press your fabric again before cutting. A smooth surface means more accurate cuts.
Fold your fabric selvage to selvage and trim the edge to square it up.
Use a clear, non-slip quilting ruler and a sharp rotary cutter. Place the ruler firmly and cut away from your body.
Cut your fabric into strips first, then sub-cut those strips into squares or rectangles. This method saves time and keeps your pieces even.
Stack up to six layers of fabric if you feel comfortable. Always keep the right sides up unless your fabric is reversible.
For a patchwork baby quilt, you might want to fussy cut special prints so the cute designs show up in each square.
Once you’ve cut your fabric into squares, organize them by color or pattern. Lay them out in stacks or rows so you can see what you have. This makes the next step much easier.
Note: Using Fanda Fabrics’ coordinated bundles takes the guesswork out of matching colors and patterns. You get a beautiful, cohesive look for your patchwork baby quilt or any easy quilt patterns you want to try.
Laying Out the Quilt Top
This is where your creativity shines. Laying out the quilt top lets you play with color and pattern before you sew anything together. Here’s a simple tutorial to guide you:
Find a flat surface, like a table or a clean floor.
Arrange your fabric squares in rows and columns. For a patchwork baby quilt, you might use a 5×6 or 6×7 grid, depending on the size you want.
Step back and look at your layout. Move pieces around until you like the balance of colors and prints.
Take a photo of your layout. This helps you remember the order when you start sewing.
Double-check that all your blocks are facing the right direction, especially if you have directional prints.
Common Mistake | Cause/Issue | How to Avoid / Fix It |
|---|---|---|
Uneven seams and misaligned blocks | Inconsistent seam allowances, inaccurate cutting | Use quilting rulers and rotary cutters for precise cutting; check block dimensions and corners frequently; use seam guides or a 1/4-inch presser foot for consistent seam allowances |
Wrong block orientation | Misplacing directional or geometric blocks | Frequently check block orientation during assembly; take photos of layout as reference; unpick and correct misplaced blocks early if possible |
Fabric distortion and color bleeding | Using unwashed or incompatible fabrics | Pre-wash fabrics, especially dark colors; use dye stabilizers if needed; starch fabric before cutting to improve accuracy and reduce fraying |
Inaccurate cutting | Dull blades, improper tools | Use sharp rotary cutters (45 mm or smaller for small pieces), accurate quilting rulers, and cutting mats with contrasting colors |
Tip: Don’t rush this step. Taking your time with the layout helps you avoid common mistakes and gives your patchwork baby quilt a polished, professional look.
If you’re using Fanda Fabrics’ bundles, you’ll notice how easy it is to create a simple patchwork quilt with their coordinated colors. This makes the quilt-making process less stressful and a lot more fun. You can focus on the creative part—choosing your favorite arrangement—without worrying about mismatched fabrics.
By following this tutorial, you’ll set yourself up for success in making a quilt. The next steps will be sewing your rows together and bringing your patchwork baby quilt to life!
How to Sew a Quilt?
So, you’ve got your fabric pieces cut and your layout ready. Now comes the fun part—sewing your patchwork baby quilt together! This part of the tutorial will walk you through how to sew a quilt, step by step, so you can see your design come to life.
Piecing & Sewing Rows
Start by sewing your fabric squares together to make rows. Here’s how you can do it:
Take the first two squares from your first row and place them right sides together.
Sew along one edge using a ¼-inch seam allowance. This is the standard for quilting.
Add the next square to the row, always keeping right sides together, and sew it on.
Continue until you finish the row.
Repeat for each row in your patchwork baby quilt.
Tip: Sew slowly and keep your fabric edges lined up. If you rush, your seams might get wobbly.
To get straight seams, try these tips:
Make sure your fabric cuts are straight and even.
Use a seam guide on your sewing machine, like a vinyl sticker or a piece of washi tape.
A quarter-inch foot with a built-in guide helps keep your seam allowance perfect.
Remember, the needle always sews straight—the fabric moves, so guide it gently.
A walking foot can make a big difference here. It feeds all the layers of your quilt evenly, so you don’t get puckers or shifting. Beginners love the walking foot because it helps keep everything lined up, even when sewing thick layers or slippery fabrics.
You’ll find it much easier to sew straight lines and keep your patchwork baby quilt looking neat.
Pressing Seams
After you sew each pair of pieces, press the seam before you open it. This sets the stitches and helps your quilt stay flat. Here’s a quick tutorial for pressing seams:
Press the seam to one side, usually toward the darker fabric. This hides the seam and keeps your quilt top looking crisp.
If you have lots of seams meeting at one point, press them open to reduce bulk.
Nest your seams by pressing them in opposite directions at intersections. This makes it easier to match corners and keeps your patchwork baby quilt smooth.
Always lift and place the iron—don’t drag it. Dragging can stretch your fabric and mess up your blocks.
Use a good iron with adjustable heat. A wool pressing mat or pressing spray can help get seams extra flat.
Note: Pressing every seam as you go keeps your quilt blocks accurate and your finished quilt looking professional.
Joining Rows
Now it’s time to join the rows and finish your quilt top. Here’s how to sew a quilt together, row by row:
Take your first two rows and place them right sides together.
Pin at every seam intersection to keep your blocks lined up.
Sew along the edge with a ¼-inch seam allowance.
Open the rows and press the seam—again, to one side or open, depending on bulk.
Add the next row in the same way, pinning and sewing carefully.
Keep going until you join the rows for the whole patchwork baby quilt.
Tip: Use the straight seams you’ve already sewn as a guide for the next row. Mark your quilt every few inches with a hera marker or pencil if you need extra help staying straight.
Fanda Fabrics’ cotton quilting fabric makes this process easier. The fabric doesn’t slip or stretch much, so your pieces stay lined up. It’s easy to cut, sew, and press, which is perfect for a baby quilt project or any easy quilt patterns you want to try.
Plus, the tight weave and high thread count mean your quilt will last for years, even with lots of washing and cuddling.
Here’s a quick table to help you remember the steps:
Step | What to Do | Why It Matters |
|---|---|---|
Piece Rows | Sew squares together in a row | Builds the quilt top |
Press Seams | Press after each seam | Keeps blocks flat and accurate |
Join the Rows | Sew rows together, pin at seams | Aligns blocks for a neat finish |
Final Press | Press the whole quilt top | Prepares for quilting and finishing |
By following this tutorial, you’ll have a beautiful patchwork baby quilt top ready for the next stage. Take your time, enjoy the process, and remember—quilting is all about creativity and patience!
Quilt Sandwich & Quilting
Once you finish your quilt top, you’re ready for the next big step: making a quilt sandwich. This part of the tutorial helps you layer everything together so you can start quilting with confidence.
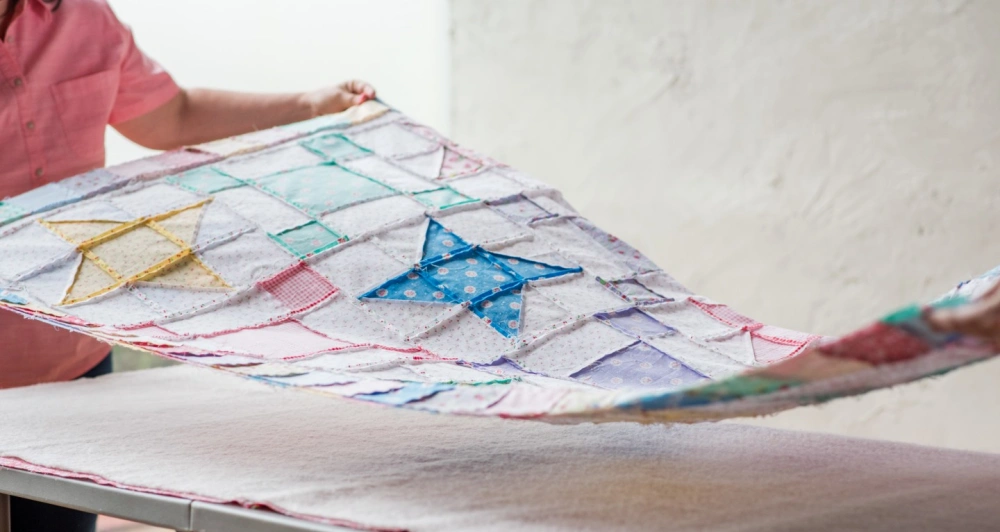
Layering Top, Batting, Backing
Let’s walk through how to layer your quilt top, batting, and backing for a smooth finish:
Press your quilt top and backing fabric well. Use a little starch or smoothing spray to get rid of wrinkles.
Lay the backing fabric right side down on a large, flat surface. If you use Fanda Fabrics’ wide back quilting fabric, you won’t need to piece together smaller sections. This fabric covers your whole quilt in one go, giving you a seamless, professional look.
Smooth the batting over the backing. Take your time to remove any creases.
Place your quilt top right side up on the batting. Make sure you have about two extra inches on all sides to allow for shifting.
Clamp or tape the layers so nothing moves while you work.
You might hear the phrase “add wadding and backing” in other tutorials. It simply means layering the batting (wadding) and backing under your quilt top.
Basting & Securing Layers
Basting holds your quilt sandwich together before you quilt the layers. Here’s a quick tutorial:
Start from the center and work outward.
Use curved safety pins every 3-4 inches, or try sewing clips if you prefer.
Make sure all three layers stay smooth and wrinkle-free.
Remove any tape or clamps once you finish pinning.
Tip: Always check the back of your quilt for puckers before you start quilting. Smooth out any wrinkles now to avoid surprises later.
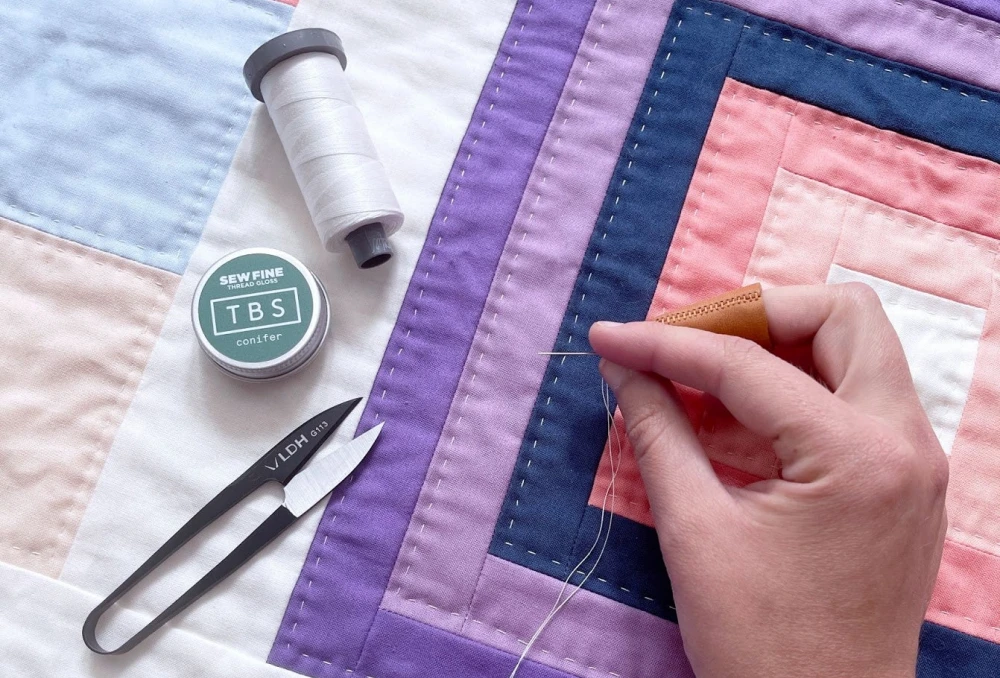
Quilting Methods for Beginners
Now comes the fun part—quilting! For beginners, simple methods work best:
Straight line quilting: Sew straight lines across your quilt, either by following the seams or marking lines with a fabric pen.
Stitching in the ditch: Sew right along the seams where your blocks meet. This method hides your stitches and keeps the quilt sturdy.
Tying: Use embroidery floss or yarn to tie knots at regular intervals. This is quick and gives your quilt a cozy, handmade feel.
Quilting cotton makes these methods easy because it’s stable and forgiving. If you want to try something new, Quilt-As-You-Go lets you quilt each block separately, then join them together. This approach gives you more control and makes handling your quilt much easier.
Remember, the goal is to enjoy the quilting process. Choose a method that feels comfortable and lets you finish your project with pride.
How to Make a Quilt: Finishing Steps
Trimming Edges
You’re almost done with your quilt! Before you add the borders or bind your quilt, you need to trim the edges for a clean, professional look. Here’s a quick tutorial to help you get it right:
Lay your quilt flat and smooth out any wrinkles.
Use a large quilting ruler and a rotary cutter to trim the quilt sandwich—batting and backing—about 3/8 inch beyond the quilt top edges. This exposes a little batting around the sides.
Square up the corners so everything lines up neatly.
Mark a sewing line 1/4 inch in from the quilt top edge. This helps you sew straight when you attach the binding.
Double-check that all sides are even before you move on.
Tip: Take your time with trimming. A straight edge makes binding much easier and helps your quilt look polished.
Attaching Binding
Now you get to bind your quilt and add the borders for a finished edge. You can use traditional cotton or try double-sided quilted fabric from Fanda Fabrics for a creative twist. Here’s how to make a quilt look professional with neat binding:
Cut binding strips about 2.5 inches wide and join them with diagonal seams to reduce bulk.
Fold the strips in half lengthwise and press with a hot iron.
Pin the binding along the quilt edges, aligning raw edges.
Start sewing on the front side, leaving a tail for joining later. Use a 1/4 inch seam allowance and a walking foot for smooth feeding.
When you reach a corner, stop 1/4 inch before the edge, fold the binding at a 45-degree angle, and continue sewing down the next side. This creates a neat mitered corner.
Join the ends with a diagonal seam, trim excess, and press flat.
Flip the binding over to the back and secure with hand stitching or machine sewing.
Tips:
Use clips to hold binding in place before stitching.
Practice mitered corners—they get easier with experience.
Try double sided quilted fabric for reversible borders.
Final Touches & Care
You’ve finished the main steps, but a few final touches make your quilt shine. Here’s how to finish a quilt with style:
Press the corners and edges with a hot iron for crisp folds.
Label your quilt with your name and the date. This adds a personal touch and helps you remember your first project.
Inspect for loose threads and trim them.
Give your quilt a final press to set the seams.
When it comes to caring for your Fanda Fabrics cotton quilt, follow these tips:
Check the care label for washing instructions.
Pre-treat stains with a gentle remover.
Wash on a gentle cycle with warm water and mild detergent.
Tumble dry on low heat or air dry flat.
Store your quilt in a clean, dry place—preferably in a breathable bag.
Note: Avoid bleach and high heat to keep your quilt soft and vibrant. Fluff your quilt after drying to restore its loft.
A well-finished quilt lasts for years and brings comfort every time you use it. You’ve learned how to make a quilt from start to finish—now enjoy your beautiful creation!
Conclusion
You did it! Finishing your first quilt feels amazing, even if it’s not perfect. Every quilt you make shows your growth and creativity. If you run into problems like uneven seams or fabric measurement errors, try using a seam guide or quilting apps.
Sharing your quilt on Instagram or Facebook helps you connect with other quilters and get inspired. You’ll find that quilting brings comfort, focus, and a sense of accomplishment. Celebrate your work, tag Fanda Fabrics, and keep quilting—each project gets easier and more rewarding!
FAQ
How do I choose the right batting for my quilt?
You want batting that matches your quilt’s purpose. For a warm, cozy blanket, pick cotton or cotton-blend batting. If you want something lighter, try polyester. Always check the thickness before you buy.
Can I quilt by hand if I don’t have a sewing machine?
Absolutely! Hand quilting works great for small projects. Use a sharp needle and strong thread. Take your time and enjoy the process. You’ll get a unique, personal finish.
What should I do if my quilt top is wrinkled before quilting?
Tip: Press your quilt top with a hot iron before layering. Use a pressing spray for stubborn wrinkles. Always let the fabric cool flat so it stays smooth.
How do I fix a mistake after sewing pieces together?
Don’t worry! Use a seam ripper to gently remove stitches. Realign your fabric and sew again. Mistakes happen to everyone, so just take it slow and keep going.
How do I keep my quilt colors from bleeding in the wash?
Wash your fabrics before you start. Use cold water and a color catcher sheet. For finished quilts, wash on gentle and dry flat. This helps keep your colors bright and your quilt looking new.