Welcome! If you’re curious about how to make a solid color quilt, you’re in the right place. Many beginners love working with solid fabrics because they make color choices simple and let your quilt shine without feeling cluttered.
Solids offer a clean look, help balance busy prints, and keep things from getting overwhelming. You’ll find that starting with solids takes away the stress of matching prints and allows you to focus on enjoying the quilting process.
Key Takeaways
Gather essential quilting tools like a rotary cutter, quilting ruler, sewing machine, and iron to make your process easier and more accurate.
Choose high-quality solid cotton fabrics, like those from Fanda Fabrics, to ensure vibrant colors and durable quilts that resist fading and wrinkles.
Plan your quilt by selecting a simple design, deciding the size, and picking colors that create contrast or harmony for a beautiful look.
Cut your fabric carefully using sharp tools and organize pieces by size and color to keep your workspace neat and sewing smooth.
Use simple sewing techniques like straight-line piecing and grid piecing to join fabric pieces, and press seams well for a clean, polished quilt.
Materials and Fabric Choice
Essential Tools
Before you start your quilt, you’ll want to gather a few must-have tools. These make the process smoother and help you get great results:
Rotary cutter and self-healing cutting mat: These let you cut fabric quickly and accurately. You can slice through several layers at once, which saves time.
Quilting ruler: Acrylic rulers help you measure and cut straight lines. They come in different sizes, so pick one that fits your project.
Sewing machine: Even a basic model works well for quilting. If you’re just starting, you don’t need anything fancy.
Thread: Choose high-quality thread that matches or blends with your fabric.
Fabric scissors and seam ripper: Scissors are for trimming, and a seam ripper helps fix mistakes.
Pins or clips: These hold your fabric pieces together before you sew.
Iron and ironing mat: Pressing seams as you go keeps your quilt looking crisp.
Most of these tools are affordable, except for the sewing machine and rotary cutter, which are bigger investments. They last a long time and make quilting much easier.
Choosing Solid Color Quilt Fabric from Fanda Fabrics
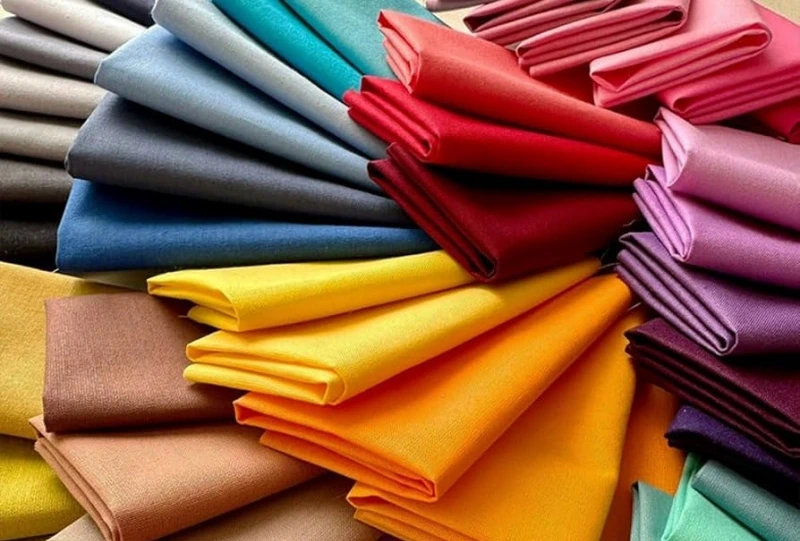
When it comes to fabric, Fanda Fabrics stands out for quality and variety. You can pick from their Solid Color Quilt Fabric, Solid Color Cotton Fabric, or Bright Quilt Fabric. These fabrics feel soft but sturdy, thanks to 100% cotton and a smooth weave.
You’ll find a huge range of colors, so matching your vision is easy. Fanda Fabrics offers wide widths, seamless backs, and flexible buying options—by the yard, in bulk, or even custom cuts.
Their fabrics resist wrinkles and keep their color after washing, so your quilt stays vibrant and fresh. Whether you want something classic or bold, you’ll find the right fit for your project.
Tip: Fanda Fabrics lets you customize color, width, and material, so you can create a quilt that’s truly your own.
Tips for Selecting Colors
Picking the right colors makes your quilt pop. Start by sorting your fabrics from lightest to darkest. This helps you create contrast and depth. Try using gradients—shades that move smoothly from light to dark—for a modern look.
High contrast between very light and very dark fabrics adds drama and interest. You can also use an analogous palette, which means picking colors next to each other on the color wheel, like blue, blue-green, and green. This creates a soothing, harmonious effect.
Don’t forget about colorfastness. Fabrics that hold their color after washing and sunlight exposure keep your quilt looking new for years. Fanda Fabrics uses high-quality dyes and cotton, so you don’t have to worry about fading or bleeding.
Try laying out your fabric swatches in natural light before you start sewing. This helps you see how the colors work together and ensures your solid colors look just right.
How to Make a Solid Color Quilt: Step-by-Step
Planning Your Quilt Design
Ready to dive in? Let’s start with the basics of planning your quilt. This step sets the stage for the whole project and helps you avoid surprises later.
Decide on the Size and Purpose
Think about who the quilt is for. Is it a baby gift, a cozy throw for your couch, or something for your bed? If you’re new to quilt-making processes, start small. Lap and throw quilts are perfect for beginners because they’re easy to handle and finish quickly.Pick a Simple Design or Pattern
Block-based designs work best when you’re learning how to make a solid color quilt. Try squares, rectangles, or strips. These shapes are easy to cut and sew. You’ll get lots of practice repeating the same steps, which builds confidence.Choose Your Fabrics and Color Palette
Stick with solid colors or simple prints. Think about the mood you want—calm and soothing, or bold and bright.Monochromatic (one color in different shades) or analogous (colors next to each other on the color wheel) palettes look great in solid color quilts. Fanda Fabrics offers a wide range of 100% cotton solids that are easy to sew and come in every shade you can imagine.
Plan Your Fabric Purchase
Figure out how much fabric you need for the quilt top, backing, and binding. It helps to coordinate your colors around the backing fabric for a pulled-together look.Keep It Simple
Don’t overthink it. Simple shapes and a limited color palette make your first quilt manageable and fun.
Tip: Sketch your layout on paper or use a digital tool. Seeing your design helps you spot any changes before you start cutting.
Cutting and Arranging Fabric
Cutting fabric is where your quilt starts to take shape. Accuracy here makes sewing much easier later.
Prep Your Tools and Fabric
Make sure your rotary cutter blade is sharp and your mat is clean. Iron your fabric to remove wrinkles. This helps you get straight, even cuts.Trim and Square Up
Lay your fabric selvage to selvage. Use your ruler and rotary cutter to trim off the selvages, keeping your edges straight. Always square up the ends before you start cutting strips or shapes.Cut Strips and Shapes
Cut strips from one side of the fabric to keep a straight edge for future cuts. If you need irregular shapes, cut those from the opposite side. Measure twice before you cut—this saves fabric and avoids mistakes.Organize Your Pieces
Label and stack your cut pieces by size and color. This keeps your workspace tidy and helps you stay on track.
Arranging your fabric pieces is where you can get creative. Try grouping colors by value (light to dark) or arranging them in a gradient for a modern look. You can also play with patterns like zig-zags or checkerboards.
The way you lay out your pieces affects the movement and depth of your quilt. Even simple arrangements can create a striking effect when you use solid colors.
Note: Use natural light to lay out your pieces. This helps you see the true colors and how they interact.
Simple Piecing Techniques
Now it’s time to sew! Beginner-friendly piecing methods keep things stress-free and help you build skills.
Straight-Line Piecing
This is the easiest way to join your fabric pieces. Sew straight seams to connect squares, strips, or rectangles. Use a 1/4″ seam allowance for consistency. Press your seams open or to one side as you go. Straight-line piecing gives your quilt a clean, modern look and works well with solid colors.Grid Piecing
Want a little more structure? Try grid piecing. Arrange your pieces in rows and columns, then sew them together. This method creates a checkerboard or crosshatch effect. It’s simple but adds texture and interest to your quilt.Kantha Stitching (Optional)
If you want to try hand quilting, kantha stitching is a great choice. It uses a basic running stitch—just sew straight or gently curved lines across your quilt. The stitches don’t have to be perfect, so it’s relaxing and forgiving.Tips for Success
Mark the right side of your fabric if you’re working with solids—sometimes it’s hard to tell!
Use a matching thread to hide small mistakes.
Press creases into your strips before sewing. This helps you keep seams straight and accurate.
Take your time and check your work often.
Remember: The beauty of a solid color quilt comes from clean lines and careful piecing. Simple techniques let your colors and design shine.
If you follow these steps, you’ll find that how to make a solid color quilt becomes a fun and rewarding experience. You’ll build skills with each block and see your project come together piece by piece.
Assembling and Quilting
Making the Quilt Sandwich
Now that you have your quilt top ready, it’s time to build the quilt sandwich. This step brings together the top, batting, and backing. Start by pressing your quilt top and backing with an iron. A smooth surface helps you avoid bumps later.
Choose a large, clean table or floor to work on. Lay your backing fabric wrong side up and tape it down so it doesn’t shift. Next, place your batting on top, smoothing from the center out. Cut the batting a few inches larger than your quilt top on all sides. Finally, lay your quilt top right side up, centering it over the batting.
To keep everything in place, use curved safety pins or basting spray. Start pinning from the center and work outward, spacing pins every 4 to 6 inches. This prevents shifting when you quilt. Cotton batting and 100% cotton backing work best for most projects. They feel soft, last long, and are easy to sew.
Tip: Always check for wrinkles between layers before you start quilting. Smooth them out for a neat finish.
Quilting Techniques for Solids
Quilting adds texture and brings your design to life. With solid colors, simple quilting lines can make a big impact. Straight-line quilting is a favorite. You can sew parallel lines, grids, or even echo the shapes in your quilt. These lines add a modern touch and highlight your careful piecing.
If you want more depth, try ombre effects. Arrange your quilting lines closer together in some areas and farther apart in others. This creates a sense of movement and makes your quilt look more dynamic.
Playing with color value—using lighter and darker shades—also helps your quilt stand out. You don’t need fancy patterns. Clean, straight lines or gentle curves let the beauty of your solid colors shine.
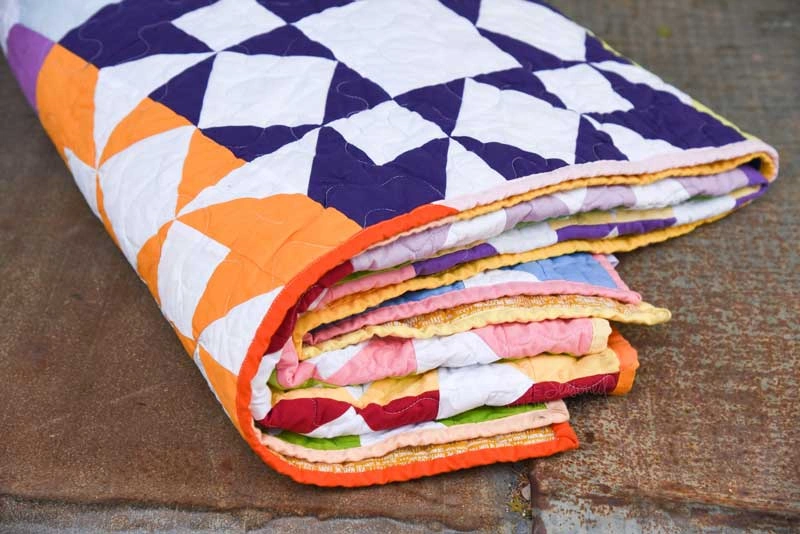
Binding and Finishing
Binding gives your quilt a polished edge. First, measure around your quilt to figure out how much binding you need. Cut strips of fabric, usually 2 to 2.5 inches wide. Join the strips with diagonal seams to reduce bulk, then fold the strip in half lengthwise and press.
Sew the binding to the front of your quilt by machine, starting in the middle of one side. Fold it over to the back and hand stitch it down for a neat look. For a fun twist, use a binding color that contrasts with your quilt top or try a pieced binding for extra flair.
Bias binding works well for curved edges, while straight-grain binding is great for straight sides.
Watch out for common mistakes like cutting binding strips too short or making uneven corners. Take your time, and your quilt will look professional and last for years.
Tips and Inspiration from Fanda Fabrics
Troubleshooting Common Issues
Every quilter faces a few bumps along the way, especially when working with solid fabrics or trying out monochromatic quilt patterns. Here’s a quick table to help you spot and fix some of the most common issues:
Issue Faced by Beginners | Explanation / Cause | Suggested Resolution |
|---|---|---|
Bird nests (thread nests) | Machine pulls thread, causing tangles | Hold thread tails at the start or use thread leaders; check your machine’s settings |
Shifting seams | Too much presser foot pressure | Adjust presser foot height or pressure as your manual suggests |
Bobbin thread showing on the front | Thread tension imbalance | Loosen thread tension slightly; test on a scrap first |
Fabric stretching or warping | Fabric stretched during piecing | Use quilt blocking techniques to reshape your quilt |
Loose quilt squares after washing | Not enough basting or quilting too far apart | Baste thoroughly and quilt more densely |
Fraying edges | Normal, but can get messy | Trim edges before quilting; keep an eye on frays |
Slight color variation in solids | Different dye lots or storage conditions | Accept as normal; washing will even out the color |
You might also run into pleats or puckers. Try making bias tape from leftover fabric and appliqué it over the trouble spots. If you see stains, gently clean the area and rewash with color catchers. Always prewash your fabric to prevent color bleeding and shrinkage, especially when working with monochromatic quilt patterns.
Creative Ideas with Solid Colors
Solid and bright fabrics from Fanda Fabrics open up a world of creative options for your next quilt. Here are some ideas to spark your imagination:
Play with gradients in your monochromatic quilt patterns. Gradients blend shades from light to dark, adding instant depth and harmony.
Try a quilt using only one color family. Monochromatic quilt patterns let you explore value, temperature, and saturation, making even simple designs pop.
Use tone-on-tone fabrics for subtle texture in your monochromatic quilt patterns. This adds complexity without breaking the color theme.
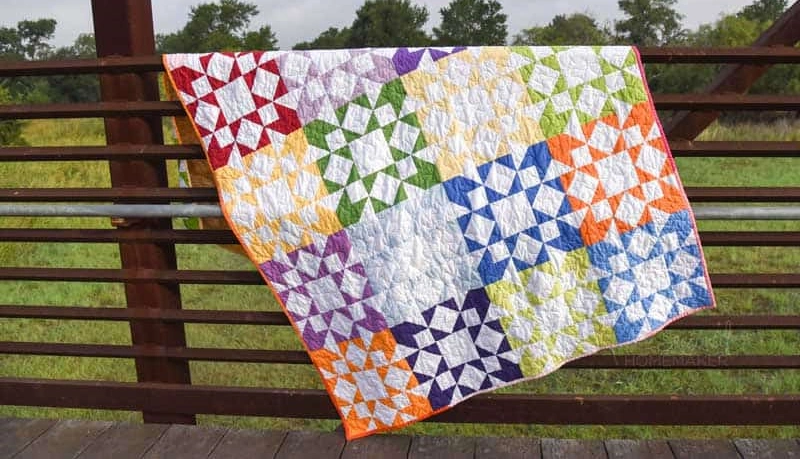
Modern patterns like bold stripes or geometric shapes work beautifully with solid fabrics. Minimalist designs highlight the beauty of your chosen color.
Mix in different textures, such as sateen or linen, to make your monochromatic quilt patterns unique.
Focus on your quilting stitches. In wholecloth quilts, the stitching itself becomes the star, especially when you use solid cottons.
Hang your quilt as wall art or drape it over furniture. Bright colors and clean lines make a statement anywhere.
Tip: The Fanda Fabrics website is packed with guides on color theory, fabric selection, and even more ideas for monochromatic quilt patterns. You’ll find step-by-step instructions, inspiration galleries, and expert advice to help you create a quilt that’s truly your own.
If you want your quilt to stand out, trust your creativity and experiment with layouts. Monochromatic quilt patterns give you endless ways to play with color and design. With high-quality solids from Fanda Fabrics, your quilt will look vibrant and last for years.
Conclusion
You now know how to make a solid color quilt with simple steps and quality materials. Fanda Fabrics offers a huge range of solid and bright quilt fabrics for any creative vision.
Try joining a Quilt Along, share your progress on social media, or tag your favorite designers to connect with other quilters.
Quilting brings people together, boosts creativity, and helps you relax.
Remember, every quilt you finish adds to your skills and confidence. This hobby is for everyone—start your project and enjoy the journey!
FAQ
How do you keep solid color fabrics from fading?
Wash your fabrics in cold water with a gentle detergent. Dry them away from direct sunlight. Fanda Fabrics uses high-quality dyes, so your colors stay bright longer.
Can you mix solid and patterned fabrics in one quilt?
Absolutely! You can combine solids with prints for extra interest. Solids help balance busy patterns and make your quilt design pop.
What’s the best way to cut solid fabrics straight?
Use a rotary cutter, a quilting ruler, and a self-healing mat. Line up your fabric carefully. Double-check your measurements before you cut for the best results.
How do you choose the right batting for a solid color quilt?
Pick cotton batting for a soft, classic feel. If you want a puffier look, try polyester. Always match your batting size to your quilt top.
Why do my quilt blocks sometimes look uneven?
Uneven blocks often come from inaccurate cutting or seam allowances. Measure twice, cut once, and use a 1/4″ seam for every piece. Press your seams flat as you go.