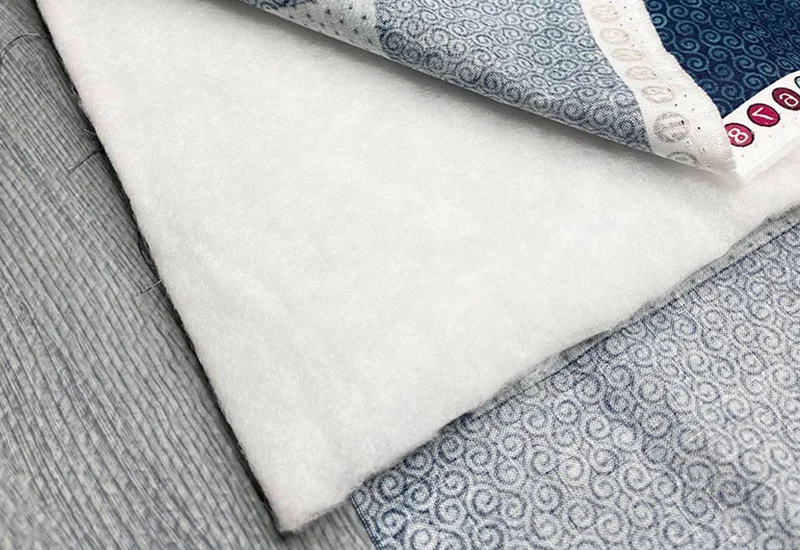
Welcome to our quilting blog! Whether you’re a seasoned quilter or a beginner just starting out, one of the essential steps in creating a beautiful, cozy quilt is properly putting the batting in place.
The batting, which is the layer of insulation between the quilt top and backing, adds warmth and texture to your quilt. In this post, we’ll walk you through the detailed process of layering your quilt top, batting, and backing fabric, ensuring a smooth and wrinkle-free result.
With our step-by-step guide, you’ll gain the confidence and skills needed to expertly prepare your quilt for the final quilting process. Let’s get started on creating a masterpiece you’ll be proud to display!
What is Batting Fabric
How to Put Batting in a Quilt
Here’s a step-by-step guide on how to put batting in a quilt:
Materials Needed:
- Quilt top
- Quilt backing fabric
- Batting
- Safety pins or basting spray
- Quilting pins or clips
- Scissors
- Quilt ruler or measuring tape
- Iron
Steps about How to Put Batting in a Quilt
Prepare the Quilt Top and Backing:
- Ensure your quilt top is complete, pressed, and free of wrinkles.
- Cut your backing fabric to be slightly larger than your quilt top, typically 4-6 inches wider and longer.
Cut the Batting:
- Cut the batting to the same size as your quilt backing. The batting should also be a few inches larger than the quilt top on all sides.
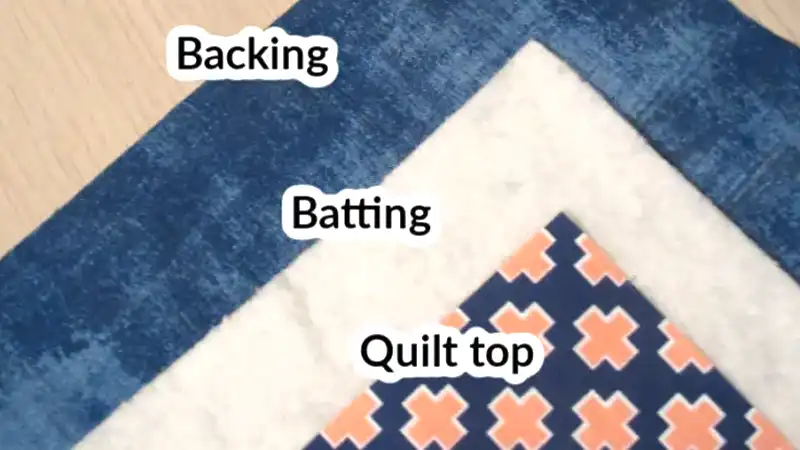
Layer the Quilt:
- Find a clean, flat surface to lay out your quilt layers.
- Place the backing fabric right side down.
- Smooth out any wrinkles in the backing fabric.
- Place the batting on top of the backing fabric, smoothing it out so that it lies flat.
- Place the quilt top right side up on top of the batting. Again, smooth out any wrinkles. Ensure the quilt top is centered over the batting and backing.
Baste the Quilt Layers Together:
There are a few methods to baste your quilt layers together:
- Safety Pins: Use safety pins to secure the layers together, starting from the center and working your way out. Place a pin every 4-6 inches.
- Basting Spray: Spray adhesive on the batting, then carefully lay the quilt top and backing in place, smoothing out any wrinkles as you go.
- Thread Basting: Use a large basting needle and thread to sew large, temporary stitches through all layers. This is less common but can be used if preferred.
Quilt the Layers Together:
- Choose your quilting method, whether it be hand quilting, machine quilting, or tying the quilt.
- Start quilting from the center and work your way out to avoid bunching or shifting of the fabric.
Trim the Excess:
- Once the quilting is complete, trim the excess batting and backing fabric even with the quilt top edges.
Bind the Quilt:
- Prepare your binding strips, either by cutting fabric strips or using pre-made binding.
- Attach the binding to the quilt edges, securing all three layers together.
Tips:
- Use a walking foot on your sewing machine to prevent layers from shifting if you’re machine quilting.
- Keep your work area clean to avoid getting dirt on your quilt layers.
- Iron your quilt top and backing fabric before layering to ensure they are wrinkle-free.
By following these steps, you’ll have your quilt layers smoothly basted and ready for quilting. Enjoy the process and the final product!
How to Put Quilt Top Batting and Backing Together
Here’s a detailed guide on how to put the quilt top, batting, and backing together:
Materials Needed:
- Quilt top
- Batting
- Backing fabric
- Safety pins or basting spray
- Scissors
- Quilt ruler or measuring tape
- Iron
- Quilting pins or clips
Steps about How to Put Quilt Top Batting and Backing Together
Prepare Your Materials:
- Ensure your quilt top is finished and pressed.
- Cut your batting and backing fabric so they are a few inches larger than your quilt top on all sides. This extra fabric ensures that the layers will align properly during quilting.
Iron the Fabric:
- Iron the quilt top and backing fabric to remove any wrinkles. Smooth fabric layers will be easier to work with.
Create a Work Space:
- Find a large, clean, flat surface to lay out your quilt. This could be a clean floor, a large table, or even a quilt frame if you have one.
Layer the Backing Fabric:
- Lay the backing fabric right side down on your work surface. Smooth out any wrinkles or folds.
- Tape the edges of the backing fabric to your work surface with painter’s tape to keep it taut and smooth.
Add the Batting:
- Lay the batting on top of the backing fabric, smoothing it out to remove any wrinkles or folds.
- Ensure the batting is evenly spread and centered over the backing fabric.
Place the Quilt Top:
- Lay the quilt top right side up on top of the batting. Smooth out any wrinkles.
- Center the quilt top over the batting and backing fabric.
Baste the Layers Together:
There are a few methods to baste your quilt layers together:
- Safety Pins: Pin through all three layers using curved safety pins. Start from the center and work your way outwards. Place a pin every 4-6 inches.
- Basting Spray: Lightly spray the batting with quilt basting spray. Carefully lay the quilt top and backing fabric on the batting, smoothing them out to remove wrinkles.
- Thread Basting: Use a large basting needle and thread to sew large, temporary stitches through all three layers.
Check for Smoothness:
After basting, double-check that all layers are smooth and flat. Make sure there are no puckers or wrinkles.
Quilt the Layers:
Quilt your quilt by hand or machine. Start quilting from the center and work your way out to avoid shifting and puckering.
Trim Excess Fabric:
- After quilting, trim the excess batting and backing fabric to align with the edges of the quilt top.
Bind the Quilt:
- Prepare and attach your quilt binding to finish the edges of the quilt.
Tips:
- Use a walking foot on your sewing machine if you’re machine quilting to prevent the layers from shifting.
- Keep your work area clean to avoid dirt on your quilt.
- Take your time to ensure each layer is smooth and wrinkle-free before basting.
By following these steps, you can successfully layer and baste your quilt top, batting, and backing together, ready for quilting.
How to Add Batting to a Quilt
Adding batting to a quilt is a critical step in the quilting process, ensuring that your quilt is not only visually appealing but also cozy and warm. Whether you’re a beginner or an experienced quilter, understanding the process of adding batting to your quilt is essential.
Let’s delve deeper into the steps involved, while incorporating the provided keywords to help you grasp the concept more effectively.
How to Add Batting to a Quilt:
1. Preparing Your Workspace:
Before you begin, set up a clean and spacious work area, such as a large table or even the floor. Ensure that the surface is smooth and free of any debris or wrinkles.
2. Choosing the Right Batting:
Selecting the appropriate batting is crucial for the success of your quilt. Consider factors such as material, loft, and size to find the perfect batting for your project. Popular choices include cotton, polyester, wool, and blends.
3. Preparing Your Quilt Layers:
Start by laying out your backing fabric on your workspace, right side down. Smooth out any wrinkles or folds to create a flat surface. Then, place the batting on top of the backing fabric, ensuring that it is evenly aligned and slightly larger than your quilt top.
4. Adding Your Quilt Top:
Carefully place your quilt top on top of the batting, right side up. Smooth out any wrinkles or creases, ensuring that all layers are evenly aligned.
5. Basting Your Quilt Layers:
To secure the layers together temporarily, use one of the following methods:
- Safety Pins: Place curved safety pins through all layers of the quilt, starting from the center and working your way outwards.
- Basting Spray: Apply basting spray to the batting, then carefully lay the quilt top and backing fabric on top, smoothing out any wrinkles as you go.
- Thread Basting: Use a large basting needle and thread to sew large, temporary stitches through all layers of the quilt.
6. Quilting Your Quilt:
Once your quilt layers are basted together, it’s time to quilt your quilt. Choose your preferred quilting method, whether it’s hand quilting or machine quilting, and start quilting from the center, working your way outwards.
7. Final Touches:
After quilting your quilt, trim any excess batting and backing fabric to create clean edges. Finally, add your quilt binding to finish the edges of the quilt, securing all three layers together and giving your quilt a polished finish.
By following these steps, you can effectively add batting to your quilt, ensuring that it is not only visually stunning but also warm and cozy—a true masterpiece to be cherished for years to come.
Conclusion
Putting batting in a quilt is a crucial step in the quilting process that involves layering the quilt top, batting, and backing fabric together. Here’s a concise conclusion on how to do it:
To successfully put batting in a quilt, start by preparing your quilt top, batting, and backing fabric. Ensure all layers are slightly larger than the quilt top to allow for adjustments. Lay the backing fabric right side down on a clean, flat surface, then place the batting on top, followed by the quilt top right side up.
Smooth out any wrinkles and secure the layers together using safety pins, basting spray, or thread basting, starting from the center and working outward. Once basted, quilt the layers together by hand or machine, beginning from the center to prevent shifting. Finally, trim the excess fabric and bind the quilt edges to complete your quilt.
By carefully layering, smoothing, and basting the quilt top, batting, and backing fabric, you can ensure a well-constructed quilt ready for the quilting process.