Tulle fabric is known for its delicate and ethereal appearance, often used in crafting, wedding decorations, and fashion projects. Adding glitter to tulle can take its charm to a whole new level, creating a dazzling and eye-catching effect. Whether you’re making a glittery tutu for a special occasion or sprucing up some tulle curtains for a more glamorous look, this guide will walk you through the process step by step.
Why Add Glitter to Tulle?
There are several reasons why you might want to add glitter to tulle fabric. Glitter adds a touch of sparkle and glamour, making any project stand out. In the world of fashion, glittery tulle can be used to create statement pieces, such as evening gowns or party dresses. For crafting projects, it can transform a simple tulle decoration into a show-stopping centerpiece. In wedding decor, glittery tulle can add a magical and luxurious feel to the venue. It’s a great way to personalize your projects and add a unique touch that catches the light and draws attention.
What Materials Do You Need to Prepare?
Tulle Fabric
Lightweight tulle, featuring a feather-like texture, is the perfect choice for crafting a dreamy and ethereal effect. In the context of wedding veils, it imparts a soft, floating appearance as the bride makes her way down the aisle. Its transparency enables a delicate reveal of the face, enhancing the overall elegance. For party decorations such as hanging streamers or table runners, lightweight tulle generates a breezy and festive ambiance.
Conversely, heavier weight tulle offers enhanced structure. It is ideal for constructing costume elements like tutus for dance performances or elaborate Halloween costumes. The additional thickness helps the tulle maintain its shape, whether it is fluffed out in a full-skirted tutu or forms the base of a dramatic, structured garment. Regarding color, white or ivory tulle is a classic choice for weddings. In contrast, bright, bold colors like hot pink or electric blue are excellent for lively party decorations or attention-grabbing costumes. Pastel shades such as light blue or pink are suitable for baby showers or more subdued, elegant events.
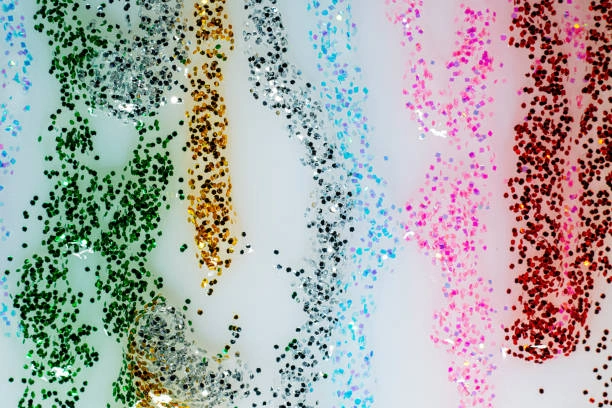
Glitter
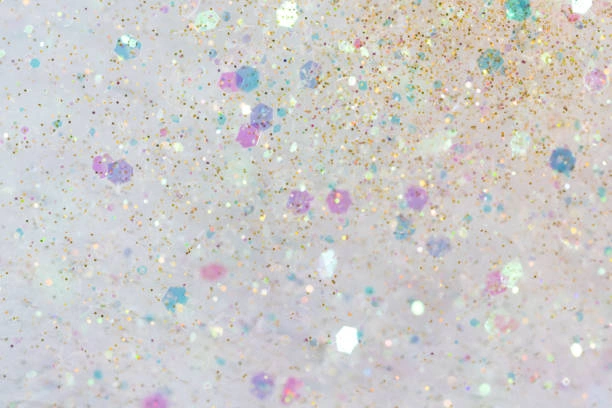
Fine-grain glitter is highly recommended for application to tulle fabrics. Its small particle size ensures even distribution on the delicate tulle surface, resulting in a smooth, sophisticated glitter. Larger sized glitter may be more difficult to adhere evenly and may cause the tulle to snag or tear. The color selection of glitter is very extensive. Gold and silver glitter offer a classic, glamorous touch, perfect for formal events such as weddings or upscale parties. Neon-colored glitter, such as neon green or orange, can bring a modern and vibrant vibe, perfect for contemporary party decor or edgy outfits. Pastel glitter, such as soft lilac or mint, is perfect for creating a more sophisticated and romantic look, suitable for baby-themed events or spring-inspired projects.
Adhesive
Fabric glue provides precise control when being applied to tulle. You can carefully apply it in specific patterns or areas where you desire the glitter to adhere. It is an excellent option for smaller projects or when meticulous glitter placement is required. However, it may take a bit longer to dry compared to spray adhesive.
Spray adhesive, on the other hand, is more efficient for quickly covering larger areas of tulle. It creates an even coat of adhesive over the fabric surface. This is ideal for projects such as large-scale party decorations or when you want to cover a significant amount of tulle with glitter. But exercise caution as it can be a bit messier, and over-spraying may cause the glitter to clump in some areas.
Application Tools (Paintbrush or Sponge Applicator)
When using fabric glue, a small paintbrush or sponge applicator is essential. A paintbrush allows for detailed application, particularly if you are creating intricate designs on the tulle. You can dip the brush into the fabric glue and then carefully paint the glue onto the tulle in the desired shape or pattern. A sponge applicator, on the other hand, is useful for covering larger, more uniform areas. It can spread the glue evenly, ensuring a consistent base for the glitter to stick to without leaving behind thick globs of glue that could weigh down the delicate tulle.
Protective Supplies (Newspaper or Drop Cloth)
Protecting your work area is of utmost importance when working with glitter and adhesive. Glitter has a propensity to spread everywhere, and adhesive can stain surfaces. Laying down a newspaper or a drop cloth beneath the tulle fabric serves as a barrier. The newspaper is a convenient and inexpensive option, and it can be easily disposed of after the project is completed. A drop cloth, typically made of a more durable material, can be reused for multiple projects. It catches any stray glitter or drips of adhesive, saving you from the time-consuming and frustrating task of cleaning up glitter from your table, floor, or other surfaces.
Mixing Container (Container for Mixing)
If you plan to mix the glitter with the adhesive, a small container is necessary. For instance, if you want to create a custom colored glitter-adhesive mixture or ensure an even distribution of glitter in the adhesive, a container enables you to combine the two components thoroughly. You can pour a measured amount of adhesive into the container, add the glitter, and then stir or shake the container until the glitter is evenly dispersed throughout the adhesive. This pre-mixed solution can then be applied to the tulle using a paintbrush or sponge applicator, ensuring a consistent glitter-adhesive ratio on the fabric.
How to Add Glitter to Tulle Fabric?
Pre-work Arrangements
Before starting the glitter adding process, gather all the necessary materials. As mentioned before, you need tulle fabric, glitter, fabric glue, a paintbrush or sponge brush, a container for glitter, scissors, and a protective covering for your work area.
Tulle Preparation
Cleanliness Check
- Ensure the tulle is clean. Any dust, dirt, or lint on the fabric can prevent the glue from adhering properly. If the tulle has been sitting in storage, give it a gentle shake outdoors to remove loose particles. For more stubborn dirt, hand-wash it in lukewarm water with a mild detergent. Rinse thoroughly and let it air – dry completely before proceeding.
Cutting to Size
- Measure and cut the tulle according to your project requirements. If you’re making a small decorative item, like a glittery tulle bow, cut a small piece. For larger projects such as a glittered tulle curtain, measure and cut the fabric to fit the window dimensions. Use sharp scissors to get clean, straight edges.
Glue Application
Brush Selection
- Choose between a paintbrush and a sponge brush based on your project size. A paintbrush is ideal for detailed work, such as creating small glittered patterns on the tulle. It allows for precise control of the glue application. For larger areas, a sponge brush can be more efficient as it can cover more surface area quickly.
Glue Application Method
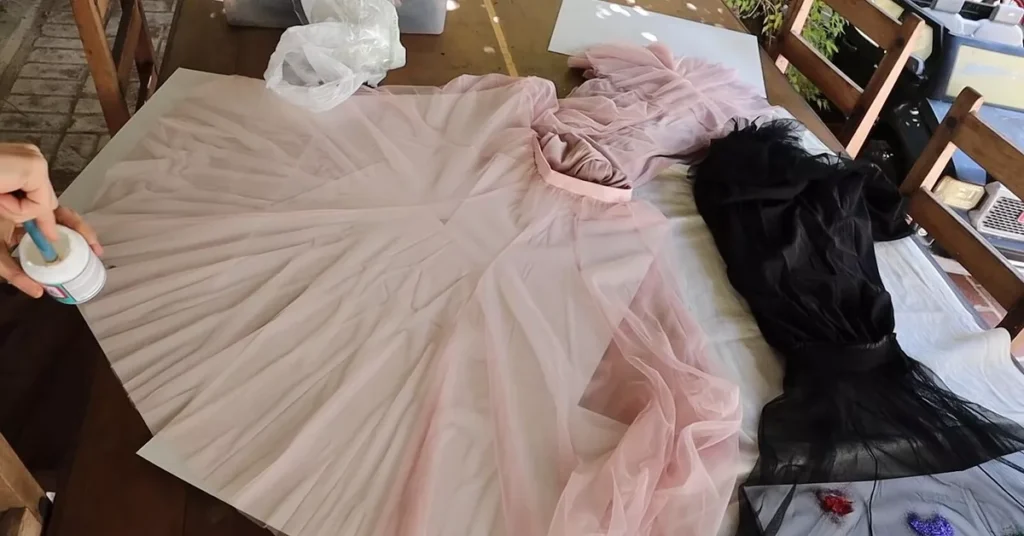
- Place the clean, cut tulle on a protected work surface, such as a layer of newspaper or a drop cloth. Pour a small amount of fabric glue into a disposable container. Dip the brush into the glue and start applying it to the tulle. Apply a thin, even layer of glue. If you’re aiming for a full coverage glitter look, spread the glue evenly across the entire surface of the tulle. If you’re creating a design, carefully follow the lines of your pre-planned pattern. Be cautious not to apply too much glue, as it can make the tulle stiff and cause the glitter to clump.
Glitter Sprinkling
Glitter Selection and Preparation
- Decide on the type of glitter you want to use. Fine glitter creates a subtle, shimmering effect, which is great for a more understated look. Chunky glitter, on the other hand, offers a bold and dramatic sparkle. Holographic glitter adds a unique, iridescent shine. You can also mix different types of glitter for a more complex and interesting visual. Pour the glitter into a container with a wide opening for easy access.
Sprinkling Technique
- Hold the container of glitter about 6 – 8 inches above the glued area of the tulle. Gently shake the container to sprinkle the glitter evenly over the glue. Start from one side of the glued area and work your way across. If you’re using multiple colors of glitter, you can layer them. For example, start with a base layer of silver fine glitter, then add a layer of blue chunky glitter on top for a more elaborate effect.
Glitter Adhesion and Excess Removal
Pressing the Glitter
- After sprinkling the glitter, take a clean, dry cloth or use your fingers (make sure they are clean and dry) to gently press the glitter into the glue. This step helps the glitter adhere firmly to the tulle. Apply light pressure and avoid rubbing too hard, as the tulle is a delicate fabric and can tear easily.
Removing Excess Glitter
- Let the tulle sit for a few minutes to allow the glue to start setting. Then, hold the tulle over a trash can or the protected work surface and gently shake it to remove any excess glitter that didn’t stick to the glue. You can also use a soft – bristle brush, like a makeup brush, to carefully brush away any remaining loose glitter particles. This will give your glittered tulle a clean and polished look.
Drying and Finishing Touches
Drying Process
The drying time for the glue can vary depending on the type of glue used and the thickness of the glue layer. Generally, it takes around 30 minutes to a few hours for the glue to dry completely. Place the glittered tulle in a well-ventilated area during this time. Avoid touching the glittered surface until the glue is fully dry to prevent smudging or dislodging the glitter.
Final Inspection and Touch – Ups
Once the glue is dry, carefully inspect the tulle. Look for any areas where the glitter may have not adhered properly, such as small bare spots. If you find such areas, apply a small amount of glue and sprinkle a bit more glitter to fix them. If you want to further protect the glitter and make it more durable, you can use a clear sealant spray. However, be aware that some sealants may slightly change the texture of the tulle, so test it on a small, inconspicuous area first.
Tips and Tricks
Use a Template: If you’re creating a specific design, you can use a template made from cardboard or stencil material. Place the template on the tulle and apply the glue through the openings to ensure a precise and consistent design.
Work in Small Sections: If you’re glittering a large piece of tulle, it’s easier to work in small sections at a time. This allows you to focus on applying the glue and glitter evenly without the glue drying out before you have a chance to add the glitter.
Protect Your Eyes: When working with glitter, it’s a good idea to wear safety glasses to prevent any glitter from getting into your eyes.
Store Glitter Properly: After using the glitter, make sure to close the container tightly and store it in a cool, dry place to prevent the glitter from clumping.
Different Applications of Glittered Tulle

Fashion Projects
Tutus: Glittered tulle is perfect for creating tutus for ballet performances, dance recitals, or children’s dress-up costumes. The sparkle adds a fun and magical element to the outfit.
Evening Gowns: Incorporating glittered tulle into an evening gown can create a stunning and glamorous look. It can be used as an overlay, on the skirt, or as accents on the bodice.
Accessories: You can make glittered tulle hair bows, headbands, or handbags to add a touch of sparkle to any outfit.
Crafting Projects
Home Decor: Glittered tulle can be used to make decorative pillows, curtains, or table runners. It can add a touch of elegance and glamour to any room.
Party Decorations: Create glittered tulle pom-poms, garlands, or centerpieces for parties. They are sure to make the event more festive and visually appealing.
Gift Wrapping: Wrap gifts in glittered tulle instead of traditional wrapping paper for a unique and eye-catching presentation.
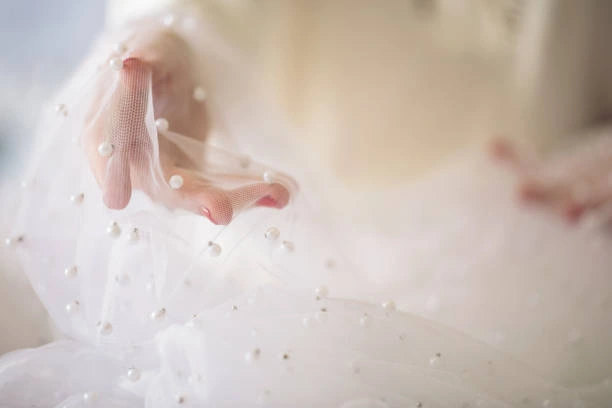
Wedding Decor
Aisle Runners: A glittered tulle aisle runner can create a beautiful and romantic entrance for the bride.
Table Settings: Use glittered tulle as table overlays or chair sashes to add a touch of luxury to the reception tables.
Bouquets and Boutonnieres: Incorporate glittered tulle into wedding bouquets and boutonnieres for a more sparkly and unique look.
Conclusion
Adding glitter to tulle fabric is a fun and creative way to enhance the appearance of your projects. With the right materials, proper preparation, and careful application, you can achieve a beautiful and long-lasting glitter effect. Whether you’re a seasoned crafter or a beginner, this guide has provided you with all the information you need to get started. So, go ahead and add some sparkle to your tulle projects and let your creativity shine!