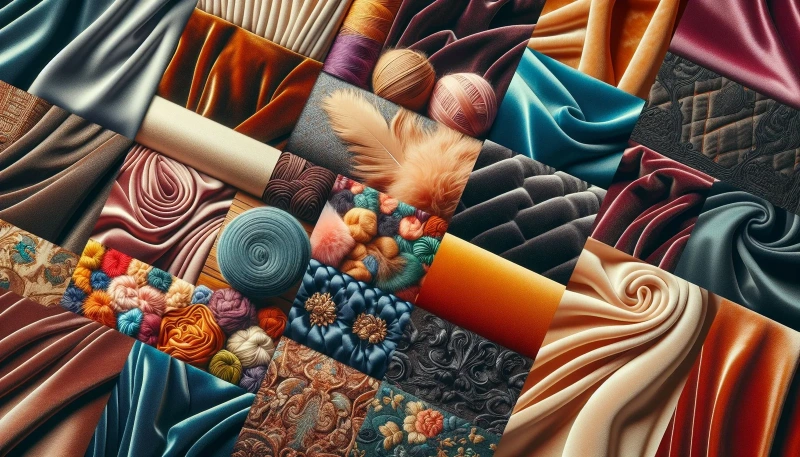
Dyeing velvet fabric may seem tricky, but with the right steps, you can achieve rich, vibrant colors and a smooth finish. In this guide, we’ll walk you through how to dye velvet fabric, even if you’re a beginner. From choosing the right dye to prepping your fabric and achieving even color, this process will transform your velvet projects.
Ready to give your fabric new life? Let’s start learning how to dye velvet fabric today!
What Is Dyeing Velvet ?
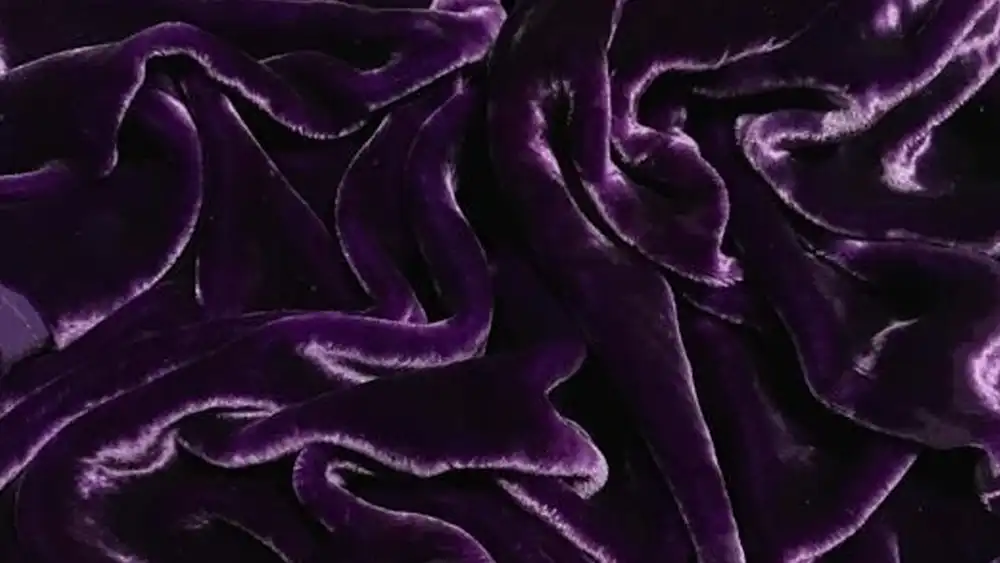
Velvet is a luxurious and captivating fabric that has been cherished for centuries. Its soft, velvety texture and rich appearance make it a popular choice for a variety of applications, from clothing and upholstery to home decor. One of the unique aspects of working with velvet is the ability to dye it, allowing you to create custom colors and patterns to suit your personal style or design needs.
Dyeing velvet can be a rewarding and creative process, but it also requires a careful approach to ensure the best possible results. In this comprehensive guide, we will explore the ins and outs of dyeing velvet fabric, covering everything from preparation and dye selection to the step-by-step dyeing process and maintenance tips.
How To Dye Velvet Fabric: Step-by-Step Guide
Step1 How To Dye Velvet Fabric: Materials Needed
| Material | Description | Why You Need It |
|---|---|---|
| Velvet Fabric | Natural fiber velvet (like cotton or silk) is ideal, but synthetic velvet can also work. | The fabric you’ll be dyeing; natural fibers absorb dye more easily. |
| Fabric Dye | Choose a dye specific to your fabric type (fiber-reactive for natural, acid dye for synthetic). | Ensures the dye bonds well to the fabric, giving you rich, even color. |
| Large Pot or Basin | A stainless steel or plastic basin large enough to fully submerge the fabric. | Needed to create a dye bath that allows the fabric to absorb the dye evenly. |
| Rubber Gloves | Thick, durable gloves to protect your hands from dye and hot water. | Prevents dye stains and protects hands from chemicals and heat. |
| Measuring Tools | Measuring cups or spoons to measure the exact amount of dye and water. | Ensures accurate proportions of dye, salt, and water for best results. |
| Mild Detergent | A gentle, non-bleach detergent for washing fabric before and after dyeing. | Cleans fabric before dyeing and helps set the dye afterward. |
| Stirring Utensil | A wooden or plastic stick for stirring the fabric in the dye bath. | Helps evenly distribute the dye across the fabric. |
| Plastic Sheet or Cover | A protective plastic covering for your workspace. | Prevents dye from staining your work area. |
| Salt or Vinegar (Optional) | Salt for cotton or vinegar for silk/nylon fabrics, depending on the dye used. | Enhances dye absorption and sets the color in the fabric. |
| Thermometer (Optional) | For checking the water temperature in the dye bath. | Ensures the water is at the right temperature for optimal dyeing. |
| Bucket or Sink | For rinsing the dyed fabric after the process is complete. | Needed to rinse out excess dye and clean the fabric. |
| Towel or Drying Rack | A clean towel or rack for drying your fabric after dyeing. | Air drying helps maintain the fabric’s plush texture. |

Step2 How To Dye Velvet Fabric: Prepping the Velvet Fabric
Before dyeing, it’s important to prep your velvet fabric. Start by washing and drying the velvet to remove any dirt or residues that could affect the dye. Next, test a small swatch to see how well the fabric absorbs the dye, ensuring the color will turn out as expected. Finally, soak the fabric in warm water before dyeing to help the fibers fully absorb the dye for an even, vibrant finish.
Step3 How To Dye Velvet Fabric: Choosing The Right Dye For Velvet
Types of dyes for different velvet fabrics (natural vs. synthetic):
Velvet fabrics vary, and the type of velvet you’re working with will determine the dye you need. For natural fibers like cotton, silk, or rayon, fiber-reactive dyes work best, delivering vibrant and long-lasting results. For synthetic velvets, like polyester or nylon, you’ll need acid dyes or disperse dyes, which bond effectively with the synthetic fibers for rich color absorption.
Factors to consider when selecting a dye color:
When selecting a dye color for velvet, consider the fabric’s base color and how it may affect the final shade. Lighter velvet takes on colors more vividly, while darker velvet may require a darker dye for proper coverage. Also, think about the dye’s compatibility with the fabric type, ensuring the dye’s colorfastness so it won’t fade over time. Always test a small swatch to confirm the outcome.
Mixing the dye according to fabric type:
To get the best results, carefully mix your dye depending on the fabric type. For natural velvet, dissolve fiber-reactive dye in warm water, while synthetic velvets need their specific dyes mixed in hot water. Follow the dye package instructions for accurate measurements of dye, water, and any additives like salt or vinegar, which help enhance the fabric’s ability to absorb the dye evenly.
Step4 How To Dye Velvet Fabric: Dyeing the Velvet
To dye velvet fabric, start by preparing the dye bath in a large pot or basin. Heat the water and dissolve the dye thoroughly, ensuring there are no clumps. Immerse the velvet fabric into the dye bath, making sure it’s fully submerged. Stir the fabric regularly to ensure the dye spreads evenly across the velvet. This helps prevent any uneven coloring and gives the fabric a rich, vibrant finish.
Step5 How To Dye Velvet Fabric: Rinsing And Drying
After dyeing, remove the velvet fabric and rinse it in cold water until the water runs clear, which removes excess dye. Then, wash the fabric with a mild detergent to help set the dye and ensure the color stays vibrant. Dry the velvet by either air drying it flat or tumble drying on low, depending on the fabric care instructions. This process ensures the dye is properly absorbed, leaving your velvet fabric with a smooth, even finish.
Step6 How To Dye Velvet Fabric: Final Touches
Once the velvet is dry, inspect it for color consistency to ensure the dye is even across the fabric. If any areas look uneven, you can re-dye those spots. To restore the plush texture of the velvet, gently iron or steam it. Be sure to use a low heat setting and avoid direct contact with the fabric by placing a cloth between the velvet and the iron. This final touch will give your velvet a smooth, luxurious finish.
Maintaining The Dyed Velvet
Proper care and maintenance are essential for preserving the vibrancy and longevity of your dyed velvet fabric. Here are some tips:
- Washing: When washing dyed velvet, use a gentle, mild detergent and cold water. Avoid agitation and machine drying, as this can damage the fabric. Instead, hand-wash or use a delicate cycle, and air-dry the velvet.
- Storing: Store dyed velvet in a cool, dry place, away from direct sunlight and heat sources, which can cause the color to fade over time.
- Cleaning: Spot-clean dyed velvet as needed, using a soft, damp cloth and a mild, pH-neutral cleaner. Avoid rubbing the fabric too vigorously, as this can disrupt the pile.
- Pressing: If the velvet becomes wrinkled, lightly steam or press it using a low-heat setting. Be sure to use a pressing cloth to prevent shine or damage to the fabric.
By following these maintenance guidelines, you can help ensure your dyed velvet fabric retains its rich color and soft, luxurious feel for years to come.
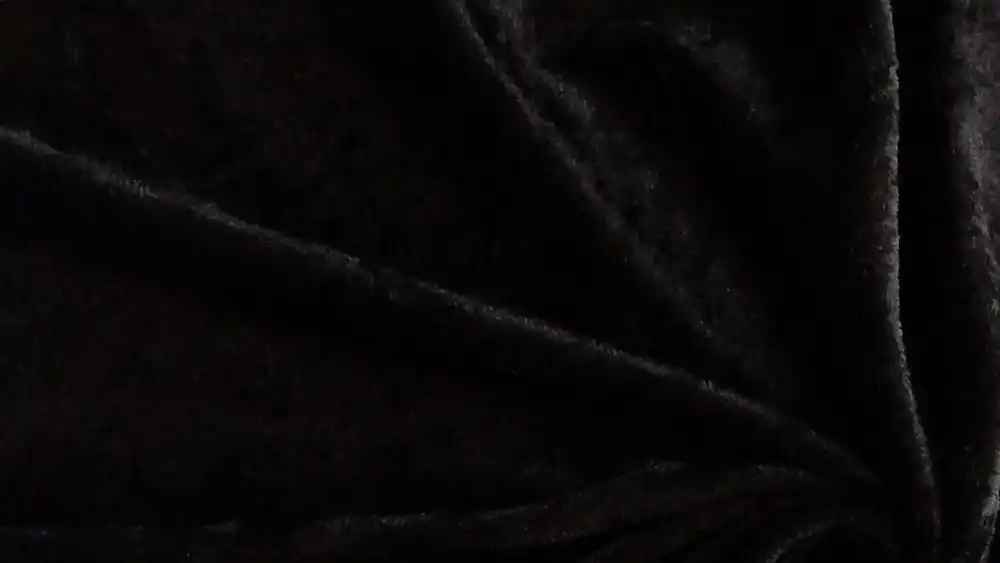
How To Dye Velvet Fabric Black
- Prepare the Black Dye Bath: Start by mixing the black dye according to the manufacturer’s instructions. This typically involves dissolving the concentrated black dye powder in hot water and adding any necessary auxiliaries, such as salt or soda ash, to help the dye bind to the velvet.
- Calculate the Dye-to-Fabric Ratio: Determine the correct dye-to-fabric ratio based on the weight of your velvet fabric. The specific ratio will vary depending on the type of black dye you’re using, so be sure to follow the guidelines provided by the dye manufacturer.
- Heat the Dye Bath: Heat the black dye bath to the recommended temperature, which is usually between 100-212°F (38-100°C), depending on the dye type. Maintain this temperature throughout the dyeing process.
- Add the Velvet Fabric: Gently add the velvet fabric to the hot black dye bath, ensuring it is fully submerged and the dye solution is circulating evenly around the fabric.
- Soak the Velvet: Allow the velvet to soak in the black dye bath for the recommended duration, typically between 30 minutes to 1 hour. Stir or agitate the fabric periodically to promote even color distribution.
- Monitor the Color Development: Closely monitor the color development by periodically removing a small swatch of the velvet to check the progress. Stop the dyeing process when the desired deep, black color is achieved.
Rinsing and Drying the Dyed Black Velvet
- Rinse the Fabric: Once the dyeing is complete, remove the velvet fabric from the black dye bath and rinse it thoroughly with cool, running water to remove any excess dye.
- Gently Remove Excess Water: Gently squeeze or blot the dyed black velvet to remove excess water, being careful not to wring or twist the fabric, as this can damage the pile.
- Air-Dry or Low-Heat Dry: Lay the dyed black velvet flat or hang it to air-dry, ensuring it is not exposed to direct sunlight, which can cause the color to fade. Alternatively, you can use a low-heat setting in the dryer, but be mindful of the fabric’s sensitivity to heat.
- Steam or Press the Fabric: Once the black velvet is completely dry, you may want to lightly steam or press it to restore the fabric’s soft, luxurious texture and appearance.
Maintaining the Dyed Black Velvet
To preserve the vibrancy and longevity of your dyed black velvet fabric, follow these maintenance tips:
- Washing: Wash the black velvet using a gentle, mild detergent and cold water. Avoid agitation and machine drying, which can damage the fabric.
- Storing: Store the dyed black velvet in a cool, dry place, away from direct sunlight and heat sources.
- Cleaning: Spot-clean the black velvet as needed, using a soft, damp cloth and a mild, pH-neutral cleaner.
- Pressing: If the black velvet becomes wrinkled, lightly steam or press it using a low-heat setting, and be sure to use a pressing cloth to prevent shine or damage to the fabric.
By following these detailed instructions and maintenance guidelines, you can successfully dye your velvet fabric a rich, sophisticated black color and enjoy the stunning results for years to come.
Tips And Tricks For Successful Velvet Dyeing
To help you achieve the best possible results when dyeing velvet, here are some additional tips and tricks:
- Perform Test Swatches: Before dyeing the entire piece of velvet, always conduct test swatches to ensure the dye produces the desired color and adheres properly to the fabric.
- Consider the Pile Direction: When dyeing velvet, pay attention to the direction of the pile (the soft, raised fibers on the fabric’s surface). Dye the fabric in the same direction as the pile to achieve a more consistent and uniform color.
- Protect the Work Surface: Cover your work surface with a waterproof material, such as a tarp or plastic sheeting, to prevent staining and make cleanup easier.
- Use Distilled Water: For the best results, use distilled or purified water when mixing the dye bath. Tap water can contain minerals and impurities that may affect the dye’s performance.
- Stir Gently: When adding the velvet to the dye bath and during the dyeing process, stir the fabric gently to avoid damaging the delicate pile.
- Monitor Temperature: Maintain the recommended temperature range for the dye throughout the dyeing process. Sudden temperature changes can affect the dye’s absorption and result in uneven coloration.
- Rinse Thoroughly: Ensure you rinse the dyed velvet thoroughly to remove all excess dye. Residual dye can bleed or transfer to other fabrics during wear or washing.
- Condition the Fabric: After dyeing and rinsing, you may want to condition the velvet with a fabric softener or specialty velvet conditioner to restore its soft, luxurious hand.
- Consider Overdyeing: If you’re not satisfied with the initial color, you can try overdyeing the velvet with a different dye to achieve a new hue or create unique color combinations.
- Experiment and Have Fun: Dyeing velvet can be a creative and rewarding process. Don’t be afraid to experiment with different dye techniques, color combinations, and fabric manipulations to discover your own unique style.
Conclusion
Learning how to dye velvet fabric can transform your projects with rich, vibrant colors and a soft, luxurious feel. By following the right steps—prepping, dyeing, rinsing, and finishing—you’ll achieve beautiful, even results.
Whether you’re working with natural or synthetic velvet, dyeing gives you endless creative possibilities. Now that you know how to dye velvet fabric, you’re ready to bring new life to your fabric projects!