Making a quilt label might not be the first thing you think of when you finish a quilt, but trust me, it’s one of the most important touches you can add. Not only does a label preserve the story of your quilt, but it’s also a special way to add a personal message for the recipient or future generations. A quilt label can include everything from the date it was made to a special note, making it more than just a finishing touch—it’s part of the quilt’s history!
Ready to add a little extra magic to your quilts? Whether you’re gifting it or keeping it for yourself, creating a fabric label gives your quilt that final, meaningful detail. Keep reading to learn step-by-step how to make a quilt label that’s both personal and professional!
What is a Quilt Label?
A quilt label is more than just a small tag sewn on your quilt—it’s a personal touch that adds identity, meaning, and history to your creation. Think of it as your quilt’s ‘signature,’ sharing its story. Labels typically include who made it, when, and sometimes a special message for the recipient.
Not only does labeling help identify your quilt, but it also adds sentimental value, making it a keepsake for generations. Whether you’re gifting it or keeping it, quilt labels are essential for preserving its history and making it even more special.
Benefits of Fabric Quilt Labels
Fabric quilt labels are a fantastic choice if you’re looking for something that lasts. Unlike paper labels, which can fade, tear, or get damaged over time, fabric labels are built to withstand the test of time. They’re stitched directly into the quilt, making them a permanent part of your creation.
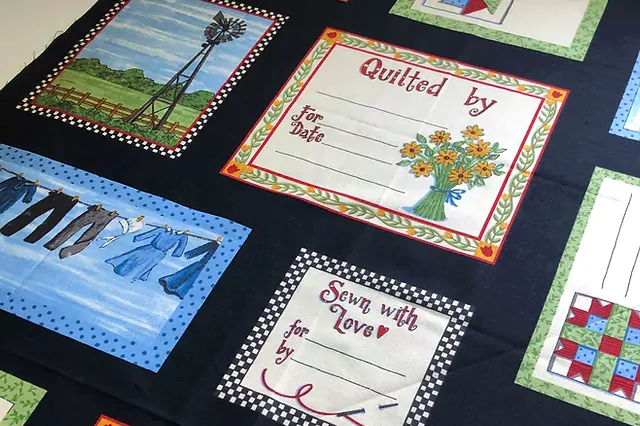
A fabric label can complement your quilt’s colors and theme, making it feel like an integral part of the overall look. Plus, they’re easy to personalize, giving you the opportunity to add your own unique touch that’ll make the label just as beautiful as the quilt itself.
Materials Needed to Create a Quilt Label
Fabric Selection
When it comes to picking fabric for your quilt label, cotton, muslin, or linen are your best bets. These fabrics are not only durable but also easy to work with, making them perfect for labels. Don’t forget to pre-wash your fabric first—it’ll help avoid any shrinkage or color surprises later.
Tools and Supplies:
Fabric markers: Super quick, but may fade over time.
Embroidery thread: Adds a textured finish and lasts longer, though it requires more effort.
Stabilizer:
- Fusible: For a firmer feel.
- Tear-away: For more flexibility.
Essential sewing tools: Scissors, rotary cutter, fabric glue, and pins.
Optional Embellishments
Feeling crafty? Add a little personality with some embroidery floss, buttons, lace, or even heat transfer vinyl for a modern touch. These fun extras will give your quilt label a unique flair that perfectly complements your quilt’s story!
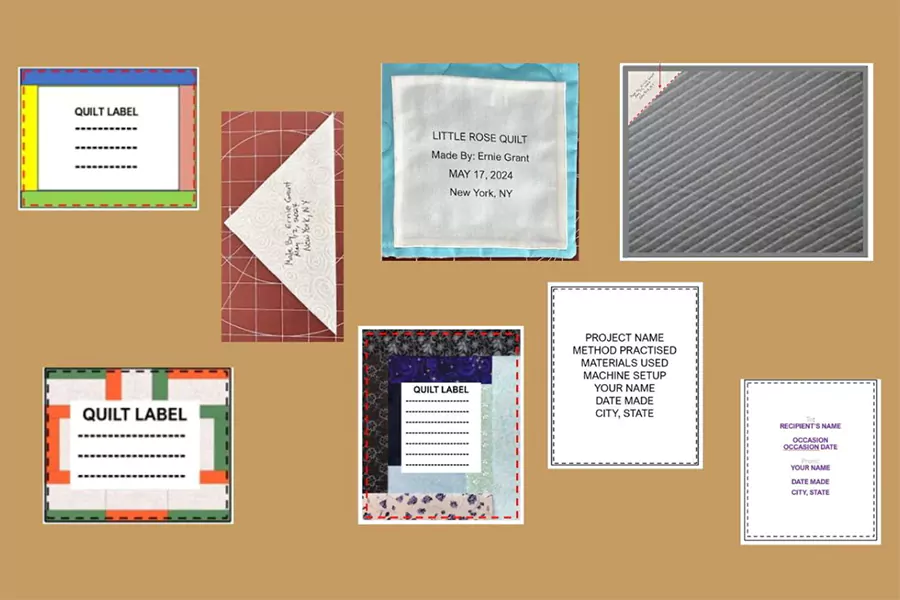
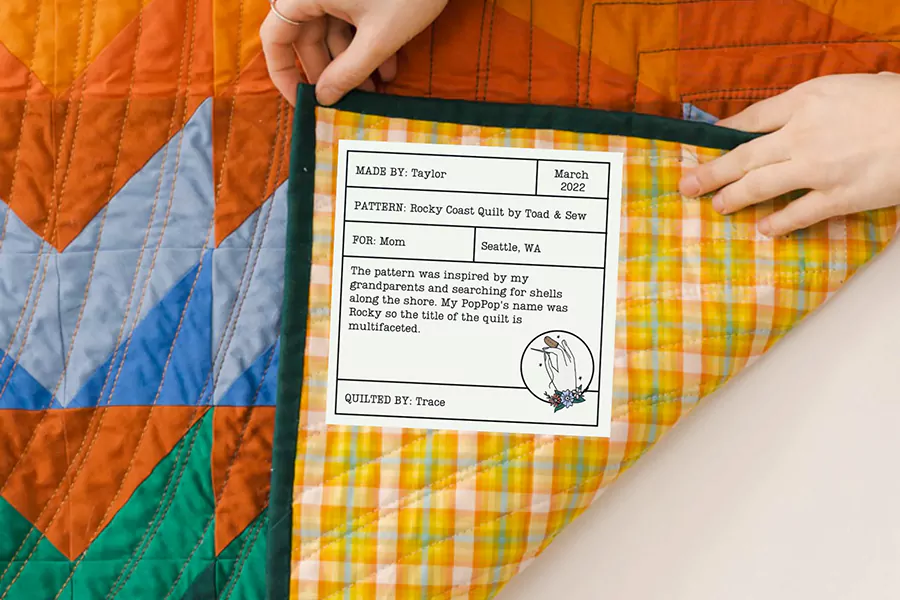
What to Include on Your Quilt Label?
Core Information:
- Who made the quilt (quilter’s name and date of completion).
- The recipient’s name (if applicable) and the occasion (e.g., gift, heirloom).
- Materials used (fabric, batting, thread).
- Quilt pattern or design name.
- Care instructions (wash, dry, or other special care).
Creative Additions:
- Special messages or quotes for the recipient.
- Personal stories or inspirations behind the quilt design.
- A unique symbol or motif that ties the quilt and label together.
How to Make a Quilt Label Out of Fabric: Step-by-Step Guide
Making your own quilt label is an easy, fun way to add a personal touch to your quilt. Plus, it helps tell the story behind your work. Let’s dive in!
Step 1: Cut the Fabric for Your Label
Cutting a piece of fabric in any shape you like—square, rectangle, or even something more freeform! Just be sure it’s big enough to fit your text and any fun designs you want to add. I recommend cutting a little extra fabric, just in case—you can always trim it down later. And don’t forget to pre-wash the fabric! This helps prevent any shrinkage later and stops color bleeding.
Step 2: Stabilize Your Fabric
To keep your fabric from getting stretched or warped, add a fusible interfacing or stabilizer to the back. This makes it easier to work with, giving you a smoother surface to write or stitch on. It also helps give your label a more professional look, so it’s worth the extra step!
Step 3: Design and Write on the Label
If you’re using fabric pens, be sure to test them first to make sure the ink doesn’t bleed. You can freehand your design, or trace it out lightly with a pencil or washable marker before stitching. For a personal touch, try adding some embroidery—whether by hand or with your sewing machine. It gives the label a beautiful, textured finish!
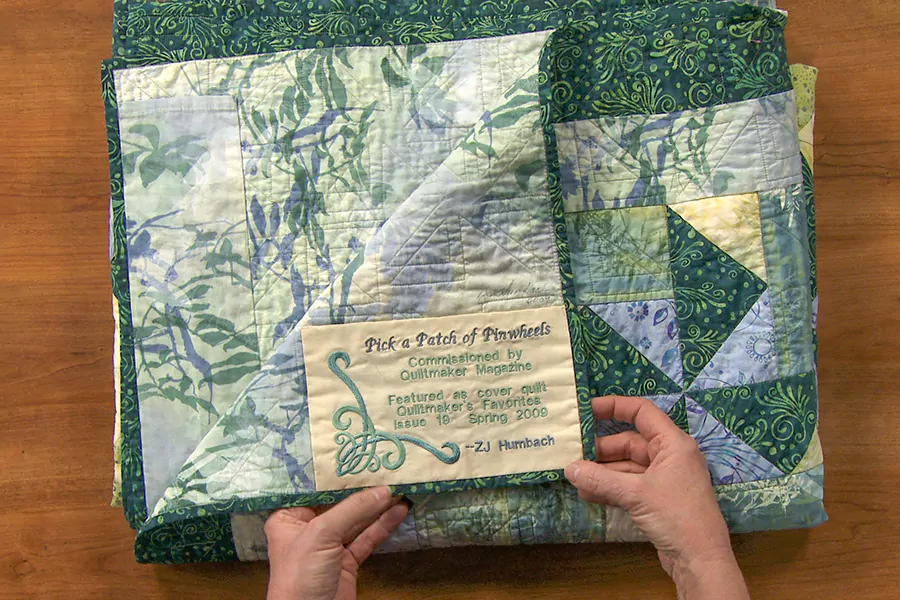
Step 4: Attaching the Label to the Quilt
Once your label is all set, it’s time to attach it to your quilt. Common spots are the lower right corner or near the edge of the backing fabric. To secure it, you can hand-stitch, machine-stitch, or even use fabric glue. If you want to make sure your label stays put for the long haul, stitch through it while quilting your quilt. That way, it won’t peel or come off!
Advanced Techniques for Quilt Labeling
Here’s a look at some advanced techniques for quilt labeling, making your quilt even more personal and polished. These methods are fun to try, and they can add a modern twist to your creations!
Creating Digital Labels
Step 1: Create Your Design
- Pick a Design Program: Whether you use Canva, Photoshop, or even Microsoft Word, choose a program that feels comfortable. Play around with fonts, colors, and layouts until it matches the vibe of your quilt.
- Add the Essentials: Don’t forget to include the key info—your quilt’s name, the date, and any personal notes. You can also get creative by adding decorative touches like borders, little icons, or symbols to make it extra special.
Step 2: Test Your Design on Paper
- Print a Test Version: Before committing to fabric, print your design on regular paper. This will help you check the alignment, font size, and general layout to make sure it looks just right.
- Tweak It If Needed: If anything looks off-center or doesn’t fit, now’s the time to make adjustments before you print it on the fabric.
Step 3: Print on Fabric Sheets
- Prepare Your Fabric Sheets: Grab some printable fabric sheets, usually made from cotton or a cotton blend. These sheets are made specifically for printing.
- Load and Print: Follow the fabric sheet instructions for loading them into your printer, and then hit print! Make sure you’re using the correct settings for fabric to ensure a crisp result.
Step 4: Heat-Set the Ink
- Let It Dry: Be patient and let the ink dry completely to avoid any smudges.
- Set the Ink: Once it’s dry, use an iron to set the ink. Be sure to follow the fabric sheet’s instructions for temperature and time. Usually, a few seconds of pressing is all you need to lock the design in place.
Step 5: Care for the Label
- Trim the Label: Once your label is dry and set, trim any excess fabric around the edges so it fits perfectly on your quilt.
- Follow Care Instructions: To keep your label looking fresh, make sure to follow the care instructions on the fabric sheet. Generally, you’ll want to wash the fabric gently and air-dry it to maintain the quality of the ink.
Incorporating QR Codes
Step 1: Create Your QR Code
Using a free online QR code generator. These are easy to find and use. Simply enter the URL or text you want the QR code to link to—whether it’s your quilt’s story, care instructions, or a video showing the creation process. Once you enter the information, click the “Generate” button to create your QR code.
Step 2: Test the QR Code Size
Check if the QR code is large enough for smartphones to scan easily. A too-small code can be hard to read, so adjust the size until it’s readable. You can test the code on regular paper by scanning it with your phone to ensure it works.
Step 3: Print the QR Code
Print your QR code on fabric. You can either use printable fabric sheets or iron-on transfer paper, depending on your preferred technique. Make sure to follow the specific instructions for whichever method you’re using, and ensure that the QR code is printed clearly and centered on the fabric.
Step 4: Attach the QR Code to Your Quilt
Once your QR code is printed on fabric, it’s time to attach it to your quilt. Position the label where you want it, like the bottom right corner or along the quilt’s edge. You can sew the label by hand or machine, or use fabric glue to hold it in place.
Troubleshooting Common Quilt Label Issues
Fading or Smudging
If your quilt label fades or smudges over time, it can be really disappointing. But, there are ways to prevent that from happening:
- Embroidery Care: Choose high-quality, colorfast thread. After finishing your embroidery, gently wash the label in cold water, and steer clear of harsh detergents to keep the label vibrant for longer.
- Prevention: Always use fabric ink pens or embroidery threads that are designed to be permanent. You don’t want your label looking washed-out too soon! Before starting, test the pen or thread on a scrap piece of fabric to make sure it’s the right choice.
- Setting the Ink: Let the ink dry completely before you touch it. For fabric pens, try setting the ink by gently pressing it with a hot iron—just be sure to follow the instructions on the pen packaging. For embroidery, using a stabilizer can prevent fabric shifting while you stitch, giving you a sharper, longer-lasting finish.
Placement Problems
Is your label looking a little off-center or in the wrong spot? No need to panic—here’s how to fix it:
- Adjusting: If the label looks crooked or off-center, simply unpick a few stitches and move it into place. Sometimes, adding it to the quilt backing or into a corner can give it a fresh, balanced look.
- Before Quilting: Take a moment to plan your label placement before quilting. Measure twice, and mark lightly with a pencil or fabric marker where you want it. This way, you can avoid last-minute placement struggles.
- After Quilting: If you’ve quilted over your label spot, it’s okay! You can still stitch it on top of the quilt backing or near the edge. Just trim any extra fabric around the label so it looks neat and tidy.
Attachment Problems
Quilt labels sometimes give us a hard time with attachment—especially when thick batting or seams get in the way. Here’s how to tackle those issues:
- Fabric Glue: If stitching through thick fabric isn’t your thing, fabric glue is your friend. Apply it lightly around the edges of the label, then press it down and let it dry completely before handling.
- Stitching Through Batting: If the batting is making it tough to stitch through, switch to a larger needle for better maneuverability. Using a walking foot on your sewing machine can also make things smoother, helping feed the fabric more evenly.
- Securing the Label: If your label starts to peel up or feels loose, reinforce it with stitching. You can stitch across the label with a decorative stitch or crosshatch it for extra security. This’ll help it stay put and add a little extra charm!
FAQs
Can I use any type of fabric for my quilt label?
Yes, you can use any fabric that is compatible with your quilting project. However, it’s best to choose a fabric that is durable and can withstand washing to ensure the longevity of your label.
Do I need to hand-sew my quilt label?
While hand-sewing can provide a more personalized touch, you can also use a sewing machine to attach your quilt label for a quicker and more uniform finish.
How should I care for my quilt label?
To ensure the longevity of your quilt label, follow the care instructions for the fabric used. Avoid using harsh detergents or bleach, and consider spot-cleaning the label if necessary.
Can I add embellishments to my quilt label?
Absolutely! Adding embellishments such as decorative stitching, appliqué, or fabric embellishments can enhance the visual appeal of your quilt label and make it truly unique.
Where should I place my quilt label?
Ideally, your quilt label should be placed in a prominent yet inconspicuous location, such as a corner or along the border of the quilt. Avoid placing it in the center, as it may detract from the overall design of your quilt.
How can I ensure that my quilt label stays in place?
To ensure that your quilt label stays in place, secure it with additional stitches or a dab of fabric glue after attaching it to your quilt. This extra step will provide added durability and peace of mind.
Conclusion
Quilt labels aren’t just about adding a name; they’re about preserving the heart and soul of your quilt. They help keep track of who made it, when, and any little personal stories that go along with it. To make sure your label stays as beautiful as your quilt, make sure it’s durable and securely attached. After all, your quilt deserves a label that can stand the test of time!
Now that you know the basics, it’s time to get creative and make your quilt labels unique! Don’t be afraid to try out different techniques—there’s no wrong way to label your creations. And speaking of great creations, if you’re looking for high-quality fabrics for your next quilt, check out my F&A Fabric for the best quilting fabric to make you feel cozy while quilting!