Quilted fabric postcards are a fun, creative, and personal way to send a little love through the mail! Combining the charm of quilting with the simplicity of a postcard, these handmade treasures make the perfect gift for any occasion. Whether it’s for a birthday, holiday, or just a thoughtful note, a quilted postcard is a unique keepsake that’s sure to be cherished.
What makes quilted postcards even better is that they’re customizable and a great way to use up your fabric scraps. You can create one-of-a-kind designs in no time, and they’re small enough to be mailed just like any regular postcard. Ready to dive in? Let’s learn How to Make Quilted Fabric Postcards and turn your fabric scraps into something special!
Understanding Quilted Postcards: Can They Be Mailed
Mailing Requirements: Size, Weight, and Postage Tips
If you’re planning to send your quilted postcard as a traditional postcard, you’ll need to stick to a few guidelines. First off, your quilted postcard should be no larger than 4″ x 6″ and no thicker than 1/4″. This ensures that it qualifies as a postcard under USPS regulations.
You’ll also need to use a standard letter stamp, not a postcard stamp, because the thickness of the quilted fabric may disqualify it from being mailed as a regular postcard.
Another thing to keep in mind is the finish of your postcard edges. If you want to mail it as-is, it’s best to use a satin stitch finish around the edges rather than binding. This smooth finish helps meet USPS guidelines and ensures your postcard is easily handled by the machines. It’s a small detail, but it makes a big difference in getting your quilted postcard safely delivered!
Alternative Shipping Methods: Envelope or Postcard?
While mailing your quilted postcard as a regular postcard is an option, some quilters (myself included!) prefer to send them in an envelope. Why? Well, an envelope adds a layer of protection, helping to keep your quilted creation safe during its journey. Plus, it’s easier for postal workers to process during busy times, like the holidays.
When you choose to mail it in an envelope, you get the freedom to add a binding around the edges of your postcard, giving it a more traditional quilted look. Don’t worry about postage—if the envelope weighs under one ounce, you can still use a standard letter stamp.
If it’s heavier, simply add a second stamp! While using an envelope may take a little extra time, it’s a great way to ensure your quilted masterpiece arrives safely and looks even more beautiful.
Essential Materials for Making Quilted Postcards
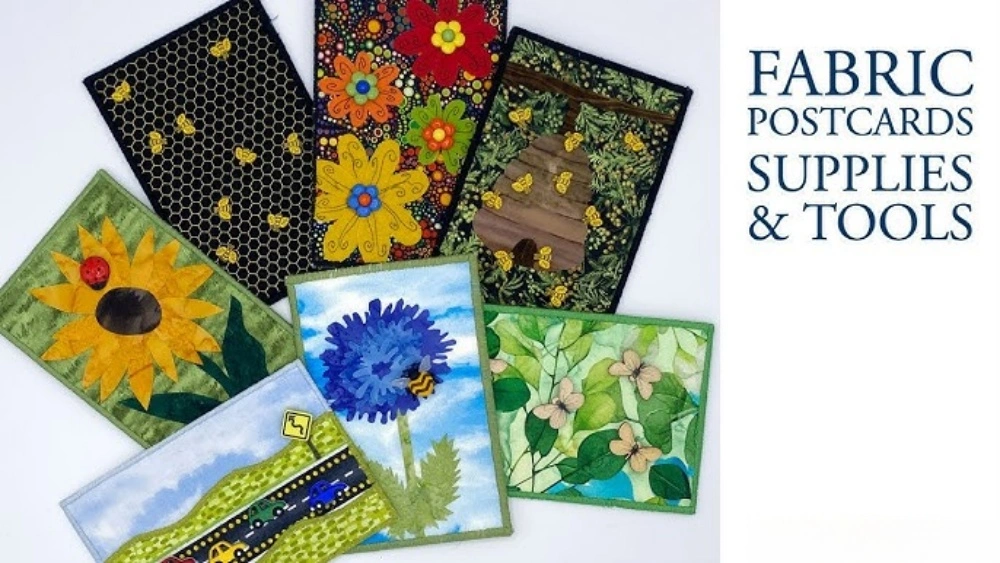
Fabric Selection
- Top Fabric: Cotton is an ideal choice for the top fabric because it’s easy to work with and comes in endless patterns and colors. You might also want to try batik fabrics if you’re after something with more texture and depth. Remember, your fabric should measure 4.5″ x 6.5″ to fit the standard postcard size.
- Backing Fabric: For the backing, you can use light-colored cotton—it’s easy to write on! If you prefer something sturdier, cardstock is a great alternative, but keep in mind that fabric is more flexible and gives your postcard a softer feel.
- Design Elements: This is your chance to get creative! Fabric scraps or fun prints work wonders for adding flowers, shapes, or other cute design elements to your postcard top.
Stabilizers & Interfacing
- Fusible Stabilizer: To give your postcard some structure, a fusible stabilizer is a must. TimTex or Peltex (both ultra-firm, double-sided fusible stabilizers) work really well. Cut a 4.5″ x 6.5″ piece to match the size of your fabric. This helps the postcard hold up while being mailed and keeps it from getting too floppy.
- Lightweight Fusible Web: When adding smaller design elements like flowers, stems, or any intricate shapes, WonderUnder or MistyFuse are your best friends. They help secure your fabric pieces without them shifting during stitching.
Batting
- Batting Thickness: Opt for medium or lightweight batting. It gives just the right amount of softness and cushioning without making your postcard too bulky. Cut a 4.5″ x 6.5″ piece to match your fabric layers.
Binding Options
- Fabric Strips: If you love the traditional quilted look, you can add a binding. For this, you’ll need a 2″ x 24″ strip of quilting cotton fabric to finish your edges neatly.
- Satin Stitch: Short on time? A satin stitch around the edges will still give you that finished look but with less effort than binding. It’s an excellent option if you’re looking for a quicker finish.
Additional Elements
- Decorative Thread: Use 50wt cotton thread for piecing together your postcard. For satin stitching or any decorative elements, 28wt or 12wt thread will give you a thicker, more noticeable finish.
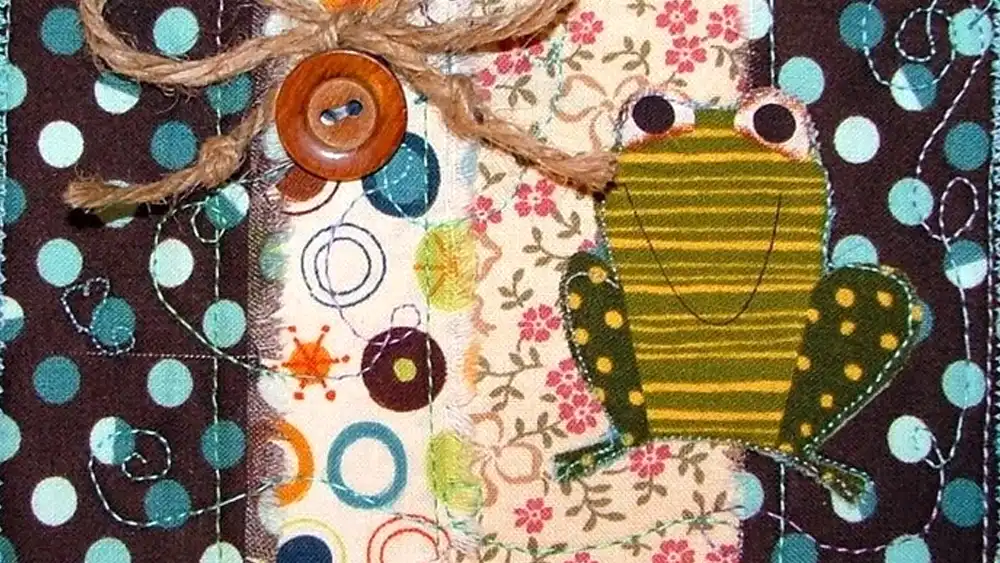
- Embellishments: This is where the fun really starts! Add beads, buttons, or even ribbons to your postcard for an extra touch of sparkle or texture. These little details make your postcard stand out and give it a personal touch.
Basic Quilting Supplies
- Iron & Pressing Surface: These are necessary for fusing your stabilizer and getting crisp seams, ensuring everything stays neat.
- Straight Pins or Binding Clips: These are essential for holding everything in place as you sew.
- Rotary Cutter & Cutting Mat: Use these for precise cutting of fabric and stabilizers—accuracy is key!
How to Make Your Quilted Postcard: Step-by-Step Guide
Step 1: Cutting Your Base
The first thing you’ll need to do is cut your fusible stabilizer to 4″ x 6″. This will be the solid foundation for your postcard. TimTex or Peltex are great choices because they’re both firm and durable, which is essential when you’re mailing your creation.
Pro Tip: Always use a Teflon sheet under your stabilizer when pressing it—this will prevent the fusible material from sticking to your iron and making a mess. Trust me, it makes the whole process a lot easier!
Step 2: Preparing the Background Fabric
Next, let’s talk about the background fabric! You can keep it simple with a solid color, or mix it up by using fabric scraps to create a patchwork effect. Make sure to cut your fabric to the same 4″ x 6″ size as the stabilizer.
Pressing Tip: Lightly press the fabric to the fusible stabilizer with just a minimal amount of heat. You want it to stick just enough so you can move it around later if needed. And, if your stabilizer has curled edges, a little steam will do wonders to flatten it out.
Step 3: Designing Your Postcard
Here’s where you can get really creative! Think about the design you want—flowers, hearts, abstract patterns, whatever speaks to you! Cut out shapes from fabric that has fusible backing (like WonderUnder), and arrange them on your postcard base. Press everything down to keep it in place.
Fun Tip: Add some extra flair with beads, buttons, or a few embroidery stitches. These little embellishments can take your postcard from cute to wow!
Step 4: Finalizing the Postcard Design
Once you’ve placed your shapes and added any fun extras, it’s time to make everything really pop! You can add decorative stitches or even some light quilting patterns to really enhance your design. Go ahead and stitch as much (or as little) as you like—the more creative, the better!
Pro Tip: Before moving on, trim any excess fabric around the edges. If you’d like a cleaner finish, use a satin stitch around the edges. This gives your postcard a polished, professional look without the need for binding.
Step 5: Attaching the Backing Fabric
Now, let’s finish up by adding the backing fabric. Choose something like white or off-white cotton—this makes it easy to write on and looks clean and simple. Cut it to the same 4″ x 6″ size as the front piece.
Align the backing with your quilted front piece, and gently press everything into place. Be sure the edges match up neatly to avoid any wonky corners!
Step 6: Edge Finishing Techniques
You’re almost there! Now it’s time to finish the edges. If you want a classic quilted look, add fabric binding with a 2″ x 24″ strip of fabric. Or, if you’re in a hurry or want a sleeker finish, try using a satin stitch for a smooth, clean edge.
For something a bit more fun, consider using a zigzag stitch, blanket stitch, or even some decorative trims around the edges. The possibilities are endless!
Pro Tips for Quilted Postcards
Batch Making: Efficiency Is Key
Planning to send out a bunch of postcards? (Who can make just one, right?) Batch-making is a total game-changer. Cutting your 4″ x 6″ pieces of fabric, stabilizer, and batting for several postcards at once. Then, tackle each step in bulk: cut your fabric shapes, fuse them to your base, and press them all at once.
When the fabric’s prepped, baste or quilt them in batches. This way, you’ll fly through the process and soon have a whole stack of postcards ready to go!
Prevent Puckering and Ensure a Smooth Finish
Puckering is the last thing you want when working on a tiny quilted postcard. To keep everything looking neat and smooth, here’s what you can do: First, make sure your fabric is properly pressed before you start stitching—this makes a world of difference. When quilting, use a walking foot to help your layers (top fabric, batting, and backing) feed evenly.
If you see any puckering while sewing, gently smooth out the fabric as you go, but don’t pull it tight. Also, don’t skip the basting—it’ll keep everything from shifting and ensure your postcard stays nice and flat!
Sewing with Beads: Add Dimension Without the Bulk
Beads add such a lovely touch of sparkle and texture to your postcards, but they can make things a little bulky if you’re not careful. Here’s how to keep it light: Choose small beads that won’t weigh down the fabric, and sew them on carefully.
You can stitch them by hand or machine, but if you’re using your machine, go slow and use a beading needle for easy threading. Focus on placing beads where they won’t overpower your design—think flower centers or the edges of your quilted pieces. That way, you get all the sparkle without the bulk!
Bonus Tip: Keep Your Edges Neat and Professional
For a polished look, always take a moment to trim your edges before adding your binding or finishing stitch. A clean edge makes your postcard look neat and balanced. If you’re using binding, make sure to cut the fabric on the bias for a smoother application.
If you’re skipping the binding and using a satin stitch, take your time and stitch slowly for a nice, even finish. Your postcard will look so much more professional with just a little attention to detail!
Creative Ideas and Customization Tips
1. Fun Themes and Designs for All Occasions
The possibilities for designing quilted postcards are endless! Here are some ideas to get you started:
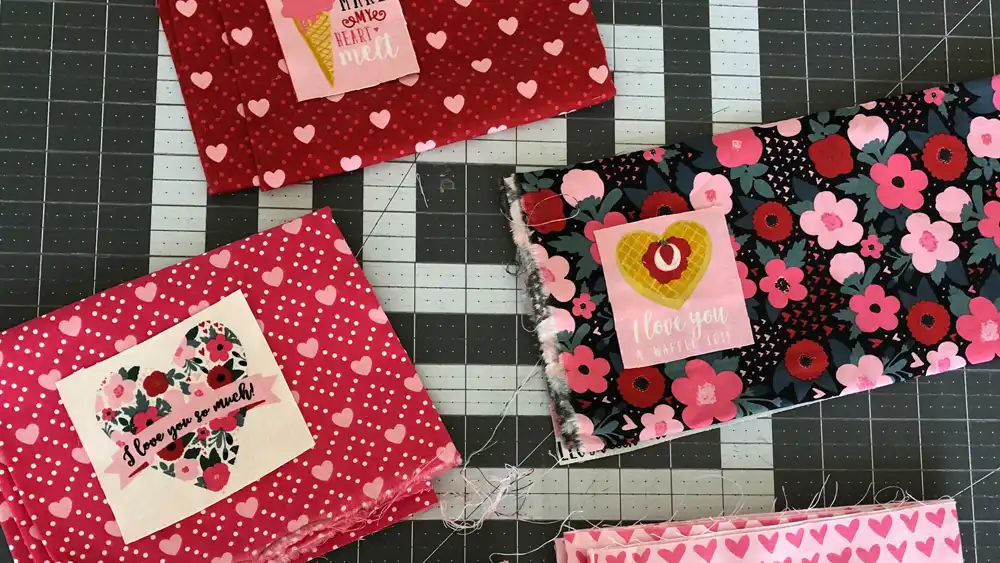
- Holidays: Try winter snowflakes, hearts for Valentine’s Day, pumpkins for Halloween, or bright florals for spring. Every season offers something fun to bring to life in fabric!
- Birthdays: Celebrate with balloons, birthday cakes, or colorful party hats. Bright fabrics are perfect for spreading cheer!
- Thank-You Cards: Show appreciation with classic floral designs or a simple “thank you” banner stitched right into the fabric.
- Other Occasions: Don’t limit yourself! Quilted postcards make great gifts for anniversaries, graduations, or just because. Get personal and creative!
2. Using Fabric Scraps for Eco-Friendly Projects
Quilted postcards are perfect for using up fabric scraps, which makes them an eco-friendly project. Plus, they give each postcard a unique, one-of-a-kind touch! Here’s how to get the most out of your fabric scraps:
- Scrap Variety: Mix it up—florals, solids, batiks, or even scraps from old clothes. The more variety, the more character your postcards will have!
- Sustainable Projects: Reusing scraps helps reduce waste, so you can feel good about creating something beautiful while being eco-conscious.
- Use All Sizes: Even the smallest scraps can be used. Tiny pieces make great details like flowers, leaves, or geometric shapes that add depth to your design.
3. Adding Personal Notes or Messages on the Back of Each Postcard
The back of your quilted postcard is a great place to add a personal message. Whether you’re writing a thank-you note or a special greeting, a handwritten message makes it extra meaningful. Here are some ideas:
- Decorative Writing: Use different pens or markers to create fun fonts or embellishments around your message. You can even match the design from the front for a cohesive look.
- Personal Messages: Write a heartfelt note or a little poem to make the postcard even more special.
- Personalized Details: Include the date or recipient’s name for a personal touch, or add a fun quote that matches your design.
Conclusion
Creating quilted postcards is a fun and creative way to add a personal touch to your mail. From choosing the perfect fabrics like cotton or batiks to ensuring your postcards meet size and thickness requirements, you can easily turn fabric scraps into heartfelt greetings. Just remember to check the mailing guidelines to ensure your postcards make it safely to their destination!
Ready to start crafting? Grab some gorgeous quilting fabrics from F&A Fabric and begin creating your one-of-a-kind quilted postcards today! Share your creations with the world and spread some handmade joy. Happy stitching!